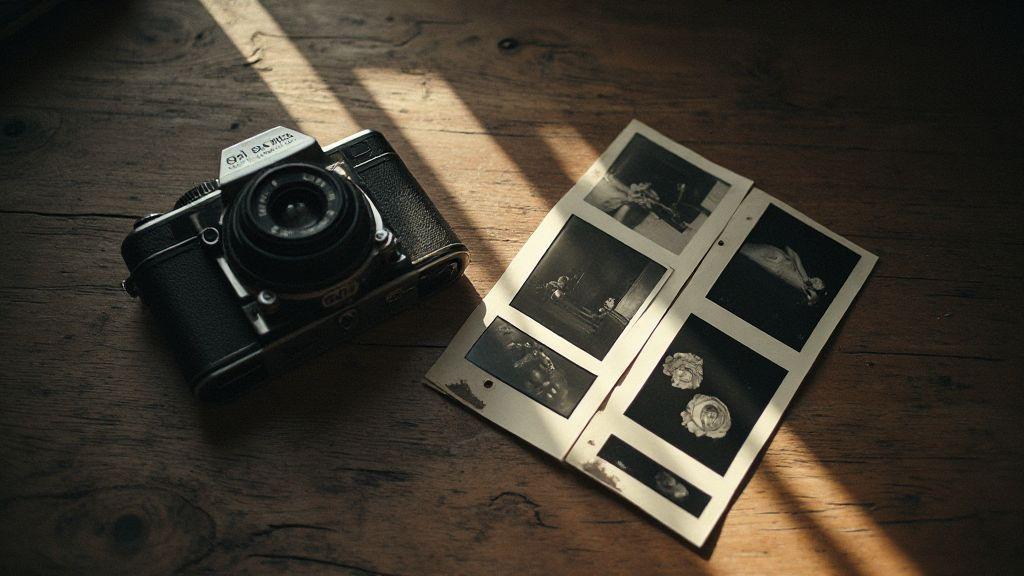
Basic analog photography narrative composition
You’re building a story with every frame you press. In analog photography, your narrative isn’t loud or flashy—it’s the quiet balance between what you show and what you leave out. Your choices matter: light, texture, and the space around your subject all whisper the mood you want. You’ll feel more confident when you see a sequence as a single conversation, not just a collection of pretty pictures. Think of your camera as the bridge between memory and moment, and your job is to guide the viewer along that bridge with purpose.
Your shots should speak in clear, simple lines you can trace with your eye. That means deciding early what you want the viewer to feel before you click. Use your film’s tones to shape the mood—soft shadows for nostalgia, bold contrast for drama. As you shoot, keep a checklist in your head: Is your subject framed with enough room to breathe? Are the background elements supporting the story or stealing focus? Short on time? Choose one idea and repeat it in a few frames to build a little arc, like a micro movie in stills.
When you review your work, look for consistency. A good analog narrative has a throughline you can follow—whether it’s a single character, a quiet moment, or a place that changes across frames. Your goal is to make the viewer feel like they’ve witnessed a small, meaningful event, not just a snapshot. This is how you turn simple pictures into Storytelling Through Composition in Analog Series.
Use the rule of thirds
The rule of thirds is your first tool to guide the eye without shouting. Imagine your frame divided into nine equal boxes, and place your main subject near the intersections. You’ll notice your compositions instantly feel more balanced and inviting. This isn’t a rigid cage; it’s a starting line that makes your intuition shine. When you position a person off-center, their gaze or gesture leads the viewer into the story instead of pulling them straight to the edge.
Practice by taking everyday scenes and nudging the subject toward one of the vertical lines. You’ll see negative space become a narrator, not a void. The background gets a voice, too—textures and lines that echo the mood you want. In tighter moments, let the rule of thirds keep your crop deliberate: it helps you decide what to exclude as much as what to include. Your goal is efficient storytelling, not clutter.
As you shoot, vary your angles around the rule. A low shot with the subject on the lower third can feel grounded, while a higher angle near the top third can reveal context or loneliness. The rule isn’t a magic wand; it’s a roadmap to clarity. When you print or scan your film, the same thirds guide your cropping decisions, preserving the story you intended from frame one.
Add depth with leading lines
Leading lines pull the viewer into your scene, guiding their eyes from the edge to the heart of the frame. In analog, these lines can be roads, fences, shadows, or railings—the quiet paths that say, look here. Your job is to notice where lines naturally form in the environment and let them lead toward your subject or a moment of tension. This technique adds dimensionality and invites the viewer to walk through your story with you.
Think about how light and texture create lines too. A sunlit wall can draw you toward a doorway, while a rain-slick street can push attention toward a solitary figure. Don’t force lines that don’t belong just to tick a technique box; they should feel inevitable, like the scene itself invited the lead-in. When you compose, sketch the path with your eye first, then confirm it with the frame. Your story gains momentum as the eye moves along the line and lands where you want.
If you’re unsure, shoot a few frames with different leading lines and compare. The best versions feel natural, almost invisible as a technique. They simply make the moment clearer and more immersive. In your analog process, that subtle control matters: depth, mood, and pacing all benefit from a well-supported lead.
How you frame a strong shot
Frame with intention. Your frame is the boundary of your story, not just a window. Start by isolating the essence: what is the one detail that carries the moment? Then add context only if it strengthens the mood or tells more about the character or place. In each frame, ask yourself if every element supports the narrative or just fills space. If it doesn’t help, you’re wasting pixels and time in the darkroom.
Rotate your perspective: shoot from eye level for honesty, a low angle for resilience, or a high angle for vulnerability. Each shift changes the reader’s perception and, in turn, the story’s tone. Pay attention to foreground and background—sometimes a single, quiet foreground object can frame the subject more powerfully than a complicated backdrop. Your framing should feel inevitable, not forced.
When you print, consider how the crop affects the story’s rhythm. A tight crop tightens emotion; a generous frame lets silence breathe. Your final shot should feel earned, as if the scene already existed before you pressed the shutter. That’s how you keep your work honest and engaging.
Plan sequential visual storytelling
You want your audience to move through your visuals like a well-paced story. Start by mapping the sequence you’ll shoot or assemble. Think of each frame as a page turn, not just a standalone image. Define the narrative beat for every shot: setup, shift, and reveal. This plan will keep your viewers engaged and prevent jarring jumps between moments. When you plan, you also plan for how you’ll handle lighting, timing, and transitions so the story feels seamless from start to end. Your plan should answer: What is the goal of this sequence? What emotion do you want to evoke at each step? What prop or action drives the story forward? By outlining these things, your final series will feel intentional, not random.
As you lock in your plan, consider the flow of information you’ll present. Your sequence should guide your audience’s eye in a natural arc. If you’re showing an experiment, start with context, move to action, and finish with what happened and why it matters. If you’re narrating a process, begin with the end product in mind, then peel back the steps in order. Your goal is to create a readable rhythm—short, punchy frames that land quickly and longer, reflective frames where you linger. A clear plan helps you spot gaps early and keep your storytelling tight.
To keep you on track, build a simple shot list you can read at a glance. Include the purpose of each frame, the eyeline direction, key props, and any dialogue or caption you’ll add later. With this roadmap, you won’t waste time improvising in the moment. You’ll know exactly what to capture and when to cut. This discipline makes your Storytelling Through Composition in Analog Series feel deliberate and professional, even if you’re shooting with basic gear.
Match eyelines and props
When you match eyelines, you guide your viewer’s eye to where you want it. In every frame, your subject should look toward the next key element or off-screen target that leads the eye onward. If your character is looking at a prop, place that prop just outside the current frame so the gaze naturally pulls you forward. This subtle push keeps the sequence feeling cohesive and intentional, not random.
Props aren’t just filler; they’re plot devices that carry meaning from frame to frame. Choose items that support the narrative and stay consistent in size, texture, and lighting. If you introduce a prop in one shot, bring it back in later frames to reinforce continuity. You’ll notice your audience feels the story more deeply when eyelines and props play together like dancers in sync.
Vary shot sizes for pacing
Mix close-ups, mid-shots, and wide frames to create a heartbeat for your sequence. A tight close-up can capture emotion or detail, a mid-shot shows action, and a wide shot establishes context. Alternate these sizes to control pace: quick cuts with close-ups speed up the moment; longer takes with wide shots slow it down. Your viewers will feel the rhythm and stay engaged because the visuals breathe.
Be deliberate with your framing. A sudden shift from a wide to a tight shot should signal a turning point or reveal. If you’re documenting a build, a wide shot early on grounds the setting, then a series of close-ups highlights key steps. This variation keeps your story dynamic and easy to follow, even if you’re working with simple equipment.
Keep continuity between frames
Continuity is the thread that keeps your story believable. Keep the same light direction, color temperature, and prop placement from frame to frame. Tiny shifts—like a mug’s smudge or a ruler’s position—can break the illusion of a single moment in time. Create a quick checklist: lighting setup, prop positions, and actor orientations for each frame. Cross-check these before you shoot to prevent mismatches that pull viewers out of the story.
If you notice an inconsistency during editing, find a way to tie it back to the narrative. A quick line of dialogue or a repeating visual cue can mask the small mismatch and restore flow. Your goal is to make the sequence feel like a single, uninterrupted story, so the audience stays immersed in what you’re showing.
Frame by frame composition techniques
You’ll unlock powerful visuals when you treat each frame like a sentence in a story. In this approach, you guide your viewer’s eye with deliberate choices, making every moment count. By thinking frame by frame, you ensure your message stays clear and your mood stays consistent. This is how you turn a sequence into meaning, not just a collection of pretty pictures. When you practice this, you’ll start to see how even small shifts—like moving a subject a few inches—change the whole vibe of a scene. Your goal is to balance clarity with emotion, so your audience feels what you intend, not just sees what you show.
You’ll notice that consistency matters more than flash. If your frames don’t connect, your story feels choppy. Use recurring elements, angles, or color cues to stitch frames together. You don’t need every shot to be dramatic; you need them to serve the flow. As you load each frame, ask: does this push the narrative forward, or is it just pretty? The answer guides your lens choice, light, and the moment you cut. Your audience will thank you for the steady rhythm that keeps them onboard.
Practice turns theory into instinct. Start with a simple storyboard and shoot small sequences. You’ll learn what works by watching how frames interact. When you review, look for gaps where a frame could convey more with a small adjustment—like nudging your subject to the left to create space for a prop, or widening the frame to include a hint of the next moment. With time, your framing becomes a language you speak fluently.
Use foreground and background
Your foreground is not just decoration—it’s a tool to anchor attention and add depth. By placing a clear subject in the foreground, you direct your viewer’s eye immediately to what matters. A simple plant, a hand, or a window frame can act as a visual cue that enforces your focal point. The background then becomes your stage, giving context without overpowering the main action. You’ll find that a thoughtful background supports mood; a cluttered backdrop can mute your message, so keep it intentional.
Layering foreground and background creates contrast that makes your subject pop. Try shooting with a shallow depth of field to blur the far background while keeping something crisp in the front. Or reverse it—keep both planes sharp for a busier, more immersive shot. Either choice should feel deliberate, not accidental. If you want a sense of scale or tension, let the distance between foreground and background reveal it. This approach is where your storytelling shines, because you guide emotional interpretation as you guide the eye.
Foreground elements also offer entry points for your viewer. A doorway, a railing, or a line of perspective can lead your gaze toward the subject and into the next moment. Use color or texture in the foreground to echo themes from the scene, giving you a subtle thread that ties frames together. Remember, you’re building a readable map for your viewer—every foreground cue should have a purpose.
Crop to focus your subject
Cropping is your fast lane to clarity. When you frame tight on your subject, you strip away noise and let the core idea breathe. A close crop can reveal emotion in a face or a telling gesture that a wider shot would bury. You’ll learn to trim away distractions so your audience reads the message in one glance. The right crop makes your meaning obvious, and that’s how you keep attention hooked.
But crop with intention. Don’t just zoom in because you can; zoom in because you must. If you crop too much, you risk losing context, so balance tightness with enough surrounding detail to anchor the moment. A well-chosen crop can also create anticipation, letting the next frame take over and push the story forward. Practice choosing crops that enhance mood—soft edges for nostalgia, crisp edges for urgency, and intentional asymmetry for tension.
Cropping is also about consistency. Use similar framing rules across frames so your sequence reads as one piece. For example, if you often crop to keep eyes at a fixed vertical line, your audience learns the pattern and reads faster. Your goal is to make the crop feel invisible—so the viewer sees the story, not the cut.
Build meaning with each frame
Each frame should add a new bead to the necklace of your story. Start with a frame that sets the mood, then add another that reveals motive, and keep building until the last frame lands your conclusion. You’re not just showing a sequence; you’re shaping a message. Use small, meaningful choices—like a prop, a light color, or a subtle motion—to imply change without spelling it out. That density of meaning is what keeps viewers engaged.
Make every frame answer a question your audience has, or better yet, raise a new one they want solved. If a frame feels empty, you’ve missed showing the next step. Add a detail that hints at what comes next, or a change in perspective that reframes the situation. Over the arc of your sequence, those micro-choices compound and your audience experiences a coherent, satisfying story.
You should be able to defend each frame with a purpose: why this moment, why now, why this angle. When you can articulate the logic, you know you’re telling Storytelling Through Composition in Analog Series in a persuasive, clear way. Use your frame to guide emotion, expectation, and understanding, and your audience will stay with you to the end.
Control mood with lighting
You feel the mood shift the moment you tweak the light. When you control lighting, you control how your scene breathes. You’re not just illuminating; you’re shaping emotion, guiding where your viewer’s eye lands, and deciding what stays soft or becomes sharp. You’ll see that a quiet moment can feel warm and intimate, or stark and tense, depending on the glow you choose. That power is why lighting isn’t an afterthought—it’s your storytelling engine.
Your goal is to make the environment do the talking. Light can cradle a character in comfort or push them into the frame with a little edge. You’ll notice that where you place light, how bright it is, and what you leave in shadow all speak before any words are spoken. When you treat lighting as a character, you start to write with photons, not just colors. Your images become scenes of feeling as much as sights.
If you’re aiming for consistency, you’ll build a simple rule: let lighting reveal intent, not detail. You want the audience to feel the moment more than to notice every speck of texture. That means choosing light that supports the vibe you want—soft and forgiving for warmth, hard and cool for tension. Your shots will read cleaner and more honest, because the mood carries the story as much as the action does.
Use natural light and shadows
Natural light is your honest partner. You’ll get the most real feel when you follow its rhythm—the sun’s arc, the way it climbs, lingers, then fades. You can stage scenes by a window and let daylight do most of the heavy lifting. Shadows become your subtle editor, sculpting faces and spaces without shouting. When you use natural light thoughtfully, you give your audience a sense of being right there with you, in real life.
Shadow play is a secret shortcut to mood. A sliver of shadow across a character’s eyes can hint at secrets, doubt, or danger. You don’t have to overthink it; you just watch how light and shade land on different surfaces. If you’re aiming for calm, keep the light broad and gentle; for mystery, lean into longer, deeper shadows. Your storytelling will feel more cinematic without needing extra gear.
Natural light isn’t drama-free, though. You’ll sometimes fight changing weather, mid-day glare, or inconsistent color temperature. But that’s not a flaw—it’s texture you can lean into. Use reflectors to soften harsh rays or bounce light into dark corners. When you let natural light guide your mood, your frames breathe with a truth your viewers instinctively trust.
Expose for mood not detail
When you expose for mood, you’re telling your camera to prioritize feeling over exact colors and textures. A slightly underexposed frame can deepen emotion, while a touch of overexposure can glow with warmth. You’ll learn to sacrifice a little sharpness in the name of atmosphere. Your viewers will notice the mood, not the missing highlight.
Think of exposure as a mood dial. If your scene is intimate and tender, nudge the exposure lower so faces soften and eyes stay gentle. For suspense or drama, push contrast a bit, letting shadows swallow parts of the frame. Your goal is that the emotion reads clearly, even if some detail gets masked. Your story remains legible because the mood is loud enough to guide the eye.
Practice helps here. Compare two takes: one cleanly exposed for every detail, another tuned for mood. You’ll quickly see which version tells your story more powerfully. Trust your gut: if the moment feels heavier than the pixels say, give mood the room it needs.
Create tone with your light choices
Your light choices set the tone, plain and simple. Warm, soft light says closeness and comfort. Cool, harsh light signals distance, urgency, or danger. You’ll use color temperature, intensity, and direction to paint your scene’s attitude without words. Your best tool? A handful of practical lamps, natural sources, and a few small modifiers to shape what the camera sees.
If you want a friendly, approachable vibe, choose gentle, diffuse light and keep shadows soft. For a night scene with tension, lean into low key lighting, let one key light carve corners, and let the rest fall away. Your tone will be obvious even before your characters speak, because light is a language you and your audience share.
Remember to test. Small changes—a touch more warmth, a dash less fill, a different angle—change the entire feeling of the frame. You’re guiding the audience with light, not shouting at them with color. Your method will become a familiar rhythm: pick a mood, tailor your light, then trust the frame to carry the feeling.
Tell with color and tonal choices
You can shape emotion with color and tone without changing your subject. Your goal is to let color speak first, then let the scene reveal meaning. Start by naming the feeling you want your audience to feel, then map that onto a color mood. If you want calm and warmth, lean into soft yellows and gentle greens. If you want tension, push toward cool blues and stark shadows. Remember, your palette isn’t just decoration—it guides attention, choice, and mood. Bold color shifts can highlight a moment; muted tones can cushion a scene’s impact. Your viewers will read what you don’t say as much as what you show.
To keep things clear, pick a few anchor colors and stick to them. This consistency helps your story breathe and your audience doesn’t chase meaning. Use light and shadow to reinforce color choices. A bright highlight on a character’s face can pull you toward hope, while a shadow under the jaw can hint at doubt. Your goal is harmony: color should support story, not shout over it. When you test a frame, ask if the color adds clarity or just pretties the shot. If it doesn’t help the narrative, trim it back.
As you practice, photograph scenes with two color notes in mind: one for mood and one for focus. The mood color surrounds the scene, the focus color accents the character or object you want your audience to notice. Your choice of color can even cue a change in time or place. If your color scheme stays steady across a scene, your audience feels steady too. If you switch colors at a turning point, you signal change without saying a word. This is how you guide your viewer, color by color.
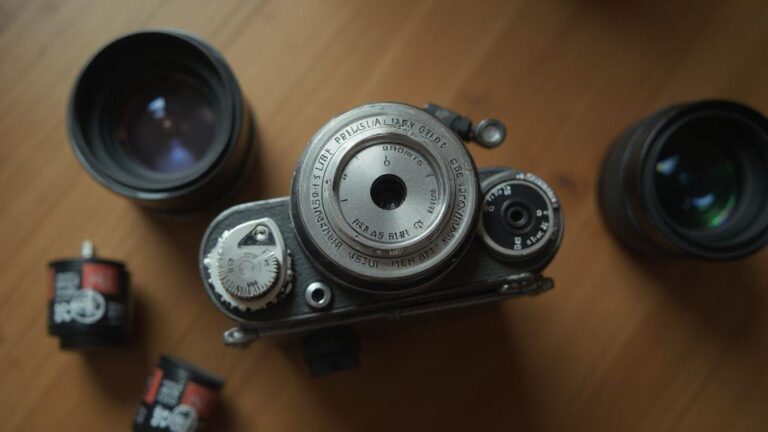
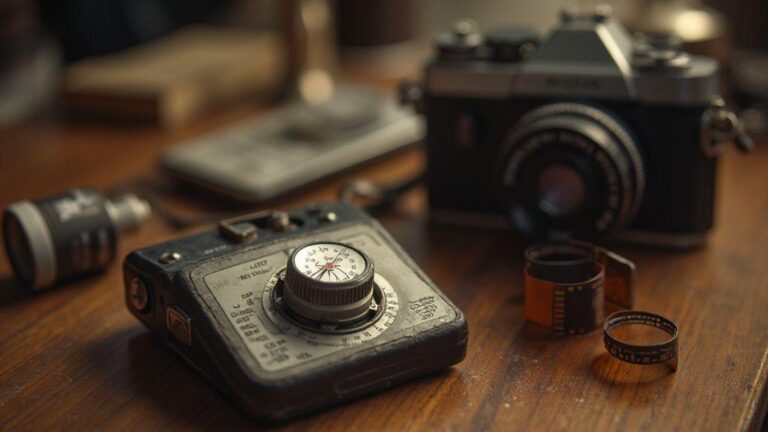
Pick film stock for color mood
Choosing the right film stock is like picking a partner for your story’s vibe. You want a result that matches your intended mood and feels authentic to your audience. If you’re after soft, nostalgic warmth, go for stocks that render gentle contrast and creamy skin tones. If you crave punchy color and high grain for a gritty edge, pick a stock that sings with bold primaries and more texture. Your choice sets the baseline for how every frame will look, so think about how it will age with your narrative.
Match the stock to your scene’s energy. A sunny, carefree moment benefits from a stock with natural saturation and smooth tonality. A night chase benefits from a stock with increased contrast and visible grain, because that texture adds urgency. Don’t chase every trend; chase what serves the moment and your characters. When you test, shoot the same scene on a couple of stocks and compare how each one communicates mood. Your memory of the moment will depend on the stock’s character.
Remember to consider practicalities too. Some stocks render skin tones more warmly, which can soften dramatic turns; others push red or teal hues in ways that can change how a villain or hero reads on screen. If you’re unsure, pick a stock that reproduces the color you already see on set and then trust it to carry the story forward. The right stock will feel inevitable, not chosen.
Balance contrast and midtones
Contrast is your storytelling hinge: it can reveal danger or soften a revelation. Midtones are the bridge between light and dark, where most detail lives. Your job is to balance them so the scene reads clearly at a glance. Start by identifying the moment where you want the viewer to pause. Increase contrast there to push the eye toward the key element, then pull back elsewhere so the rest stays legible. A well-balanced frame lets you show more with less.
Push your midtones to carry the character’s expression. If you crush them too dark, you erase subtle emotion; if you lift them too bright, you flatten nuance. A good rule: keep skin tones natural in the midtones and let shadows and highlights do the dramatic work. Use contrast to separate layered information—foreground from background—without making the image feel harsh. Your audience should feel the weight of the moment, not glare at it.
Play with local adjustments. A small shift in contrast on a single region can change how the scene breathes. If a doorway frames a decision, brighten that doorway a touch to guide the eye. If a face becomes unreadable in shadow, tweak the surrounding contrast to reclaim the expression. When you balance midtones and shadows, you give your viewer a map of the story, not just a pretty picture.
Let color guide your story
Color should be the compass for your storytelling, not an afterthought. Let your chosen palette push the plot: a sudden color shift signals a turning point; a consistent color motif anchors a character’s arc. Your aim is to use color intentionally, so every frame feels purposeful and not accidental. If your color changes with a character’s mood, your audience will sense their inner life even before you show it with dialogue.
As you build scenes, test how color interacts with composition. Color can draw attention to important details—the glint of a prop, the contour of a face, the edge of a silhouette. It can also soften or sharpen perception, guiding where the viewer looks first. When you plan ahead, you’ll notice how much easier it is to tell your story without a lot of explanation. Your viewers will feel your intent and stay engaged because color helps them follow the through-line.
Remember the idea of Storytelling Through Composition in Analog Series. Your color choices aren’t just pretty accents; they’re the story’s voice. Use color to reveal character, time, and stakes, and your audience will ride along with you, frame after frame.
Use symbols and visual motifs
You’ll lean on symbols and visual motifs to tell your story without saying every detail out loud. Think of a single object that reappears in every scene, like a coin, a broken clock, or a fluttering ribbon. Each time you bring it back, you deepen the meaning and cue your viewer to connect sooner. When you choose a motif, pick something that can exist in different states—new, worn, or damaged—to mirror your character’s growth or the plot’s twist. This creates a thread your audience can follow, almost like a breadcrumb trail. You’ll notice that small, repeated images can carry big ideas, and you won’t need to spell everything out.
Use color and texture as your visual vocabulary too. A warm yellow can signal hope, while a cold blue hints at distance or danger. A rough grain or a slick surface can contrast moments of chaos versus calm. By lining up your symbols with your scenes, you make the story feel cohesive, not stitched together. You’ll want these motifs to pop at just the right moment—when a decision is near, or when a truth finally lands. Your viewer will feel clever for catching them, even if they don’t name the symbol aloud.
Remember to keep symbols accessible. If you overcomplicate a motif, you risk pulling your audience out of the flow. Test your visuals with a friend who hasn’t seen the work yet; if they notice the motif without you guiding them, you’re on the right track. Your goal is to offer a shared language that rewards attention, not to bury meaning in cryptic codes. When symbols click, your story breathes with new life and your audience feels included in the discovery.
Repeat objects to link scenes
Repeating objects across scenes is your bridge between moments. You can place the same mug on a table, the same song playing in the background, or the same camera angle showing a doorway. Each repeat acts like a reminder that these scenes belong to the same story. You’ll create rhythm and anticipation, so your audience starts to predict what comes next in a healthy, satisfying way. The trick is to vary the context a little each time—a different light, a different mood, or a different character interacting with the item. This keeps repetition from turning stale and makes every appearance earned.
As you repeat objects, tie them to character choices. Show your protagonist reaching for the mug when they’re about to make a tough call, or let the mug crack after a reveal. Those tiny shifts help your viewer sense the stakes rising without shouting them out loud. You’ll also notice how repetition can help flatten a sprawling tale into a compact, memorable arc. A familiar item serves as a compass that keeps your story on track, even as new events swirl around it.
Keep it simple and deliberate. If you flood a scene with too many repeated objects, you’ll confuse your audience rather than link scenes. Use one or two motifs at most, and let them evolve. Your aim is to give your audience a tactile map—something concrete to hold onto as the story unfolds. When done well, repeating objects becomes a subtle choreography that guides, rather than nags, your viewer.
Frame symbols for clear reading
Framing symbols clearly helps your audience read the story the way you intend. Position a symbol in the foreground to show it’s important, or place it in the background to hint at larger themes without shouting. Try shot pairs: one frame with the symbol sharp and centered, the next with it off to the side or partially obscured. This contrast signals that meaning is there, but not yet fully understood. Your goal is clean, legible storytelling that rewards careful viewing.
Use composition to separate or join ideas. A symbol in the left third of the frame can feel different from one on the right; one whispers, the other asserts. You can also move the symbol across frames to track a character’s inner journey. As the scene changes, let the symbol drift closer to or farther from the camera to mirror shifts in intention or mood. When your symbols are framed with intent, your audience reads the subtext as easily as the dialogue.
Be mindful of clutter. A busy frame can hide your symbol and confuse the reader. Let space breathe around the motif to keep it prominent. If you’re unsure, test with a fresh pair of eyes. If they notice the symbol without being told, you’ve nailed the framing. Clear signs help your viewers follow the thread without slowing down.
Build layers of meaning in shots
Layer meaning by stacking visuals, sounds, and small actions inside a single shot. Start with a main action and add a background detail that echoes a theme or motif. The extra layer should feel natural, not forced. For example, pair a character’s choice with a recurring symbol in the background or a sound that mirrors the emotional beat. These textures invite your viewer to notice more with each viewing, enriching the experience without complicating the plot.
Think in terms of three layers: the obvious action, the supporting symbol or motif, and the ambient details that set tone. Layering helps you show rather than tell. Your audience will sense the tension building as the layers interact, all while staying grounded in the moment. You’ll find that strong, layered shots stay with people long after the scene ends, especially when you weave in a line or a glance that resonates with the motif.
Experiment with pacing and depth. A tight, busy shot can create urgency, while a slow, spacious frame invites reflection. Let the layers breathe; you don’t want to crowd the viewer’s mind. The right balance makes your message feel earned and your scenes feel purposeful. As you practice, you’ll learn to build complexity without losing clarity, keeping your storytelling tight and engaging.
Place subjects for narrative flow
In this section, you’ll shape how your subjects enter, sit, and move through the frame so your story lands with clarity. Think of each subject as a signpost guiding your viewer’s eye. You want a rhythm where the eye travels smoothly from one focal point to the next, never fighting against how you’ve placed things. Start with the most important element slightly off-center to invite curiosity, then anchor with a secondary subject to give context. As you experiment, you’ll notice how subtle shifts—like a person stepping into the light or a prop catching a diagonal line—change the whole mood. Your goal is to build a natural path that your viewer can follow without thinking about the mechanics.
Placement matters, but so does timing. You might place a subject low in the frame for gravity and weight, then raise another to signal progression. The frame should feel like a heartbeat: a quiet start, a deliberate pause, and a gentle push forward. If you’re telling a multi-shot story, rotate which subject holds the lead role in each frame so your viewer perceives a true arc rather than a static moment. Remember, your frame is a highway; your subjects are the cars, and you’re the traffic controller guiding them with clean, predictable lanes.
Consistency is your friend. Use the same spatial relationships across the sequence so your audience learns the language of your composition. You don’t need a loud cue every time—just repeat the idea: leading subject, supporting subject, and the space around them. This steady pattern gives your audience confidence and makes the narrative feel intentional. When you’re unsure, fall back on a simple rule: let the primary subject stay near the same vertical line, and shift only one element at a time to show change.
Lead the eye across the frame
You lead by creating a visual path that mirrors how you want your story to unfold. Start with a bold anchor in the foreground, then invite the eye to travel toward a secondary detail in the midground, and finally rest on a subtle clue in the background. This walkthrough keeps your viewer oriented and curious. Use lines—like a bookshelf edge, a window frame, or a road in the distance—to guide attention naturally from left to right or from top to bottom. When you design this path, you’re building a quiet forecast of what comes next, so your viewer feels satisfied, not confused.
Contrast is your compass here. A bright subject against a muted background pulls the eye instantly, then softer tones help it glide to the next element. If your frame has multiple textures, let the strongest one lead and the rougher, quieter one follow. Shift lighting gently to nudge attention where you want it, but don’t overdo it. Subtlety wins. You’ll know you’ve nailed it when your viewer’s gaze travels in a single, confident arc rather than bouncing around the frame.
Placement changes are powerful but must feel intentional. A slight movement of a hand, a tile on the floor catching a spark, or a shadow stretching across the wall can draw the eye along the path you designed. If you’re building a sequence, keep a consistent tempo: a quick trigger, a slower reveal, a final quiet moment. Your aim is a seamless journey, not a jump scare of attention.
Shift placement across the series
Across your series, you’ll want to evolve how you position subjects so the story breathes rather than repeats. Start by moving the main subject a little toward a new edge of the frame in the first piece, then let the next piece tilt the composition so the secondary element grows in importance. This gradual shift creates momentum and signals to your viewer that the narrative is advancing. Don’t overhaul everything at once; tiny, deliberate changes keep the rhythm intact and your audience engaged.
Consistency with variation is the sweet spot. You should preserve the core rules of composition—where the gaze lands, how lines guide flow—while changing angles, distances, or lens perspective. That balance is what makes a series feel cohesive but alive. If you notice a frame feeling stale, nudge one factor: your subject’s distance, the angle, or the focal point—just enough to refresh the path without breaking the shared language you’ve built.
Your sequence should read like a story, not a reel of isolated shots. Each installment should answer a question the prior one posed, and pose a new one for the next. When you shift placement purposefully, you’re letting your audience infer the passage of time, the change in mood, or the evolution of the character. Use this technique to keep your viewers hooked and to reinforce the theme: Storytelling Through Composition in Analog Series.
Guide the viewer through your series
You guide by layering intent: define the destination, lay stepping stones, and then offer a gentle nudge toward the next piece. Start with a frame that clearly signals the theme—a bold subject paired with a simple, quiet backdrop. In the next shot, introduce a supporting detail that deepens the meaning, then in the third, reveal how the relationship between elements shifts the tone. This progression gives your viewer a map they can remember and follow without confusion.
Intentional sequencing beats random order every time. If your goal is curiosity, end with a small, unresolved cue that invites the next frame. If you want resolution, close with a tidy, meaningful reveal. Either way, the thread that connects each piece should feel natural, not forced. Your viewer should feel like they’re being guided by a confident storyteller, not teased by a trick of the frame.
Pay attention to transitions. Gentle changes in perspective, light, or distance can signal a new chapter without breaking the flow. Use this to your advantage by pairing a consistent, recognizable motif with small but meaningful shifts. When you master this, your series will feel like a single, evolving piece rather than a string of neat pictures. And that coherence is what keeps your audience returning, page after page, for Storytelling Through Composition in Analog Series.
Shoot cinematically for analog series
You want your analog series to feel timeless, not dated. To get that, think like a storyteller with a camera in hand. Start with a simple plan: capture scenes that breathe, using natural light when you can and deliberate exposure when you can’t. Lighting should shape mood, not just illuminate. If you’re aiming for warmth, open your shutter slightly and let the highlights glow. If you want drama, push the shadows deeper and let your subjects pop from the frame. Your goal is consistency—keep a cohesive look across episodes so viewers feel they’re watching one continuous story, not a random collection of shots. Your choice of settings should serve the emotion you’re trying to express, not just show what’s happening.
When you shoot, think about texture as a character. Micro details—dust motes in sunbeams, the grain of old film stock, the way a door creaks when it’s opened—these are your storytellers. Use them to anchor scenes in reality, making the audience lean in. If you’re documenting a moment in time, a touch of grain or a slight color shift can transform it from footage to memory. Don’t overdo it; the key is subtlety that invites the viewer to feel, not just see. Your aim is to make every frame count, so you don’t waste a single second of screen time.
Finally, plan your sequence like a mini-narrative. Before you press record, know what you want the audience to feel at the end of each shot. Use pacing to your advantage: longer takes for quiet, shorter cuts for tension. When you finish a scene, place it so the next one steps forward with a clear purpose. If you think in terms of storytelling through composition in analog series, you’ll naturally couple visuals with emotion, turning ordinary footage into an engaging chapter in your ongoing project.
Choose focal length for emotion
Choosing the right focal length is your quietest, most powerful tool. A wide lens invites the viewer in, showing context and environment that tell your story’s mood. It’s great for setting scenes where characters interact with a space, giving you room to breathe and to reveal what surrounds them. A longer lens narrows the frame and pulls you into a character’s inner world, creating intimacy and distance at the same time. If you want your audience to feel close to a moment, reach for a telephoto and let the background melt away.
Your lens choice should wire into the emotion you want to convey in every shot. For suspense or drama, a tight frame tightens perception; you catch tiny tells—an eye twitch, a tremor in a hand—that would vanish with a wider view. For awe or openness, go wide and let the horizon stretch. Remember, you’re guiding the viewer’s eye and feelings with a simple tool: distance. Test a scene with two focal lengths to compare how the mood shifts; often the best choice isn’t the obvious one.
Don’t forget practical limits. A longer lens can compress space, but it also magnifies camera shake. If you’re handheld, pick a shorter focal length for stability or strap on a monopod. If you’re shooting with a fixed setup, plan your moves so your subject doesn’t drift out of frame. The right focal length, used intentionally, makes your visuals sing and supports your narrative without shouting.
Use camera angle and height
Angle and height shape how your audience connects to the subject. A low angle can elevate a character, making them feel powerful or heroic, while a high angle might diminish them, signaling vulnerability or surveillance. Use these shifts to mirror the story’s arc, not just for style. When you want the viewer to root for someone, get down at their eye level; you’ll create a shared space where they feel present in the moment. For scenes of authority or menace, tilt the camera slightly upward to cast the subject in a larger-than-life light.
Height is your quiet guide to perspective. A shot taken from above looms like a judge’s view, signaling distance and judgment. A shot from below whispers possibility and grit, inviting awe. If your scene moves quickly, keep the camera at a natural height to avoid disorientation. For tender, intimate moments, a close-to-ground angle can reveal texture in the skin or dust motes in the air, giving the moment gravity. Your angles should reinforce the story’s beats, so plan a few standard moves and deviate only when the moment asks for it.
When you mix angles with height thoughtfully, you craft a rhythm your audience can feel. Don’t overthink it—trust your instincts. A single, well-placed angle can turn a simple interaction into a memorable beat in your analog series. Your goal is to guide emotion, not to impress with technique alone.
Achieve a filmic look with composition
Composition is the quiet backbone of your filmic feel. Start with the rule of thirds, then learn when to bend it for impact. Place your subject off-center to invite the eye to travel the frame, but don’t neglect the space around them. The environment should tell part of the story: a cluttered desk can reveal a character’s obsessive nature; a doorway opening to a sunlit hallway can signal a path forward. Let color be a character too—muted tones can feel nostalgic, while a pop of color can mark a moment of change.
Frame with depth in mind. Use foreground elements to create layers that pull the viewer into the scene. A window frame, a hanging plant, or a passing bus can all add texture and context. Negative space isn’t empty; it’s a stage for your characters to breathe and for the audience to imagine what happens next. Balance your frames so nothing feels accidental—every edge should contribute to the story, every line a line of dialogue.
Finally, keep your shots consistent so the series reads as one story. Matching light quality, color temperature, and grain across scenes helps your audience stay with you. When you treat composition as a dialogue between subject, environment, and mood, you’ll deliver a more cohesive and cinematic analog series experience.
Edit for continuity and pacing
You want your audience to stay with you from start to finish, so you edit with a clear map in mind. First, read your entire sequence aloud and look for any jumps that pull you out of the moment. If you stumble, your viewer will too. Keep your core idea front and center, and trim anything that dilutes it. You’ll gain momentum by cutting redundant beats and tightening transitions. Remember: every cut is a choice, and every choice should push the story toward your intended emotional beat. When you spot a lingering moment that doesn’t serve the arc, delete it or reframe it so it carries its weight more efficiently. This is where your rhythm takes shape, and your audience feels it, even if they can’t name the reason.
Next, map your scenes on a simple spine: setup, escalation, payoff. If a section drags, insert a short beat that nudges the tempo, like a quick glance, a sound cue, or a line that reframes the stakes. You want a smooth spine where each shot earns the next. If a sequence feels crowded, separate it into two tighter sub-beats so your viewers can breathe and stay engaged. Your goal is steady propulsion without the rush that causes fatigue. When you finish editing, read it once more with a timer—aim for clean, confident pacing that feels intentional, not accidental. And always check for consistency in tone, lighting, and sound; this keeps continuity from slipping as the tension builds.
Finally, test your edit with a fresh perspective. Watch with the sound off to verify visual continuity; then turn the sound up to hear rhythm and pauses. If your audience hears a lull in the wrong place, reinforce that moment with a visual cue or a tighter line. You’ll know you’ve nailed continuity and pacing when the story flows naturally, and you feel the push toward the next beat without needing extra explanations. Your edit should whisper the idea of keep watching without shouting it.
Order shots to build tension
Start with the smallest, most intimate moment and gradually stack stakes. You’ll create suspense by layering contrast: close-ups for vulnerability, wide shots for looming consequences, and mid-shots to connect feelings to actions. Think of your sequence as a climb: each shot should lift you to the next rung, never skip it. When you order shots, place the most revealing detail early enough to hook, then delay the reveal of the big twist until the peak moment. This keeps your audience leaning in, wondering what happens next. Use a deliberate progression to guide their eyes and their curiosity.
Use timing and space to control suspense. A lingering close-up can feel like a breath held too long, while a quick cut can spike adrenaline. Alternate between quiet, tense moments and eruptions of action to keep energy balanced. If you need a reset, drop in a calm, wide shot that signals a pause, giving your viewers a moment to absorb and prepare for what’s coming. You’ll see tension build when you place the most significant shot just after a breath, so don’t hide the power where it’s easy to miss it. The right order makes your story feel inevitable yet surprising, which is the sweet spot for engagement.
Remember to align each shot with your narrator’s intent. If a line is about doubt, follow with a face that shows concern; if it’s about resolve, show shoulders squared and eyes focused. Consistency in look and feel helps your audience follow the thread of the plot without getting overwhelmed by visuals. And when a scene feels flat, swap in a cut that rephrases the moment—maybe a reaction shot or a micro-milestone—that ramps the tension without breaking continuity. The better you thread shots, the stronger your Storytelling Through Composition in Analog Series becomes.
Use repeats and pauses to set rhythm
Repeats create familiarity; pauses, necessity. Use a repeating visual motif or sound cue at key intervals to signal a beat without shouting it. This builds a heartbeat for your audience, a rhythm they come to expect and then recognize when it shifts. Choose a motif that isn’t overused—just enough to anchor the moment. A simple gesture, a recurring line, or a recurring shot can become your signature rhythm, guiding the viewer through the emotional cadence you want.
Pauses are valuable because they let meaning soak in. After a revelation, cut to silence or a single lingering image to let the idea settle. Use short, controlled pauses to heighten anticipation, and longer, deliberate pauses to let a critical moment breathe. The trick is balance: too many pauses feel dull; too few feel frenetic. You’ll hit the right tempo by testing where your audience naturally exhale or lean in. When you find the rhythm, repeat it with small variations to avoid predictability, keeping your audience attentive and emotionally invested.
Leverage repeats to reinforce your core message. A repeated shot or line can reframe what’s already known, giving your audience a chance to notice new layers with each pass. Pauses then punctuate those layers, sharpening focus on what matters. This is how you craft momentum that feels organic, not engineered, and how you sustain curiosity through your entire sequence.
Control tempo in your finished series
Tempo is your invisible conductor. Decide early where you want tension, relief, and escalation to land, and then weave it through every shot, line, and sound cue. Use faster cuts and brighter audio for moments of urgency; slow pans and softer tones for reflection. Your finished series should move with a clear tempo arc: a steady climb, a crest, then a controlled descent into closure. If a scene disrupts the tempo, reframe it with a different angle, shorten the duration, or swap in a reaction shot to re-sync the rhythm. The goal is a cohesive, readable flow that your audience can predict in a good way.
Keep tempo consistent across your series by standardizing a few texture cues: lighting warmth, color grading, and compression feel. These are your backstage metronomes. When you vary them too much without purpose, you pull viewers out of the moment. If you’re introducing a new tempo shift, do it with intention—perhaps to mark a turning point or a realization—so it lands with impact rather than surprise for surprise’s sake. The more you tune tempo, the more your composition becomes a guided experience, and the more your audience trusts you to lead them through the story.
Your finished work should feel intentional in pace: moments of breath, then bursts of momentum, all braided with clear purpose. If you’ve done your job, your viewer will finish with a sense of closure and a memory of the rhythm you set, including that key line about Storytelling Through Composition in Analog Series.

Junior Souza is a passionate analog photographer and the mind behind estoucurioso.com. With a camera always in hand and a roll of film never far away, Junior has spent years exploring the world through a 35mm lens — learning, experimenting, and falling deeper in love with the slow, intentional process that only analog photography can offer.
What started as pure curiosity quickly became a lifestyle. From testing different film stocks under harsh light to hunting vintage lenses at flea markets, Junior believes that understanding your tools is just as important as developing your eye.
Through estoucurioso.com, he shares everything he has learned along the way — the techniques, the mistakes, the references, and the stories behind the frames. His goal is simple: to build a space where beginners and enthusiasts alike can grow, get inspired, and never stop being curious.
Always learning. Always shooting.