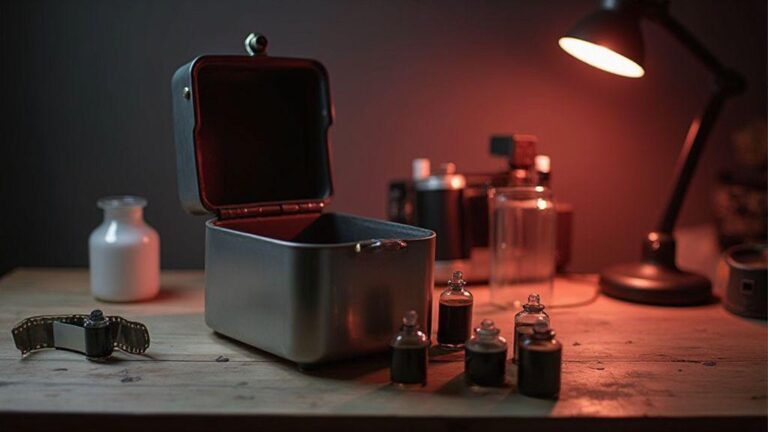
Gather your gear for C-41 at home
When you’re ready to start processing color film at home, you want a setup that’s simple, safe, and predictable. This is the foundation of Step-by-Step Color Film Processing for Newbies: build confidence with a routine and gear designed for beginners. With the right tools, you’ll see results faster and worry less about sample errors.
Keep it practical: a basic thermometer helps hit required temperatures, and a reliable timer keeps your process in sync. Light safety matters too, so choose a developing tank that blocks light and a way to shade the reels. The goal is a smooth workflow you won’t have to hunt for mid-process. Choose gear that’s durable and easy to use, a beginner-friendly kit, a simple transparency chart, and clear step-by-step instructions to stay confident.
What you need to start
To begin your C-41 journey at home, use a dedicated C-41 developer kit to avoid guessing at concentrations or times. Your kit should include developer, bleach, fixer, stabilizer, and precise timing guides. A thermometer that reads both Celsius and Fahrenheit helps you stay on track, especially when a recipe lists temperatures in one unit. You’ll also want a light-tight developing tank with reels and a dark bag or changing bag to load film without exposing it to light.
For safety and maintenance: gloves, eye protection, and a mixing container with measurement marks. Use labeled measuring spoons or cups to avoid rough eyeballing. Secure a dedicated space that’s easy to clean and away from sunlight, dust, and pets. With these basics, you’re ready to practice careful, repeatable steps.
Recommended C-41 home processing kits for newbies
A beginner kit should feel friendly and forgiving, with clear instructions, measured chemical concentrates, and a color-safe chart. The best kits provide enough chemistry for several rolls and a simple recovery plan if timing or temperatures need adjustment. Look for kits with customer support or a short tutorial video, not just guesswork. Safety and clean results should come first, with straightforward labeling and simple, written directions. If in doubt, choose a kit that targets beginners and includes a color test strip to verify first results. A successful first roll boosts motivation more than any gadget.
Buy a beginner C-41 kit
A beginner kit should offer clear, calm instructions and a transparent temperature range. A troubleshooting guide is invaluable if your first rolls come out off. Ensure the kit uses balanced chemistry for standard lab temperatures, not specialized equipment. Include safety gear and a reusable mixing container. A quick-start checklist helps you move from unboxing to processing quickly. With a solid beginner kit, you’ll run your first rolls with less risk of errors and more confidence.
Follow the C-41 step order
Master color film processing by sticking to the C-41 sequence. Each step prepares the film for the next, sealing in color and density. Consistent timings reduce color casts and grain, yielding balanced negatives. Think of it like baking: miss a step or rush a bath, and the final result suffers. Following the steps builds a repeatable process you can rely on.
Plan your session, measure each chemical, and track times closely. Keep temperatures stable and have clean tubes or bottles ready. You’ll notice color balance improving as you move the emulsion from one chemical to the next with proper rinsing. Careful timing turns a messy experiment into clean, consistent results you’ll trust with every roll.
This approach also helps you catch errors early—film sticking to a reel or uneven development become easier to fix. Confidence grows as you see consistent skin tones, blue skies, and true greens on test shots. Stay patient and precise, and future rolls will be smoother.
Step-by-Step Color Film Processing for Newbies
Getting started with color film can feel daunting, but the core idea is simple: follow the times, check temperatures, and rinse well between baths. The first few attempts teach you about your chemicals and your room’s behavior. Don’t rush the temps—stability matters, especially for color shifts that appear if the liquid is even a degree off.
As you proceed, you’ll learn to read the film’s response. A red/magenta cast indicates balance issues you can adjust in future runs. Small tricks save time, like pre-warming containers and maintaining a clean workspace. With each roll, tighten your process and bring your prints closer to the scene you photographed.
How to develop color film at home
Developing at home gives you control and saves money, but it requires respect for the chemicals and a tidy bench. Set up a dedicated work area, keep labels clear, and never mix unrelated baths. Your goal is repeatable results, so log times, temperatures, and adjustments. If a color shift happens, note it and try a small tweak next time.
Warm baths to target temperature before loading film saves time. A stable environment matters, especially for color density and skin tones. With practice, you’ll move faster while preserving accuracy, leading to more confident editing later.
Control chemicals, time, and temp
You control the three levers that bring color film to life: chemicals, time, and temperature. Organize a simple setup: label each bottle, note the temperatures, and keep a timer handy. With practice, you’ll develop a rhythm—pour, wait, rinse, read the results. The aim is consistent results, not luck.
Keep solutions fresh and measured. Time steps precisely; even a 10-second shift can shift the hue. Temperature matters as much as time: too warm can bloom colors oddly; too cool can reduce contrast. Treat each frame as a clue for next time. Set up a clean, organized workspace with pre-measured chemicals in labeled cups and a clear sequence. If needed, test with a practice sheet before real film to guide future runs. Nail the basics and your final results will pop with accurate skin tones and true color balance.
Color film developing chemicals and timings
Color film needs three main baths: developer, stop bath, and fixer. Each bath has its job, and timing is tight. Pour the developer first to activate the latent image, rinse in the stop bath to halt development, then finish with the fixer to lock the image. Keep a steady watch and follow the film’s data sheet timings; even a small deviation can shift color, density, or contrast.
Chemicals should be clean and fresh. Contaminants or old solutions ruin colors. Stir gently, don’t shake, and keep bottles capped when not in use. Record timings and results to compare future runs. If unsure, run a small test sheet first to learn how your developer behaves with your water and temperature. With practice, you’ll read the film like a book and know what a given chemical is doing to the final image.
Temperature control for color film development
Temperature is your ally for color accuracy. Start at the target temperature and monitor closely during each bath. Use a heat gun or bath thermometer to maintain the line. If the temperature drifts, you’ll see color shifts—too warm exaggerates magentas and oranges; too cool flattens contrast.
Adjust development by nudging within the recommended range. Keep baths as constant as possible; temperature swings stress the emulsion. When in doubt, follow the manufacturer’s guidelines and test with a few controlled results before adjusting further. Practice at a single temperature with a short roll or test strip to build a reliable map for different lighting.
Hold 38°C for C-41 timing
For C-41 processing, 38°C is the sweet spot. This temperature helps color dye development stay even across the frame. Use a reliable thermometer and a steady timer. If you drift, you’ll see color shifts or uneven areas, especially in skin tones and skies. Aim for stable 38°C during the developer stage, then move quickly to the next steps. Consistency here yields predictable results and crisper, balanced color.
Fix common mistakes fast
When you’re learning Step-by-Step Color Film Processing for Newbies, the fastest wins come from spotting small errors early. Start with your processing schedule and follow it exactly; rushing leads to missed steps and off colors. Use a simple checklist you can tick off every round to lock in consistency.
Messy routines invite mistakes. Always label tanks and use clean, labeled measuring tools. Dirty water or leftover chemicals can stain frames. If you see foggy or blotchy results, pause and verify the chemical strength. You don’t need fancy gear—just precise measurements and clean equipment. Confidence grows when you see the same results roll after roll.
Temperature matters. A small heat shift can tilt browns toward greens or reds. Keep a stable room temp or use a thermometer and adjust time slightly if the environment is hot or chilly. Small, steady steps beat big, uncertain changes.
Common mistakes in color film processing for beginners
- Skipping the wash between steps allows cross-contamination and color drift. Rinse briefly but thoroughly before continuing.
- Over- or under-development: start with package timings and test on a spare frame to dial in the exact timing for your water and temperature.
Troubleshooting color shifts in home film processing
Color shifts usually come from temperature, chemical strength, or timing mistakes. If greens look too strong, check developer temperature and agitation time. If reds are muddy, you may be low on developer or the water temperature is too low. Change one variable at a time and re-test with a short roll.
Keep a simple session log: temperature, dilution, and times. When a roll drifts, you’ll know where to look first. Small adjustments, big harmony.
Correct color casts by checking temp
The simplest fix for many color casts is to verify temperature. A blue cast suggests cooler developer; a yellow/orange cast suggests rinse or fixer issues. Use a reliable thermometer and keep the same temp for each bath. This small check makes a noticeable difference.
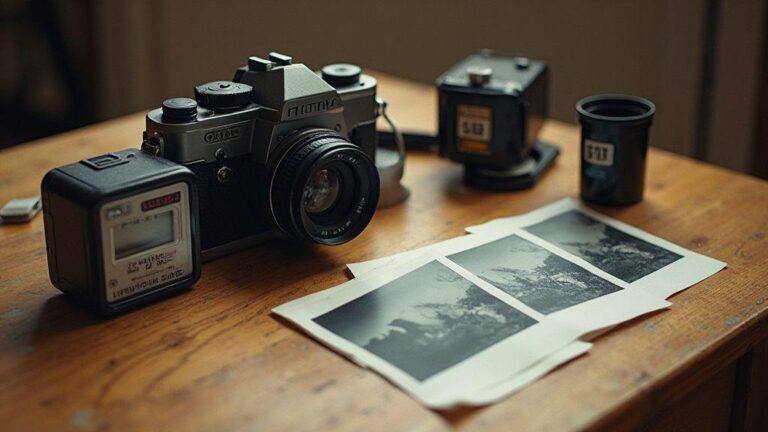
Scan and print like a pro
You’re turning film into digital memories. Set a steady workflow: scan, then print with intention. Set your scanner to the right color profile and resolution, align negatives, and keep a consistent setup for uniform scans. When you print, choose paper that suits the film type and tweak brightness and contrast to match what you saw. Treat scanning and printing as a paired task to save time and avoid surprises.
If color shifts appear in the scan, adjust white balance in editing before printing. Log settings to reproduce results later. Aim for faithful representation, not exaggeration. When done, compare the print to the original to note tweaks for next time. With practice, scanning and printing become smoother, and your photos will reflect what you imagined when you pressed the shutter.
If you’re new to this, start with a basic setup: clean workspace, reliable scanner, and neutral viewing light. Don’t rush test scans; you’ll quickly learn which adjustments are worth it. Keep files organized by project and date so you can reprint or edit without drama. Step-by-Step Color Film Processing for Newbies can guide you, but trust your eye above all.
Scanning and printing color negatives after development
Scan color negatives carefully to preserve color accuracy. Use clean holders, avoid fingerprints, and scan at high bit depth to capture subtle tones. In editing, use color correction that respects the scene’s mood. When printing, pick compatible ink/paper and avoid pushing contrast too hard—color negatives reward restraint. If something looks off, re-scan after a quick dust clean and re-edit before printing again. Consistency beats clever tricks.
Prints should reflect what you saw during editing. If colors feel flat, adjust saturation gently and reprint a small test strip before committing to a full batch. Note which paper/ink combo worked best to keep future prints on the same track. Scanning and printing as a paired task helps you maintain color integrity.
Drying, dust care, and handling
Drying is where small habits save big headaches. Let work dry in a clean, dust-free area. Wipe stray dust with a soft cloth—never rub hard, it can scratch. Handle negatives by the edges, using clean fingers or gloves if you’re meticulous. A quick routine—dust, wipe, dry—keeps results sharp.
Dust is sneaky. Keep the workspace tidy with closed storage, lint-free wipes, and a gentle blower. If dust appears on a scan, pause and re-scan after a quick clean. Consistency matters for clean results that let the image shine.
Store and handle chemicals safely
Treat chemicals like precious tools. Keep everything organized, labeled, and away from heat or light. Store in a cool, dark spot with containers sealed to prevent spills. When you need a bottle, grab the right one quickly because labeling is clear and dated. Always wear gloves and eye protection, and work in a ventilated area. If a bottle leaks, close it and clean the spill. Don’t pour leftovers back into the original bottle; use a dedicated waste container or follow disposal steps from your supplier. Step-by-Step Color Film Processing for Newbies is easier with small batches, fresh mix, and a clean station.
Your workspace should have separate areas for mixing and storage. Use labeled bins or cabinets at comfortable heights to reduce spills. Wipe surfaces with a mild cleaner and dry completely before closing. Avoid cross-contamination by never mixing incompatible chemicals. Keep a simple log of what you mix and when for predictable color results.
Highlight important instructions and follow a lightweight checklist to stay consistent. Color film chemistry ages; treat it with care to keep results steady.
Beginner guide to C-41 color processing care
C-41 care starts well before you dunk film. Keep tanks clean with warm water, mild detergent, and a final rinse. Dry thoroughly and check gaskets for wear. If a seal looks worn, replace it to prevent leaks.
Temperature control is key: most labs use around 38°C–40°C for C-41. Use a dependable thermometer and keep a steady immersion. Time is equally important; follow the kit’s timings and keep a timer handy. If color shifts or density varies, you’re likely out of spec—recheck temperature, timing, or chemical activity. Don’t rush; calibrate slowly to gain steadier results.
Keep a simple wall checklist: pre-wash, developer, bleach, redevelop, rinse, stabilizer. Use fresh chemistry for each batch and label bottles clearly. A color-coded system (blue for developer, yellow for bleach) helps you know where you are in the process at a glance. With steady practice, this becomes second nature, and your negatives will thank you.
Maintain reels and tanks to last longer
Reels and tanks are the workhorses of your setup. After use, rinse with warm water to remove residues, then wash with mild detergent. A soft brush helps reach film dust. Dry completely before storage to prevent corrosion and mold. If you see scratches or gouges, replace the part or reel. Inspect seals, o-rings, and joints for wear; replace damaged parts to prevent leaks. Store reels in a clean, dust-free container. Avoid harsh solvents when cleaning; your gear will reward you with reliability.
Develop a quick maintenance rhythm: wash, inspect, dry, and store. Keep a small kit with a spare gasket, lubricant for threads, and a microfiber cloth. Treat reels and tanks like a favorite camera—gentle handling, regular checks, and routine cleaning keep your workflow steady.
Safe disposal and storage
Disposal of used chemicals is essential for safety and the environment. Do not pour used fixer or developer down the drain unless local guidelines approve. Let chemicals settle, then seal in labeled containers for proper disposal or take-back programs. Store used and fresh chemicals separately to avoid mixing. Keep hazardous containers away from food and personal items. If a spill occurs, use a spill kit with absorbent material and gloves. Follow local rules for disposal. A simple routine—small batches, fresh mix, and a clean station—helps Step-by-Step Color Film Processing for Newbies stay safe and smooth.
Label everything clearly with dates and contents. If a spill happens, clean promptly and dispose of cleanup materials properly. By maintaining safe disposal habits, you protect your space, your family, and your future photographs.
Step-by-Step Color Film Processing for Newbies: quick-start checklist
- Set up a clean, light-tight work area with clearly labeled bottles and a timer.
- Use a beginner-friendly C-41 kit with clear instructions and a color test strip.
- Pre-warm baths to target temperatures (around 38°C) before loading film.
- Follow the exact dosing and timing for each bath: developer, stop, fixer, stabilizer.
- Rinse thoroughly between baths and log temperatures and times for each roll.
- Keep reels, tanks, and bottles clean; inspect seals and replace worn parts.
- Read color shifts carefully and adjust one variable at a time in future runs.
- When scanning and printing, keep a consistent workflow and color profile.
Step-by-Step Color Film Processing for Newbies guides you from gear and setup through the development, scanning, and printing stages, helping you build reliable, repeatable color film results.

Junior Souza is a passionate analog photographer and the mind behind estoucurioso.com. With a camera always in hand and a roll of film never far away, Junior has spent years exploring the world through a 35mm lens — learning, experimenting, and falling deeper in love with the slow, intentional process that only analog photography can offer.
What started as pure curiosity quickly became a lifestyle. From testing different film stocks under harsh light to hunting vintage lenses at flea markets, Junior believes that understanding your tools is just as important as developing your eye.
Through estoucurioso.com, he shares everything he has learned along the way — the techniques, the mistakes, the references, and the stories behind the frames. His goal is simple: to build a space where beginners and enthusiasts alike can grow, get inspired, and never stop being curious.
Always learning. Always shooting.