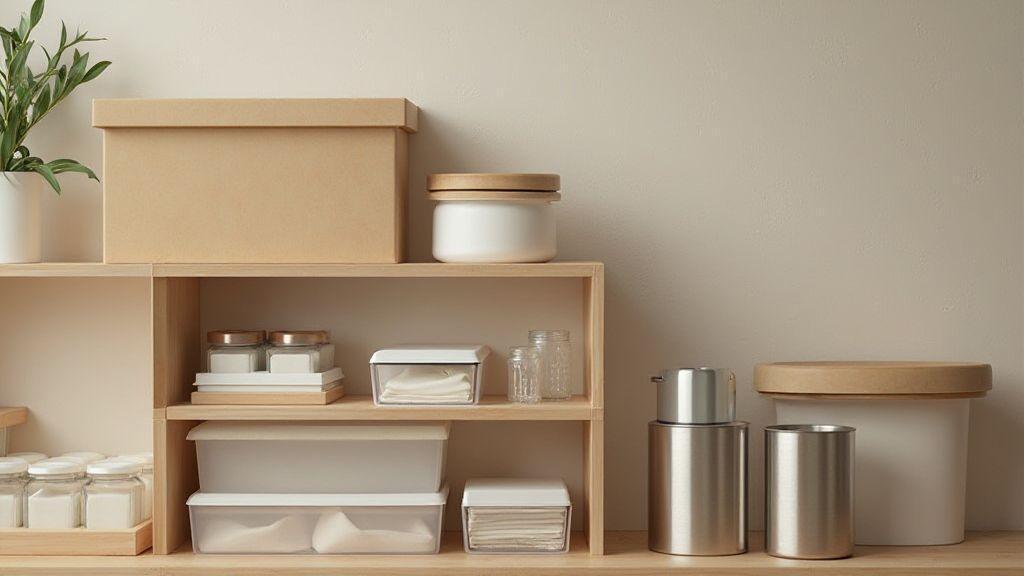
Durable food storage containers you can trust
When you pick containers, you’re choosing how long your food stays fresh and tasty. Look for options that resist leaks, dents, and stains, with sturdy walls and secure lids that click, seal, and stay put after a long week of fridge, freezer, and bagging tasks. The right choice helps you save money, cut waste, and keep meals enjoyable. Think of durable containers as the dependable workhorse of your kitchen—they’re the ones you reach for first when you’re multitasking between errands and dinner.
Your best bet is to select containers made from materials designed to handle temperature shifts and rough handling. Thick, shatter-resistant plastics or tempered glass with snug seals resist cracking and keep odors in check. If you’re worried about microwave use, choose containers labeled microwave-safe with clear lids to prevent splatters. Durability also means easier stacking and labeling so you can organize your fridge and cabinets without a jumble. When you feel confident in the build, you’ll reach for these containers without a second thought, every time you meal prep or portion leftovers.
In the end, durable containers save you time and money. They cut down on waste because they’re less likely to warp, leak, or stain, and they help you plan meals with confidence. If you’re choosing between several options, pick those with reinforced corners, sturdy lids, and a history of reliable performance. Your kitchen deserves containers you can trust, day after day.
How material affects freshness
Material choice actually changes how long your food stays fresh. Glass stores flavors cleanly and won’t absorb odors, so your pasta sauce won’t taste like last week’s soup. Plastic, when strong and BPA-free, is lighter and cheaper, but you want to avoid thin walls that sweat and warp in a freezer. The lid design matters just as much as the container body—an airtight seal locks out air and moisture that can steal freshness. If a seal is flimsy, your food dries out long before its time.
The surface finish also matters. Smooth, non-porous materials resist staining and bacteria better than rough textures, making cleanup easier and less likely to leave lingering smells. Temperature tolerance is part of freshness too: you want containers that tolerate cold from the fridge and heat from the microwave without warping or cracking. When you choose well, you’ll notice produce stay crisper, yogurt stays smoother, and soups don’t pick up last week’s flavors.
Finally, the ease of cleaning preserves freshness longer. Dishwasher-safe options speed up cleanup and reduce the chance of soap residue. A simple routine—rinse, wash, dry—keeps microbial growth down and your food tasting like it should. You’ll feel the difference every time you open a container and find it still tasting fresh.
Food-safe seals and lids
Your lid should be more than a cover—it’s the guard against air, moisture, and odors. Look for gasket seals that are flexible and intact, with a snug snap or twist mechanism. A lid that seals well keeps greens crisp and rice fluffy, instead of soggy or dry. If you often carry containers, leak-proof designs can save you from puddles in your bag and on the pantry shelf. A reliable seal also stops spills when you stack containers in the fridge or freezer, so you can stay organized without chaos.
Materials matter here too. Silicone rings last longer than cheap plastic, and clear lids let you see inside without opening. Some lids allow you to vent steam for reheating—handy for soups and sauces. When you test lids, twist and squeeze the edge to ensure there’s no give. A good seal is quiet in daily use but powerful when you need it most.
Choosing containers with durable, food-safe seals means you don’t chase replacements every few months. You’ll notice less waste, fewer spills, and your food staying at its best from the first bite to the last.
Choosing BPA-free containers
BPA-free is a must for long-term use because this chemical can migrate into food when plastic is stressed by heat or movement. Look for containers labeled BPA-free and choose reputable brands with clear safety information. You don’t have to overspend to get safe options; many solid, affordable lines offer BPA-free plastics and strong lids. When you’re budgeting, prefer simple designs with robust seals rather than flashy features that don’t add real safety or durability.
If you’re unsure, check for certifications like food-grade labels and third-party safety tests. You deserve confidence that your containers won’t leak or break under routine use. Your choice should reflect a balance of safety, practicality, and cost, so you can store leftovers safely and reuse containers without worry.
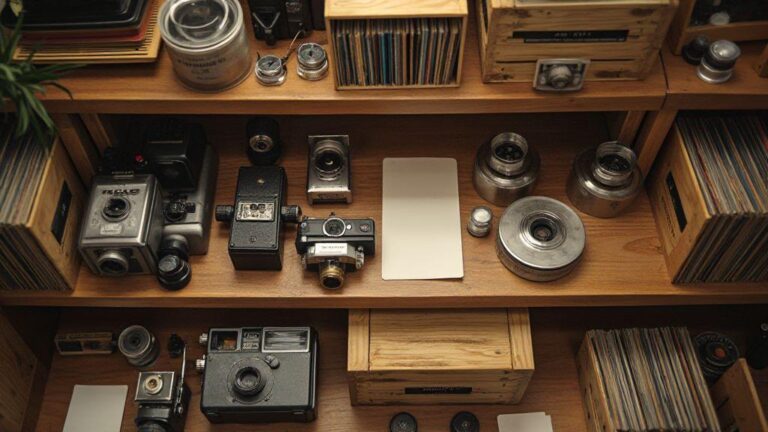
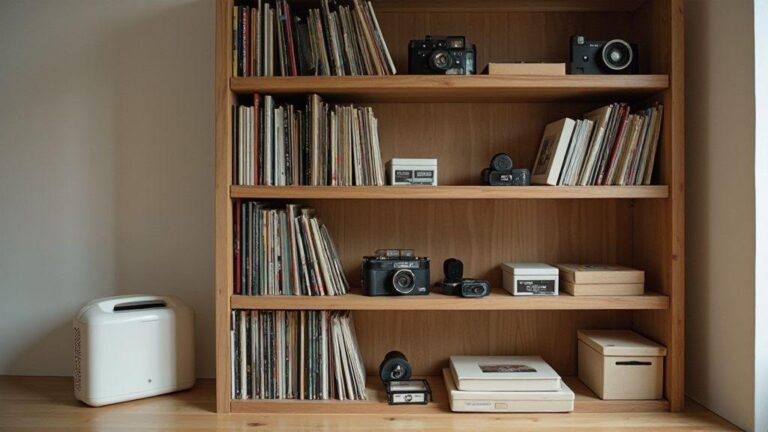
Archival storage supplies for your paper and photos
You want your memories to last, not fade away. Start with the right supplies, and you’ll see the difference in how your papers and photos stay vibrant. Think of archival storage as a shield for the parts of your life you’ve saved in ink and image. You’ll notice the impact when you pull out a box years later and your notes and pictures still look clear and sturdy. The key is choosing materials that don’t release acids or chemicals that could hurt what you’re protecting. Look for trusted options that say they are acid-free, pH-neutral, and lignin-free. When you pick the right products, you’re investing in peace of mind as much as protection.
Your goal is to keep things clean, dry, and organized. That means storage boxes, sleeves, and folders that fit your items without crowding or bending them. If you store things in loose piles, you risk creases, tears, and lost corners. By contrast, a simple, well-chosen system makes it easy to find what you need and keeps everything stable. You’ll feel the difference during a move or when you’re sorting through old pieces for a project. The right supplies act like a simple routine that protects your efforts from time’s wear and tear.
When you use the proper archival storage, you also make future retrieval easier. You’ll want clear labeling, sturdy boxes, and sleeves that slide in and out without catching on edges. The goal is to create a calm, predictable setup where you can add items without disrupting what’s already safe. With consistent use, your archive becomes a trusted resource you can rely on, not a fragile pile you nervously handle. Choose materials that are designed for long life and easy access, so you can enjoy your collection now and for years to come.
Why acid-free storage boxes matter
You’ll see the difference right away: acid-free boxes slow the yellowing and weakening that can ruin paper and photos. Regular cardboard can seep acids that migrate into your items, leaving you with brittle corners and fading ink. With acid-free boxes, your papers stay flexible and colors stay truer longer. It’s worth spending a bit more for boxes labeled acid-free, lignin-free, and pH-neutral. Your future self will thank you when you don’t have to fight with crumbling edges or telltale brown stains on a favorite page.
The way you store matters as much as what you store. Acid-free boxes prevent a slow chemical reaction that happens over time. If you’ve ever seen a photo that looked fine at first but yellowed after years in a regular box, you know what I’m talking about. Use boxes that are clearly labeled for archival use and keep them off concrete or damp floors. A simple habit—storing in a cool, dry place and away from direct sunlight—complements the acid-free box and extends your items’ life. You’ll feel relief when you don’t have to rescue a fragile page from a crumbling corner.
Sleeves, folders, and labels
Sleeves and folders protect items from handling, dust, and light while you’re organizing. Choose sleeves that fit your photos and papers without bending them. A snug fit is better than a loose one, which invites sliding around and potential scuffs. Look for sleeves made from archival-quality polyester or polypropylene that are acid-free and will not stick to photos or ink. Label the outside clearly so you can find things without opening every sleeve. A simple, bold label makes a big difference when you’re hunting for a memory.
Labels help you keep track of date, event, and subject without writing on the items themselves. Use a soft pencil or archival ink that won’t bleed. You want your labels to stay legible through years of storage. Keep folders organized by year or category so you can skim your collection quickly. The goal is to minimize handling and maximize accessibility. With the right sleeves, folders, and labels, you turn a potential mess into a tidy, working archive you actually enjoy using.
Store photos flat and dry
Keep photos flat to prevent curling and bending over time. Store them in sleeves or in acid-free envelopes that lie flat inside your boxes. Avoid stacking that creates pressure marks on the glossy surface. A dry environment is essential: use moisture-absorbing packs if needed and keep boxes away from damp basements or sunny windows. Flat storage helps preserve color, detail, and sharp edges so future you can view the photos the way you remember them.
Museum conservation materials for your sensitive objects
You need materials you can trust when protecting your sensitive objects. The right choices keep artifacts safe without changing their look or chemistry. Think of your collection like living history: a small mistake can cause big, lasting damage. By choosing proper supplies, you reduce risk and extend the life of everything from textiles to paper to metal. Your goal is to build a simple, reliable kit you can reference every time you handle or display items. Start with inert, proven options and keep notes on what works best for each object.
Selecting materials that don’t react with your objects is essential. You’ll be relying on them for padding, support, cleaning, and safe storage. The wrong material can stain, abrade, or trap moisture. The best approach is to use items designed for conservation, not general-use plastics or everyday bedding. With careful choices, you’ll protect the integrity of your collection while making handling and display safer for everyone.
Always document what you use. This helps you track compatibility and outcomes over time. When you choose a new material, note the object type, storage conditions, and any changes you observe. This habit saves headaches later and makes it easier to teach others how to care for the collection.
Inert supports and padding
Your first line of defense is inert supports and padding. Choose materials that don’t shed fibers or chemicals, like acid-free papers, inert foams, and buffered boards. These options cushion objects during handling and travel without offering a raft of reactions you don’t want. You’ll feel the difference when you pull a box from the shelf and see your item sitting securely rather than shifting around, getting scuffed, or carrying dust from rough surfaces. Use supports that distribute weight evenly so delicate corners don’t press into a single point.
Padding should be clean, dry, and free of contaminants. Avoid wadded fabrics that shed or compress over time; opt for conservator-grade cotton or polyester wadding that stays plump. For flat objects like photographs or drawings, place them on stable, inert boards with a soft spacer to prevent pressure. If you use capsules or mounts, ensure they’re designed for long-term storage and don’t rub against the artwork. Your goal is quiet protection that doesn’t fight with the object’s materials.
Always check your padding and supports after long-term storage. If you notice stiffness, cracking, or color changes, reassess the setup. Keep a simple log of what you used and how it performed so you can tweak your approach next time.
Safe cleaning and handling
Cleaning and handling should feel careful, not heroic. Use gentle methods that remove dust without abrading surfaces or altering finishes. Soft brushes, microfiber, and low-suction vacuum tools with protective filters are your everyday allies. Wear clean cotton gloves or use clean, dry hands to minimize oils that can accelerate deterioration.
For cleaning, test a small inconspicuous area first. If you see color transfer or surface changes, stop and reassess. Plain, distilled water with very light wiping is enough for many object types. For stubborn grime, consult a conservation guide or a professional before applying solvents. Work slowly and document every step, so you know what helped and what didn’t.
When you move or store objects, use two hands and support from the base or edges. Avoid gripping delicate features, and never force a lid or closure that doesn’t fit naturally. A calm, methodical approach prevents accidents and keeps your pieces looking true to their original state.
Use proven conservation materials
Always reach for materials designed for museum conservation. These are tested to be stable over decades and compatible with a wide range of materials. Look for products labeled as archival quality, acid-free, or inert. Using trusted materials reduces the risk of unwanted chemical reactions and helps your objects survive years of storage and display. If you’re unsure, ask for documentation or certification from the supplier. Your goal is reliability over novelty.
Climate-controlled storage solutions for your long-term preservation
Your films and materials deserve a stable home. Climate-controlled storage keeps them safe from surprising swings that can age cellulose, fade dyes, or warp bindings. You’re protecting history, not just keeping things tidy. By choosing a space with steady temperature and humidity, you reduce the risk of mold, curl, and cracking. Think of it as giving your collection a calm, shielded room where every item stays in its best shape for years to come.
In practice, look for dedicated climate-controlled units or rooms that track both heat and moisture. If you’re storing a mix of positive and negative materials—like film reels, acetate prints, and paper archives—consistency is king. Your goal is to avoid rapid changes that stress different materials in different ways. With the right environment, you’ll notice fewer off-gassing odors and less edge curl on paper items. It’s not flashy, but it’s what actually preserves your assets over the long haul.
When you compare options, ask about insulation, air exchange rates, and the ability to maintain low humidity without sounding like a wind tunnel. A quiet, steady climate means fewer surprises during your next inventory. You get peace of mind, and your collection gets a real chance to endure.
Ideal temperature and humidity ranges
You want stable ranges that work across a variety of materials. A practical target is around 65–70°F (18–21°C) for temperature and 30–50% relative humidity, depending on what you’re storing. For tighter groups of items, you might push toward 65–68°F (18–20°C) with 30–40% RH to slow deterioration without making the air brittle for some films. If you’re mainly preserving paper and cellulose acetate, stay closer to the lower end of those humidity levels to prevent acetic acid formation and softening bindings.
Your best move is to pick one zone and keep every item in it. Mixing items that hate humidity with items that love it is a recipe for warping and color fading. You’ll also want to avoid rapid heats or sudden dampness after a dry spell. Consider having a dedicated humidity buffer—like a desiccant cabinet or a controlled humidification system—that you monitor and adjust slowly. Regular checks help you catch small drifts before they become big problems.
Monitor with sensors and alarms
Your eyes aren’t enough. You need sensors that alert you the moment things drift. Place temperature and humidity sensors in several spots, not just near a doorway or the front desk. A few data loggers that record readings every hour give you a clear history. When you see a trend—rising heat in the afternoon or humidity spikes after a rain—you can act before damage happens.
Choose systems that connect to your phone or computer so you can set alerts for out-of-range values. Alarms that ping you at night are worth their weight in gold, especially if you’re guarding rare or irreplaceable items. Regularly test alarms and backup power supplies, and have a quick response plan: move items to a different climate zone, adjust humidification, or pause use of the space until conditions stabilize.
Airtight vacuum-sealed bags and UV-protective storage solutions
You’ll get the best results when you pair airtight vacuum-sealed bags with UV-protective storage. These bags lock out air and moisture, keeping films and materials from oxidizing or mold growth. The UV-protective options add a shield against sunlit shelves, which means your items stay stable longer. Think of it as a double layer of defense: one seal for freshness, one shield for light.
With vacuum sealing, you reduce volume and slow down chemical reactions that lead to fading or brittleness. For films and materials sensitive to humidity, this is a game changer. You’ll notice fewer wrinkles and fewer spots that look cloudy. And when you grab a sealed bag, you’re essentially picking up a time capsule you can trust to stay consistent, even on crowded storage shelves.
If you’re managing a mixed collection—photos, negatives, or delicate textiles—these systems help you organize with confidence. The right bags and UV barriers make it easier to rotate stock, label clearly, and know you’re keeping your items in a stable environment. It’s not flashy, but it’s practical, and practicality matters when you care about long-term preservation.
When to use vacuum sealing
Use vacuum sealing whenever your items are sensitive to air, humidity, or odor transfer. For films and materials that fade in sunlight, vacuum sealing reduces exposure to oxygen and moisture that speed deterioration. If you’re stacking boxes in a dim closet or attic, you’ll appreciate the compact packs and the reduced risk of pests. You’ll also save space, which keeps your room easier to navigate and reduces forgetfulness about what you have.
Vacuum sealing isn’t a cure-all for every item. For items that need to breathe or that have irregular shapes, you may need flexible bags or sized pouches. It’s best to seal in short, informative batches—keep a quick log of what’s inside each bag. That way, when you pull something out, you know exactly how it was stored, and you avoid repeated sealing cycles that can stress delicate materials.
UV barriers for light-sensitive items
UV barriers aren’t just fancy add-ons; they’re a practical safeguard for anything prone to fading or heat damage. If you’ve got old film stock, color prints, or vintage textiles, you’ll want bags or boxes with UV protection. The sun’s glare can degrade coatings and dyes over time, so a simple UV shield can extend the life of your treasure. You’ll notice color and texture stay truer longer, which is a big deal when you’re preserving memories or valuable assets.
Test seals and UV ratings
Test seals by storing a small sample under normal light conditions and checking for changes after a few months. For UV ratings, compare products with clear certifications and real-world performance. A strong seal plus a documented UV rating is your best bet. If you see fading or moisture on test pieces, reassess your materials or switch to higher-rated options. Trust but verify—reliable brands for storage and conservation products stand up to simple, repeatable tests.
Trusted preservation brands and industrial-grade storage systems for your needs
You want solutions you can rely on, not guesswork. When you choose preservation brands, look for those with a track record in handling delicate films and materials. Trusted brands bring tested durability, consistent performance, and clear guidance on how to care for your items. In practice, this means selecting systems engineered for long-term stability, with corrosion-resistant housings, humidity control, and modular design that adapts as your collection grows. Your goal is a setup that minimizes risk while maximizing accessibility for your team or yourself.
Think about the day-to-day realities of storage. You’ll want systems that are straightforward to operate, not just on paper but in real life. Industrial-grade storage should be tough enough to withstand daily handling, yet gentle enough for fragile materials. Look for brands that publish practical specs, maintenance tips, and customer support that actually answers when you call. The right choice will feel like a reliable partner: sturdy, predictable, and easy to integrate into your current workflow, whether you’re cataloging films, negatives, or physical archives.
Finally, your selection should balance price with long-term value. A slightly higher upfront cost from a reputable brand can save you money later in repairs, replacements, and reduced risk of loss. Seek systems that offer warranties and documented performance under real conditions, not just glossy brochures. When you align with trustworthy names and durable designs, you protect your collection today and for generations to come.
Look for certifications and reviews
When you evaluate options, certifications are your first signal. Look for independent labs or industry bodies that test storage systems for temperature stability, humidity resistance, and material safety. Certifications show that what you’re buying meets agreed-upon standards, not just marketing claims. Don’t skip the reviews either. Real user experiences reveal how products perform under typical conditions, how responsive the vendor is, and how easy things are to repair or replace.
Pay attention to both up-front claims and long-term performance notes in reviews. A product might boast great specs, but reviews can reveal issues like stiff doors, difficult seals, or poor fit with standard shelving. Compare experiences from institutions or individuals similar to you, whether you’re preserving film reels or archival paper. If a brand consistently earns praise for reliability and thoughtful design, that reliability translates into fewer headaches for you.
Remember to weigh negative feedback as part of your decision. A few critical points may reflect unique use cases, but patterns—like recurring humidity problems or premature wear—are red flags. Favor brands with transparent responses to concerns and evidence of ongoing improvements. Your goal is confidence that the system you choose will stand up to your needs and protect your items over time.
Match system to item size and risk
Your items come in different sizes and sensitivities, so your storage must fit that reality. Start with measurements of your largest item and plan for spare capacity. A good system should accommodate a range of formats without forcing you into awkward hacks or extra boxes. If you’re dealing with fragile film, you’ll want cushioned supports or archival-grade sleeves that minimize handling damage. For larger, heavier reels, ensure shelves and cabinets can bear the load without warping or sagging.
Assess risk by considering how often you’ll access items and how much environmental control you need. If your collection is volatile to humidity changes, you’ll want sealed, corrosion-resistant enclosures with reliable climate control or desiccants. For items prone to light exposure damage, choose systems with UV-blocking features or storage in darker environments. The right match lets you maximize access while keeping risk at bay, rather than trading convenience for safety.
Finally, think modular. Systems that can expand as your collection grows save you from future transitions, which can be disruptive and costly. A modular setup also helps you reconfigure space as your needs shift, whether you start with a focus on films and negatives, then add textiles or paper-based works. Your storage should flex with you, not against you.

Junior Souza is a passionate analog photographer and the mind behind estoucurioso.com. With a camera always in hand and a roll of film never far away, Junior has spent years exploring the world through a 35mm lens — learning, experimenting, and falling deeper in love with the slow, intentional process that only analog photography can offer.
What started as pure curiosity quickly became a lifestyle. From testing different film stocks under harsh light to hunting vintage lenses at flea markets, Junior believes that understanding your tools is just as important as developing your eye.
Through estoucurioso.com, he shares everything he has learned along the way — the techniques, the mistakes, the references, and the stories behind the frames. His goal is simple: to build a space where beginners and enthusiasts alike can grow, get inspired, and never stop being curious.
Always learning. Always shooting.