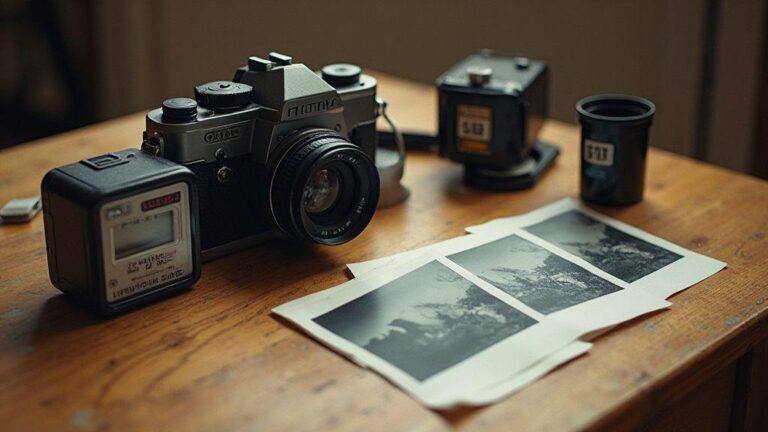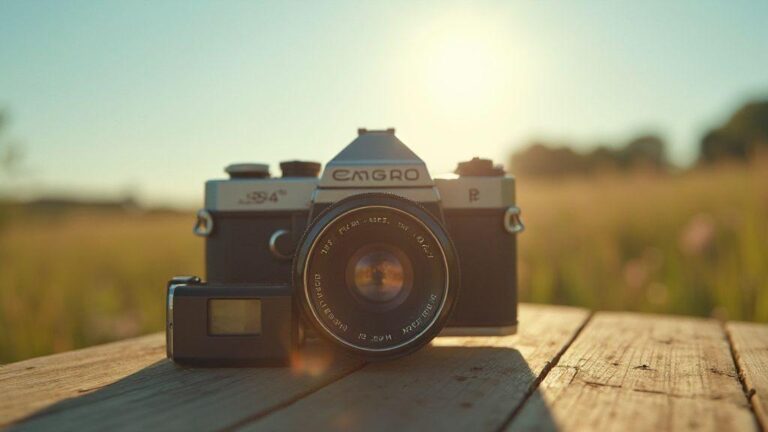
Intermediate Zone System basics
The Intermediate Zone System is your practical bridge between art and accuracy in photography. It maps light levels to your film’s response so you can predict what lands on your negative or slide. It’s a repeatable method that helps you lock in exposures you can trust, even when a scene looks tricky. Think of it as a ladder you climb to keep highlights safe while still revealing detail in the shadows.
The system centers on how your film handles brightness. You’ll learn to read the scene, decide what you want to preserve, and translate that into exposure steps. By thinking in zones, you avoid surprises during development or printing. Your goal is consistent results you can rely on, night or day, high or low contrast, with less guesswork in the darkroom or with a digital scan.
As you practice, you’ll build confidence in judging tonal relationships. You’ll see that a small exposure change can swing a whole tone range. The Intermediate Zone System shines here: a clear plan for choosing exposure so your final image matches your intent rather than luck.
Zone System for Film Photography roots
The roots lie in the need to control tonal values on film. You learn to think in zones from pure white (Zone 10) to deep black (Zone 0), with the middle grays in between. This framework lets you map scene brightness to film response, so you know exactly where your critical tones land in development and printing.
When you start using it, you’ll set a target zone for important details. Meter the scene and bias exposure to place those tones where you want them on the scale. It’s about consistency: shoot the same lighting again and reproduce the same tonal balance. The more you practice, the more natural this becomes, and the less you rely on guesswork.
The technique isn’t just for old cameras. Modern films, paper, and even digital scans can benefit from Zone thinking. You’ll translate the old theory into practical steps: meter, place your critical tones, and shoot with intention. That mindset sticks with you, turning every scene into a plan rather than a shot in the dark.
Key zones and tonal scale
In the Zone System, you’ll learn the key tonal zones and where they typically sit on film. Zone V sits at middle gray, a reference point you’ll use to decide exposure. Highlights sit above Zone V, while shadows sit below. Your aim is to place important textures or details where you want them on that scale.
Understanding this scale helps you predict how your film will respond after development. If you want bright skin tones, you’ll push your exposure to land those tones in a higher zone. If you want rich shadows, you’ll pull back a bit so the details stay visible there. It’s a simple map, but it changes how you exposure and how you print.
With practice, you’ll start to see scenes as a series of zones rather than random light. Your metering becomes a precise tool, not a guess. You’ll adjust for contrast, eye toward the detail you care about, and trust that your final image will reflect your intent.
Metering methods for precise analog exposures
When you’re aiming for precise analog exposures, the way you meter matters. Your meter is a tool, not a magic wand—it helps you lock in tones you can reproduce. In daily shooting, you’ll use a mix of reflected, incident, and spot readings to build a reliable exposure map you can trust across scenes. Think of it as setting a baseline so your highlights don’t scorch and shadows don’t crush.
Consistency is the backbone here. You’ll often test a scene by taking a few different readings and comparing them to a neutral target you know your film responds to well. If you’re unsure, you can bracket slightly, then pick the middle exposure that keeps skin tones natural and the rest readable. The goal isn’t to chase perfect numbers but to predict how your film will render the scene, so your final print matches your vision.
As you practice, you’ll notice that some scenes demand more precise control. You’ll rely on your meter to guide you to a safe middle ground where details stay intact. The more you work with these methods, the more your instinct grows, and you’ll start to see a rhythm in the light that comes from your lens to your film.
Reflected vs incident metering
With reflection metering, you’re measuring light bouncing off the subject. This is handy when you want the exposure to render tones as they appear to your eye. But remember, it can be fooled by bright backgrounds or dark subjects, skewing your exposure toward the scene’s average brightness. You’ll want to compensate when you notice the meter leaning too bright or too dark for the subject you care about most.
Incident metering reads the light falling on the subject, not the subject itself. This is your friend when you need a neutral canvas. It’s less fooled by color or reflectance, so you often get more predictable skin tones and midtones. If you’re unsure which, start with incident metering for a calm base, then adjust if your film’s response tells a different story. You’ll find incident metering shines in backlit or high-contrast situations, keeping your key tones steady.
When you switch between these two, you’ll notice the difference in how your film records light. Reflected can push you toward dramatic, contrasty results if the scene has strong contrasts. Incident tends to deliver steadier midtones, which is great when you’re aiming for a natural look. Practice both so you know exactly how each reading will translate onto your film.
Using spot meters and gray cards
Spot metering is your precision tool. It lets you measure a tiny area that matters most—usually a neutral gray area or a critical highlight. Use it to lock in an exposure that preserves the exact detail you want in a specific part of the frame. If you want a particular subject to pop, spot metering helps you set exposure around that target without guesswork.
Gray cards are your anchors. They give you a reliable reference point for a neutral tone, which makes exposure calculations easier. Place the card in the same light as your subject, take a reading, and set your camera or meter to a middle gray. This keeps skin tones and important details from drifting toward muddy shadows or blown-out highlights. With practice, you’ll use gray cards to standardize exposures across different shoots so your film’s tonal range stays consistent.
Pairing spot metering with a gray card is a powerful combo. You get precise control for tricky lighting and a solid baseline for your readings. This approach helps you build a repeatable method you can apply in varied scenes, from bright sun to dim interiors, without losing your creative edge.
Set your meter for consistent zones
Your meter’s zone settings shape how you translate light into exposure. Set it to consistent zones so you’re not surprised when film responds. If you shoot a lot of portraits, aim for a zone that preserves detail in skin tones while letting the background fall where you want it. For landscapes, you may push a bit more contrast to keep the scene lively without washing out the sky.
Once you pick a zone system that matches your film and style, stick with it. You’ll save time, and your results will feel familiar, even in changing light. Practice reading scenes with your chosen zones and note how your film responds. Quicker decisions come with muscle memory, and you’ll shoot with confidence rather than guesswork.
Intermediate tonal mapping
You’re stepping into a practical method that helps you control how your scene feels. With intermediate tonal mapping, you’ll balance the midtones so your photos keep detail without flattening contrast. This is the sweet spot between bright highlights and deep shadows. You’ll set up your workflow so that those middle areas carry the most information—no guesswork, just predictable results you can trust on every shoot. This is the core of the Intermediate Zone System for Precise Analog Exposures.
In this approach, you’ll think of your image as layers of tone that need to land in specific places. Your goal is to make the middle tones readable and true to life, while still protecting the highlights and shadows. If you’ve ever struggled with muddy midtones, this method gives you a clear path to keep them crisp. You’ll develop a routine you can repeat, not a one-off fix that only works some of the time.
As you practice, you’ll start to see how small tweaks to the midtones ripple through the whole image. The idea is to map those midtones so they sit where your eye expects them to be. You’ll gain more control over texture, skin tones, and material subtleties, which makes post-processing faster and more reliable.
Place middle tones with tests
When you test where the middle tones land, you’re benchmarking your eye against your histogram. Start with a neutral scene and push the midtones up a touch, then pull them back if highlights start clipping. Do the reverse if shadows feel too dense. By testing, you’ll find the exact sweet spot for your camera, lens, and lighting. You’ll notice that small shifts in the middle can change the mood of the entire frame, so test often and keep notes.
Use a simple set of reference scenes: one with bright lights, one with even lighting, and one with darker, textured surfaces. For each, adjust the midtones in small increments and compare how skin, fabrics, and textures respond. Your goal is to keep detail in the midtones without sacrificing glow in the highlights or depth in the shadows. When you’re happy with a test result, lock it in for similar shots.
Map scene tones to zone numbers
Think of your tones in zones, with each zone representing a brightness range. You’ll assign middle tones to the zones that match your preferred look—balanced, punchy, or soft. This mapping helps you predict how changes in exposure or processing will affect the overall image. If your scene has complex lighting, map the brightest parts to the zone that preserves detail, while letting the midtones carry the texture you want, and keep shadows deep enough to anchor contrast.
As you map, you’ll start to see which zones pull the viewer’s eye where you want. You’ll know which zone handles skin tones, which handles foliage, and which zone keeps metallics from blowing out. This clarity makes you faster on set and more consistent in post, because you’re following a written plan rather than guessing.
Record your intermediate tonal mapping
Record your mapping so you can reuse it. Write down the zones you assign to middle tones, the test results you liked, and any settings you used during the shoot. This log becomes your quick-start guide for future sessions. When a scene looks similar, you can pull up your notes and apply the same mapping with confidence.
Your record should include: the lighting scenario, the camera and lens used, the midtone adjustments you tested, and the final choice. Save a small reference image or a screenshot with highlighted zones so you can compare quickly in the field. With this habit, your Intermediate Zone System for Precise Analog Exposures becomes repeatable and reliable.
Zone-Based Exposure Control in practice
You’re aiming for control you can feel. Zone-Based Exposure Control puts you in the driver’s seat, letting you map light to detail. Think of it as a simple map: your shadows, midtones, and highlights each get a home. When you treat each zone like a room with its own lighting, you avoid blown-out highlights and muddy shadows. You’ll notice you make sharper, more natural images because you’re guiding where the light lands, not guessing from a single meter reading. This approach helps you build a consistent look across scenes, whether indoors with mixed lighting or outdoors on a sunny day.
Visualize highlights, midtones, shadows
You’ll train your eye to separate what you want to pop and what you want to stay quiet. Visualize your scene in three planes: highlights that sing, midtones that carry most of the detail, and shadows that frame the mood. When you picture these zones, you can decide which parts you’ll protect and which you’ll let breathe. Practically, that means checking your histogram and thinking about where your brightest area should live. If you push highlights too far, you’ll lose texture; if you chase shadows too hard, you’ll crush detail. Keeping the mental map simple helps you stay in control in changing light.
Shift exposure to protect highlights
Your first rule is to protect the highlights. If you see a skim of white or a bright window, you shift exposure to bring those tones into a safe zone. This doesn’t mean wrecking the rest of the image; it means you tell your camera where to place the exposure, so the brightest parts stay textured. In practice, you adjust exposure compensation or the camera’s exposure mode until the highlights aren’t clipped. Think of it like adjusting the beam on a flashlight so the wall still shows texture instead of turning into plain light. This habit keeps your images bold without losing the fine lines in bright areas.
Apply zone-based exposure control
Apply zone-based exposure control by assigning real values to each zone: highlights, midtones, and shadows. You’ll set your baseline so the subject’s skin or primary detail lands in a pleasing midtone range, while bright highlights stay protected and shadows keep their depth. This method isn’t rigid; it’s a practical workflow you can repeat. Use your meter, but don’t rely on it alone; confirm with histograms and your eyes. When you lock in the zones, you’ll shoot faster and with more confidence, knowing the final image will hold detail in the places that matter.
Film development exposure calibration
You’ve got a stack of film, a stopwatch, and a vision for perfect tones. This section helps you tune your process so your negatives line up with what you see in life. You’ll learn to match development to what your subject actually calls for, not just what the meter says. The goal is consistency: each roll should come out with the same contrast, depth, and latitude you expect. By using clear steps and reliable checks, you’ll reduce guesswork and gain confidence that your results reflect your intentions.
Adjust development time by zone needs
Your film lights up differently across brightness ranges, so you should treat each zone like a separate recipe. If you’re pushing shadows, extend development just enough to pull detail without losing highlight purity. For bright areas, shorten times so you don’t blow out highlights that would otherwise glow unnaturally. Your aim is a smooth bridge from dark to light, where midtones sit where you want them and the extremes stay legible.
When you test, compare a scene with known values and tweak. If your shadows look muddy, tilt development toward the lower zones by a few seconds. If blacks are too dense or highlights bloom, back off or cut time for those sections. Keep a log and run the same adjustment on similar scenes until your results feel repeatable. This is how you turn guesswork into a plan you can repeat.
Use test strips and development logs
Start with test strips to map how development time changes tone for your film stock. Shoot a target that includes a range of tones, then develop tiny strips at incremental times. Compare the results side by side and pick the time that gives you the cleanest, most usable range. Your test strips are your roadmap, not just a one-off. They tell you whether your developer, temperature, or agitation pattern needs adjustment. Your logs are the memory of your process: note film, developer, temperature, agitation, and time.
As you build your log, you’ll start to see patterns. Maybe your stock handles midtones best at a longer sweep, or your developer prefers a specific temperature range. Record your final choice for each zone and keep a quick note about surprises, like a slight shift after a morning batch. With consistent records, you’ll cut down on guesswork and your development becomes a repeatable skill you can trust.
Calibrate development for true tones
Calibration is your truth-teller. You want the final image to reflect the scene as you imagined it, not as your meter alone suggested. Start with a scene that has a calm sky, skin tones, and a texture you know well. Adjust development time until the midtones feel right, then check shadows and highlights after printing or scanning. If tones drift, nudge the dial in small, controlled steps until your true tones come through.
As you fine-tune, you’ll see how small tweaks in time or temperature shift the whole image. Calibration is like tuning a guitar: a little move changes the whole sound. You’re not chasing perfection every time; you’re chasing consistency that matches your vision. Once you lock in a method that gives you dependable, natural tones, your workflow becomes predictable, and the final result feels closer to your intended look.
Negative density assessment
Paragraphs describe how to understand and manage negative density for consistent printing. You’ll learn to gauge whether density is too light or heavy for your chosen paper and process. This matters because misreads can ruin a print batch. Focus on shadow details and highlight retention by examining the tonal range, using test strips to adjust quickly and stay in control of your workflow.
Read negatives with a densitometer
A densitometer is your post-shot truth-teller. After development, measure negative density in key areas to confirm exposure matched intent. Keep the same setup each time for repeatable results. If you change variables, you’re not comparing apples to apples. The densitometer gives you a clean numeric read to guide adjustments for punchy mids and controlled blacks.
Match negative density to paper grade
Paper grade matters because each stock has its own tonal behavior. A dense negative on glossy paper will print differently than the same density on matte stock. Map a small set of samples on your usual paper grade, note how density reads on your densitometer, and compare to your target. If off, tweak exposure or development for that paper. This becomes your go-to guide: density that works best for your paper, reproducible with confidence.
Measure negatives before printing
Measure before you print to catch problems early. A quick densitometer check tells you if the negative will print as expected. If the reading is off, you adjust before you waste ink and time. Keep a routine: measure, compare to target, and decide what to change. If consistently off, build a small adjustment rulebook. It’s not glamorous, but it saves you guesswork and surprise prints.
Exposure latitude optimization
Choose film and ISO for latitude
Your film choice and ISO set the baseline for how much you can push or pull exposure. For wide latitude, pick forgiving stock and a matching ISO. Lower ISO gives more dramatic contrast and grain—great for gritty looks but harder to recover highlights. Higher ISO or a stock with smooth tones offers more forgiveness, letting you capture scenes with bright highlights and deep shadows without losing midtone detail. Test a few rolls to learn how your material behaves.
Choose film and ISO with your scene in mind. In bright sun, a lower ISO with good highlight handling keeps skies from clipping. In dim scenes, a higher ISO or a stock that handles shadows well saves you from muddy blacks. Latitude gives you room to breathe, guiding you toward safer, cleaner results.
Bracket exposures for safety
Bracket shots to guard against surprises. Start with one standard exposure, then add a brighter and a darker exposure to the same scene. You’ll learn where your film sits regarding shadows and highlights and which exposure brings out the most detail. Bracketing is a practical safety net that makes your workflow calmer and your final set stronger.
As you bracket, you’ll map your film’s response. You can develop or push frames later to recover highlights or shadows. Bracketing also teaches you to trust your eye: if the middle exposure looks flat, lean toward the brighter or darker frame. This habit prevents missing moments due to a single unlucky exposure.
Maximize exposure latitude in-camera
In-camera latitude helps you keep post-processing options open. Expose to preserve highlight detail first, then rely on processing or film latitude to pull shadows up without crushing highlights. Slightly overexpose by a third stop to protect skin tones and bright areas, then let the film’s tone curve do the rest. You’ll gain more maneuvering room in development, scanning, or printing.
Pushing exposure can be tempting, but consider how the film handles push processing. Some stocks bloom with grain and color shifts when pushed. If you want maximum latitude, shoot with your final look in mind, test a few frames, and note the film’s reactions. Stay consistent and efficient.
Zone System workflow for darkroom
In the darkroom, start with a plan based on the zone system. Think in zones 0 through X, map your scene, and decide your target development. Predict the final print by judging contrast ranges on the negative before chemistry. With practice, you’ll feel which areas should land on which zones, saving time in the darkroom. Use your test strip as a compass: it shows how exposure and development push the tonal scale, so you can adjust on the fly rather than guess later. Consistency keeps your meter, film, and development times aligned, making your zone map reliable across shoots.
Your workflow hinges on disciplined pre-visualization. Expose by placing critical tones—skin, sky, foliage—on precise zones. After you print, compare the print to your plan and refine. Keep shadows clean but not crushed, and preserve highlight detail without muddy midtones. Treat each print as a check against a mental model: if the print misses, tweak exposure or development to nudge those zones back where you want them. The cycle—plan, expose, print, adjust—becomes your steady rhythm.
Practice builds confidence, and confidence brings faster results. Each session, lock down a repeatable sequence: meter, expose to target zones, test strip, print a few proofs, adjust, and repeat. Maintain a compact notebook or digital log with key data: meter readings, development time, agitation method, and zone targets. When you face a tough scene, consult your log to see what worked before. With time, your Intermediate Zone System for Precise Analog Exposures becomes second nature, letting you tackle tricky lighting with calm precision.
Make contact sheets and test prints
Your contact sheets lay out a row of thumbnails from your rolls, showing how zones behaved across frames. Start with a few key frames—the ones with tonal drama or the final look you want. Each print teaches you which zone shifts you need for balance, and you’ll calibrate future shoots from those lessons.
When you print, test both exposure and development. If skin tones lean too pale or dense, adjust development time or agitation. With contact sheets, compare several approaches quickly and pick the winner without re-shoots. Tag sheets with target zones and final decisions so you can repeat the recipe later. This discipline makes your workflow predictable and your results reproducible.
Compensate development when printing
Compensation is your safety net. If a negative prints flat or highlights are harsh, tweak development to move the balance toward your target zones. Adjust development time or agitation to add or reduce density in the paper’s emulsion. Use this tool sparingly to avoid introducing new problems. Keep notes on what worked so your next batch behaves the same. The right compensations can rescue a near-miss and produce a clean, meaningful print.
When printing, run multiple grades and filtering tests to see how paper and developer respond. Slight changes in development yield big shifts in tone, so keep records to guide future decisions. If a negative is too dense in shadows, shorten development; if highlights are too thin, lengthen it. This keeps your zone targets intact while you pursue your exact look.
Streamline your zone system workflow
Standardize a repeatable routine: meter the scene, expose to target zones, test strip, print a few proofs, adjust, and repeat. Keep a compact notebook or digital log with key data: meter readings, development time, agitation method, and zone targets. When you hit a challenging scene, consult your log first to reuse past successes. This steady routine frees you to experiment with tonal relationships and creative decisions.
Having a consistent process minimizes guesswork during printing. Contact sheets and test strips reveal exposure or development drift at a glance, so you can correct on the next pass. The goal is to reduce surprises and keep final prints predictable, letting you focus on the artistry of the shot.
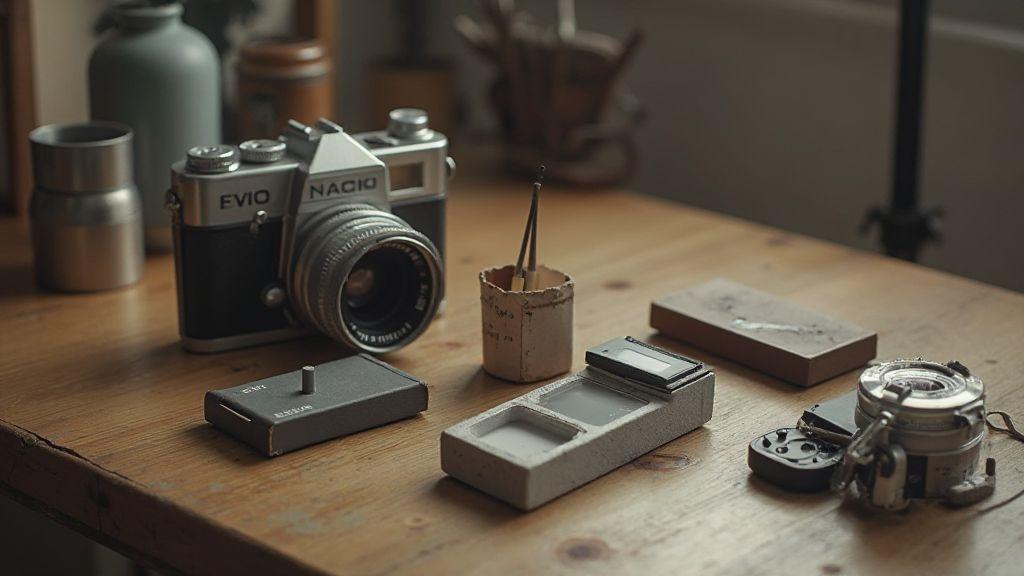
Tools and record-keeping for analog control
You’re aiming for consistent results, so you’ll want a simple, reliable setup. Your day-to-day wins come from how well you log what you shoot and what tools you use to keep exposure honest. Think of this like keeping a recipe: the more you record, the easier it is to repeat or tweak the final image. Build a small library of references that tell you when a shot is on track and when it isn’t. This section helps you choose the right tools and keep clean records so your film photography stays predictable and expressive.
Your workflow starts with clear, quick references. When you light a scene, jot down the basics: film type, developer, temperature, and light level. Use a simple notebook or a basic app so entries are easy to find. You’re not writing a novel; you’re capturing facts you’ll rely on next time. By keeping notes tight and consistent, you’ll spot patterns—like which films handle skin tones best in mixed light or which developers push contrast the way you like. With those notes, you move from guesswork to intention in every frame.
For quick checks, keep a small, sturdy kit in your camera bag: spare battery, a clean cloth, and a notepad. Armor your process with a ready-to-use chart you can glance at while shooting; it keeps exposure decisions honest. In short, your setup should reduce friction so you stay focused on capturing the moment—not chasing technicalities.
Use logs, charts and exposure cards
Your logs are your memory you can trust. Each entry should include scene type, lighting, film speed, ISO, exposure time, and development notes. Reference these when you choose film next time, ensuring your exposure stays within your preferred range. Use bold notes like meter under 1 stop or slightly over for depth to quickly spot what worked. Charts act as a visual map—plot targets for highlights, midtones, and shadows, then compare results after you develop. Exposure cards give you quick reads in the moment; a card with standard values can save you from overthinking in tough lighting. By keeping logs, charts, and cards, you’ll keep your technique transparent and repeatable, which is exactly what you want when chasing a mood rather than a perfect scene.
When you start using exposure cards, you’ll notice how fast you can lock in a good starting point. A card listing typical exposure values for common setups makes decisions nearly automatic. You’ll still adjust for taste, but the baseline stays steady. Logs let you see the chain from light to result, helping you learn which tweaks push your images toward your preferred look. Over time, your charts fill with patterns, and you’ll stop guessing. You’ll gain confidence that your next shot won’t surprise you with a harsh highlight or muddy shadows.
Essential tools: spot meter, densitometer
Your spot meter is your eye for light at the exact point you care about. You’ll point it at a key highlight or a shadow detail and trust the numbers to tell you how to set exposure. A quick check keeps you honest about contrast and prevents blowing out a detail you want to keep. With bold confidence, you’ll know when to push or pull exposure to land where you want in the tonal range. A simple habit—meter a critical area, compare to your film’s reciprocity or developer’s curve, then set exposure—gives you steady control your camera can’t whisper back to you.
A densitometer is your post-shot truth-teller. After you develop, measure negative density in key areas to confirm if your exposure matched your intent. It’s your shield against drift across rolls. You’ll use it to compare different scenes, speeds, and development times, building a reliable map of how your materials respond. With a densitometer, you’re not guessing—you see the real density and adjust next time to stay inside your target zone.
Keep records to refine your process
Your best shots become your best rules when you keep careful records. After each roll, compare what you planned with what you got. Note where your exposure landed on the curve, how development time changed density, and which film gave you the look you crave. Build a practical how-to guide you can reuse, not a stack of scattered notes. Each comparison teaches you where the process overreaches or slows you down, so you can tighten your workflow.
If something feels off, isolate variables: lighting, metering, development, or exposure compensation. Test one change at a time and document the result. Your notes become a personal roadmap to your Intermediate Zone System for Precise Analog Exposures, and you’ll see clear progress as you refine your steps. With this discipline, you’ll push your craft forward while preserving the spontaneity that makes analog photography feel alive.

Junior Souza is a passionate analog photographer and the mind behind estoucurioso.com. With a camera always in hand and a roll of film never far away, Junior has spent years exploring the world through a 35mm lens — learning, experimenting, and falling deeper in love with the slow, intentional process that only analog photography can offer.
What started as pure curiosity quickly became a lifestyle. From testing different film stocks under harsh light to hunting vintage lenses at flea markets, Junior believes that understanding your tools is just as important as developing your eye.
Through estoucurioso.com, he shares everything he has learned along the way — the techniques, the mistakes, the references, and the stories behind the frames. His goal is simple: to build a space where beginners and enthusiasts alike can grow, get inspired, and never stop being curious.
Always learning. Always shooting.