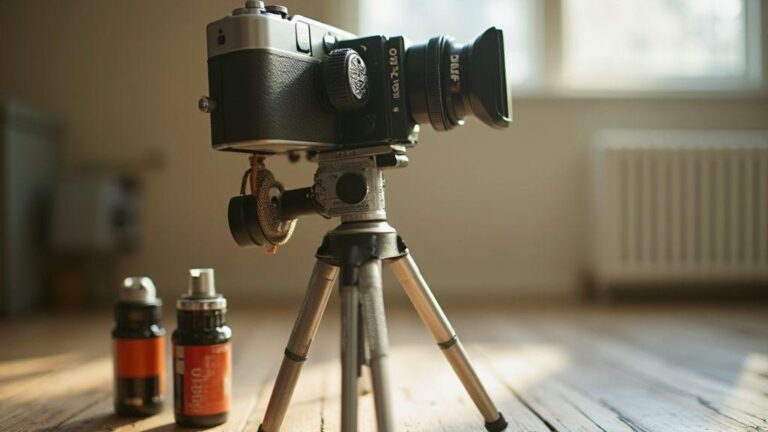
How Aperture Affects Depth of Field in Analog Lens PhotographyAnúncio
In How Aperture Affects Depth of Field in Analog Lens Photography, aperture shapes depth of field in a way that feels almost tactile. A wide opening blurs the background and makes your subject stand out, while a small opening keeps more of the scene in focus. Your choice governs how viewers connect with your image, and with analog gear, the film texture and lens design add their own character.
A quick DOF primer
- A larger aperture means less depth of field and a creamier background, helping your subject pop.
- A smaller aperture increases depth of field, bringing more of the scene into sharp relief.
- Distance to the subject and focal length interact with aperture to modulate how much blur you get.
- Film stock and lens design influence texture and response, so expect subtle differences across setups.
Understanding f-stops (f-numbers)
- A lower f-number (like f/2.8) yields a bigger opening and more background blur, great for portraits where the subject should stand out.
- A higher f-number (like f/8) narrows the opening and sharpens the scene from front to back, ideal for landscapes or scenes with many details. It may require more light or a longer exposure on film.
Shape and quality of bokeh
Aperture also shapes the bokeh—the quality of the out-of-focus areas. Wider apertures produce strong subject separation with smooth, creamy backgrounds. Narrower apertures bring more of the scene into focus and reduce background blur, which suits landscapes and busy scenes where texture matters. The blur’s character depends on the lens design and blade count, and film grain can add a tactile feel that digital methods can’t quite replicate.
Aperture, focal length, and subject distance in analog photography
- A long lens at a wide aperture will still blur the background, though a shorter lens at the same aperture won’t blur as much.
- Moving closer to or farther from the subject changes the blur you see; the exact results depend on lens, distance, and film grain.
- Test small changes to understand how distance and focal length interact with aperture on your rig.
Hyperfocal distance for landscapes and cityscapes
Hyperfocal distance helps you keep more of a scene sharp from near to far. Set the lens to the hyperfocal distance for your focal length and aperture, then shoot to keep foreground detail and distant features crisp. With practice, you won’t need extreme stopping down to maintain depth; you balance light with depth to tell the story across the frame.
Blade count and bokeh quality
Aperture blade count influences the shape of out-of-focus highlights. More blades tend to yield rounder, smoother bokeh, while fewer blades can introduce polygonal shapes around bright spots. If you care about bokeh, choose a lens with a higher blade count and test how each lens renders highlights at wide apertures. The focal length also affects how pronounced the bokeh is at a given distance.
Test apertures with a simple chart
Create a quick chart by shooting a scene with fine detail at several apertures (for example f/2.8, f/4, f/5.6, f/8, f/11). Keep distance and framing constant and compare the results side by side. Note where edges stay sharp and where texture feels most natural. This hands-on test helps you discover the aperture sweet spot for your setup.
Take manual control of aperture and exposure
Manual control gives you reliability. Set a target light level, then dial in the aperture, shutter speed, and ISO to match that light. Practice with deliberate exposure to see how small changes in aperture shift mood, focus, and color tone. Keep notes so you can reproduce successful results.
Manual aperture control depth of field tips
- For a blurred background and subject pop, open the aperture (smaller f-number).
- For more scene detail, close the aperture (larger f-number).
- If unsure, try mid-range like f/5.6 to f/8.
Your lens choices matter
Some lenses are soft when wide open, so stop down for sharper results. For portraits, a wider aperture can soften skin tones and separate the subject from a busy background. For architecture or landscapes, a deeper DOF helps keep lines and textures crisp from front to back.
Practice with a quick test
Take the same shot at f/2.8, f/5.6, and f/11. Compare sharpness and how the background changes. This helps you understand how aperture shapes mood and focus, improving your eye faster than any auto mode.
Set f-stop depth of field film camera for repeatable results
- Establish a fixed f-stop for shoots when possible to keep depth of field predictable across lighting changes.
- Pick a focal length and a target f-number (for example, f/8 for landscapes or f/2.8 for portraits) and hold it across a series of frames.
- If lighting shifts, adjust exposure rather than chasing the focus to maintain consistency.
Step-by-step stop-down metering guide
- Meter with the chosen f-stop in mind, then adjust shutter speed or ISO to hold the f-stop constant.
- Use spot, center-weighted, or matrix metering to guide exposure, but keep the f-stop steady while measuring.
- Keep notes of metering methods and final settings to build a quick instinct for typical scenes.
Pick the right aperture for portrait or landscape work
In portrait work, you typically want the subject to pop with a soft background, often starting around f/2.8 to f/4 for separation. For landscapes, you usually stop down to f/8, f/11, or f/16 to maximize depth and detail from foreground to horizon. If you’re using medium format or full-frame, depth of field will shift with focal length, so adjust accordingly. Balance shutter speed and aperture to avoid motion blur, considering film grain and latitude.
Aperture selection for portrait film to isolate your subject
To isolate a subject on portrait film, use a wider aperture (around f/2.8 or wider, if light allows) to create a three-dimensional look with crisp eyes and a smooth background. Distance between subject and background governs the amount of blur you’ll achieve, so adjust distance and focus carefully on the eyes for best results. Film contrast and latitude will influence your required light; test multiple apertures to find what matches your style.
Use small apertures for large depth of field film scenes
When you want everything in frame sharp, choose small apertures (f/11, f/16, or smaller if supported). Be mindful of light constraints; in dim conditions you may need higher film speed, tripod support, or additional lighting. Diffraction can soften images at very small apertures, so if you notice softness, open up slightly to recover sharpness while preserving depth. Use depth-of-field scales on lenses to anticipate how much will stay in focus.
Quick aperture checklist for your shoot
- Decide the main subject and background relationship: blur or sharp.
- Choose a starting aperture: portraits around f/2.8–f/4, landscapes around f/8–f/16.
- Check light: is there enough light for the aperture you want, or do you need a tripod?
- Gauge distance: close subject vs distant background changes depth of field.
- Meter or estimate exposure for film speed and lighting.
- Test a couple of frames at different apertures to see the results.
How Aperture Affects Depth of Field in Analog Lens Photography (recap)
You’ll find that aperture shapes depth of field in a way that feels almost tactile. A wide opening blurs the background and makes your subject stand out, while a narrow opening keeps more of the scene in focus. Your goal is to use aperture as a creative tool, not a guesswork dial. By testing a few standard apertures on each camera and combining with thoughtful distance, you’ll discover the look you want—this is the essence of How Aperture Affects Depth of Field in Analog Lens Photography.
In portrait work, use a wider aperture to isolate the subject; in landscapes, stop down for maximum sharpness across the frame. The film stock, lens design, and even blade count all contribute to the final mood and texture. With deliberate practice, you’ll learn to control depth of field with precision, turning aperture into a storytelling instrument rather than a mere exposure setting.

Junior Souza is a passionate analog photographer and the mind behind estoucurioso.com. With a camera always in hand and a roll of film never far away, Junior has spent years exploring the world through a 35mm lens — learning, experimenting, and falling deeper in love with the slow, intentional process that only analog photography can offer.
What started as pure curiosity quickly became a lifestyle. From testing different film stocks under harsh light to hunting vintage lenses at flea markets, Junior believes that understanding your tools is just as important as developing your eye.
Through estoucurioso.com, he shares everything he has learned along the way — the techniques, the mistakes, the references, and the stories behind the frames. His goal is simple: to build a space where beginners and enthusiasts alike can grow, get inspired, and never stop being curious.
Always learning. Always shooting.