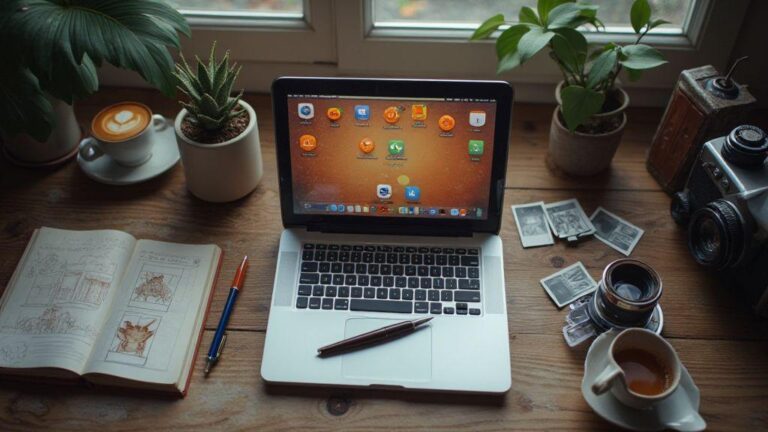
Start your journey with Essential Books for Learning Analog Photography Styles
You’re stepping into a world where the feel of light on film tells a story you can touch. In this guide, you’ll discover why certain books become trusted companions—from understanding basics to mastering look and mood. When you start with the right titles, your first shoots feel steadier, your colors more honest, and your decisions more confident. Think of these picks as your first kit—the sturdy spine you’ll lean on as you learn to see through a classic lens and a slower pace. With the right pages in hand, you’ll begin shaping a personal style that fits you, not the trend.
Choosing the right books comes down to clarity, technique, and inspiration. You’ll want clear explanations that don’t sugarcoat tough parts, practical exercises you can try tonight, and images that spark your own ideas. This trio keeps you moving: read a tip, practice, then compare your result with the author’s example. It’s a cycle that feels like a conversation with a friend who knows film. Your journey begins with intention, but you’ll grow through experiments, not just notes. Choosing Essential Books for Learning Analog Photography Styles gives you a clear path from beginner basics to a personal style.
By the end of this section, you’ll see how these volumes turn a casual hobby into a steady routine. You’ll feel more confident deciding which film to load, how to meter light, and when to push for a soft focus or a strong contrast. The goal is to make you more than a shooter—you’ll become a student of light, texture, and memory. The best part? Essential Books for Learning Analog Photography Styles don’t just teach you to take pictures; they teach you to think in film.
Pick essential analog photography books for your first shoots
Your first shoots deserve reliable guides that speak plainly. Look for titles that break down film types, exposure, and development in simple steps. A book that walks you through a real project—like shooting a neighborhood street scene on color print film—gives you a blueprint you can repeat. You’ll practice setting ISO, choosing a film stock, and deciding when to push or pull. As you try these ideas, your camera becomes a trusted tool rather than a mystery box.
The best beginner picks pair techniques with quick practice ideas. You’ll find checklists you can flip through before you shoot, plus small assignments you can finish in one afternoon. When you read about composition, you’ll see how frames feel with film grain and soft focus. You’ll notice your eyes slow down, noticing light on shop windows, shadows on sidewalks, and the way people move in front of your lens. These pages matter because they turn reading into doing, and doing into better habits.
Remember to choose books that respect your pace. If a chapter overloads you, set it aside and come back later. Your first shoots aren’t about mastering every rule in one night; they’re about building a steady rhythm you can keep. The right book helps you track what you tried, what happened, and what to tweak next time. Your goal is consistent practice, not a perfect first roll.
Use a film photography techniques guide to practice at home
A home practice routine makes theories stick. Start with a simple guide that outlines daily drills: meter the room, load a film, and take a few photos in mixed light. Then try a mini project—like capturing texture with a close-up on natural light from a window. The point is consistent repetition: you’ll learn to spot exposure errors, notice how grain appears in shadows, and see how contrast changes with different films. As you practice, you’ll build muscle memory for timing and framing without the safety net of a digital preview.
Keep a small notebook or a digital log to record your outcomes. Jot down the film stock, exposure settings, development notes, and how the final image felt to you. This habit makes your next shot smarter. You’ll start to predict outcomes, not just react to them. A decent guide will also offer a few home-friendly development techniques, like how to push a roll in development or how stand development changes mood. These tips widen your options without needing a full darkroom.
Your at-home practice becomes a private workshop where you experiment with looks you love. When you’re bored with one style, switch to another—swap grainy black-and-white for soft color, or try high-contrast street scenes. The goal is to build a toolkit you can pull from during any first shoot. Each practice session should leave you with a clear takeaway you can apply next time.
These Essential Books for Learning Analog Photography Styles provide at-home drills you can repeat weekly, helping you turn practice into progress.
Build your reading plan from the best books on film photography
Your plan should mix fundamentals with flavor. Start with a core set that covers exposure, composition, and film texture. Then sprinkle in books that highlight light, mood, and storytelling. Set a pace that fits your life: one chapter a night, one project a month, or a weekend write-up after every shoot. Your reading plan is a map, and it keeps your practice focused on what matters most—your evolving eye.
As you assemble your plan, balance technique with inspiration. Pick titles that show real-world shoots, not just theory. You’ll want to see how professionals solve problems—overexposed highlights, underexposed shadows, and appealing grain. This balance helps you learn faster because you’re not just following rules, you’re absorbing how to react in the moment. Your plan should feel doable, not overwhelming, so you keep turning the pages and turning those pages into photographs.
Your plan is yours, and that’s the point. You’ll tailor it as you grow, swapping out titles that don’t click with your style for ones that light your curiosity. The best reading plans feel like a steady conversation with friends who love film just as much as you do. A balanced plan from Essential Books for Learning Analog Photography Styles helps you blend fundamentals with creative spark.
Master your darkroom with darkroom printing and processing books
You’ll get the most from your darkroom when you treat every page like a hands-on guide you can trust. The right darkroom printing and processing books aren’t just shelves of facts; they become workflow partners. In these pages you’ll find step-by-step routes from dust-free backlights to finished prints, with clear explanations that fit real-life sessions in your own space. Look for titles that walk you through materials, temperatures, timing, and handling so you can repeat great results rather than guessing what went wrong last time. When you read with your hands ready, you turn knowledge into familiar, confident actions that feel almost instinctive.
As you dive in, you’ll notice how good guides structure your practice: start with simple steps, then layer in more precise controls. A great book shows you how to mix chemicals safely, measure exposure, and test print a small strip before you commit to a full sheet. You’ll learn to keep your area neat, labeled, and well-ventilated, because discipline in technique saves you from missteps that waste paper and time. With steady, practical explanations, you’ll begin to notice patterns—how certain films respond to developers, or how contrast changes with dilution—and you’ll use that knowledge to plan smarter sessions. This is the kind of learning that sticks, turning curiosity into reliable craft.
Ultimately, the best books are your constant references. They remind you to respect the process, honor safety, and celebrate the quiet joy of watching an image appear in your own hands. You’ll want books that include troubleshooting tips and real-world notes from practitioners who’ve tested every step. When you keep returning to them, your darkroom becomes a space you control, not a mystery you stumble through. With each session, you’ll feel more connected to the craft and more proud of the prints you bring to life.
Learn film development chemistry and workflow you can trust
You deserve chemistry guidance you can rely on. A solid book teaches you the exact ratios, timings, and temperatures that matter. You’ll see how developers, activators, and fixers work together, and you’ll learn the signs of healthy chemistry—how a good developer should smell, how the timing shifts with temperature, and how to test a small patch before committing to a full roll. The best guides translate science into simple, repeatable steps you can follow every time, so you won’t be caught guessing in a dim room.
As you read, you’ll recognize workflows that match your film choice and your processing style. Some books give you a classic straight development path, while others explore push processing or alternative development methods. You’ll learn the safe handling of chemicals, how to clean and store solutions, and how to recycle or dispose of waste properly. These concrete scripts help you build confidence, so you can plan sessions you actually enjoy rather than dread.
Choose darkroom printing and processing books that teach safe practice
Safety isn’t optional in the darkroom, and the right books put it front and center. You’ll want clear sections on ventilation, protective gear, and storage, plus practical checklists you can print and keep nearby. Look for guidance on avoiding skin contact with chemicals, staying mindful of fumes, and recognizing warning signs from solutions. A good book shows you how to set up a dedicated space, how to label containers, and how to minimize exposure during mixing and pouring. When safety is woven into every chapter, you’ll feel more relaxed and focused on the art, not the risk.
Beyond personal safety, choose guides that emphasize safe handling of paper, negatives, and equipment. You’ll learn best practices for loading film, inspecting negatives for flaws, and cleaning your gear without leaving streaks or dust. These safeguards protect your prints and your health, so you can keep learning without interruptions from accidents or irritation. A thoughtful book makes safety a natural habit, not a chore you dread.
Set your processing checklist to protect prints and health
You’ll want a simple, repeatable checklist you can trust every time you process. Start with clean hands and a clean workspace, then confirm your chemical temperatures, timer settings, and bath concentrations before you dunk anything. Keep notes on each session—what worked, what didn’t, and what you’ll change next time. A concise checklist helps you catch mistakes early and prevents harm to you and your prints. Make it a quick reference you can glance at while you work, so you stay in flow and avoid skipping steps.
Now you’re ready to grow a routine you actually stick with. Your checklist protects your health by reminding you to ventilate, wear gloves, and avoid splashes. It protects prints by ensuring correct dilution, precise timing, and proper rinsing. With this tool, you’ll see fewer surprises and more consistent results, which means more pride in your final images.
Refine your black tones with black and white film photography manuals
You’ll notice your world changes when you study black and white film manuals. Your photos gain depth as you learn how to balance shadows and highlights. These guides teach you to read light the way you read a room when someone walks in—the mood shifts, and you adjust. Start with sections that cover the basics of contrast and tonal ranges, then move to examples that show how small changes in exposure affect the final print. Practice with simple scenes: a window light, a street corner, or a friend in shade. You’ll start seeing subtle tonal shifts you missed before, and your comfort with black tones grows quickly.
Next, focus on practical steps you can take today. Build a small routine: pick a scene, shoot twice with different exposure, and compare later. The act of comparing helps your brain notice where blacks crush too hard and where whites bloom too bright. As you study, you’ll begin to trust your eye more than your meter, yet you’ll still use it as a safety net. Remember, mastering black tones isn’t about making everything dramatic; it’s about preserving texture, grain, and mood. Your camera becomes an instrument for storytelling, not just a box that spits out images.
Finally, embrace patience. Black and white film rewards deliberate choices. When you refine your workflow, you’ll enjoy richer depths and cleaner separations in your images. Your friends will notice the atmosphere in your photos—the quiet, deliberate feel you’ve brought to life. Keep a small notebook of tonal notes: where you liked the contrast, where you wanted more detail in shadows, and how different films render skin tones. This ongoing practice sharpens your eye and makes every future shot feel more intentional.
Use composition and lighting for film photography to shape your images
You shape your images with simple rules and a few clever adjustments. Start with composition: leading lines guide the viewer, the rule of thirds helps you place important shapes, and negative space gives your subject room to breathe. When you’re shooting in black and white, textures become your color. Look for surfaces with grain, bricks, cloth, or metal that catch light in interesting ways. Your eye notices patterns—repeats, shadows, and edges—that tell a story beyond color. By focusing on these tangible elements, you’ll create images with presence and rhythm.
Lighting is your second big tool. Soft, diffused light turns chaos into calm, while hard light reveals texture and adds drama. Play with the direction of light—side lighting for texture, backlighting for silhouette, or front lighting for clarity. In film, you’ll also consider how the light interacts with your film stock and development process. Your choices here aren’t just technical; they set the mood you want your viewer to feel. You’ll start predicting how a scene will translate in the final print, even before you press the shutter.
Then you’ll practice with quick, repeatable exercises. Shoot a doorway, a window, or a face in profile at different times of day. Note how the mood changes with lighting direction and intensity. Compare your resulting images to see what worked and what didn’t. Over time, your instincts sharpen: you’ll know instantly when a composition feels right and when the light will sing in your black and white frame.
Find black and white film photography manuals that explain exposure for you
Look for manuals that lay out exposure concepts in plain language. You want clear sections on exposure value, development time, and how different films respond to light. A good guide will show examples with small adjustments—like a stop here or there—and explain the impact on contrast and grain. You’ll appreciate when explanations connect directly to real-world scenes you shoot, not abstract math. When exposure feels explained, you gain confidence to try bolder compositions without fear of losing detail.
Next, seek manuals that walk you through common scenarios. Portraits, street scenes, and landscapes each need different attention to exposure. A reliable manual will tell you how to meter for skin tones, how to hold detail in skies, and how to keep blacks rich without crushing the rest. It’s also helpful when the book includes troubleshooting tips: what to do if highlights blow out, or if shadows swallow details in certain films. With these guides, you’ll learn to anticipate outcomes and adjust with purpose.
If you’re pressed for time, you’ll still benefit from compact chapters that distill exposure into practical steps. Look for checklists or quick reference charts you can thumb through on location. Even a few pages can save you from shooting blind. The right manual becomes your on-hand mentor, explaining exposure in a way that fits your pace and your life.
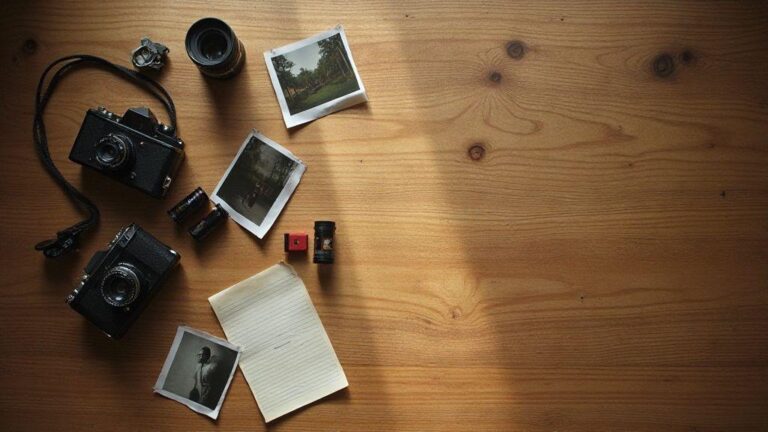
Compare your negatives and prints to refine your eye
Holding your negatives and prints side by side helps you notice differences you didn’t catch at first glance. Compare tone, contrast, and grain across both to see how your exposure choices translate into the final image. Ask yourself: is the black solid or muddy? Do you see texture in the shadows? Is detail preserved in the highlights? These questions train your eye to judge what your camera sees and what your development process does to the film.
Your comparison habit pays off in time. You’ll begin to predict how a scene will print before you shoot it. You’ll know when to underexpose for rich blacks, or when to overexpose slightly to reveal skin detail. The more you practice, the quicker your decisions become. Soon, comparing becomes second nature, and your photos improve with less trial and error.
As you refine, keep notes of what you learned from each set. A simple log of exposure, film, development time, and your final judgment helps you see patterns. Before long, you’ll feel your eye growing sharper, your prints more consistent, and your confidence rising with every roll you shoot.
Explore medium format with medium format film photography books for your craft
Dive into the world of medium format to upgrade your craft. These books are your practical guides, not glossy posters. You’ll find real examples from artists who work with larger negatives, which means richer tones and more detail you can actually see in your own work. Look for chapters that break down how vendors, lenses, and film stocks interact, so your shots aren’t a mystery when you load your camera. You can feel the difference when you study layout and printing workflows that expose the true potential of medium format. If you’re building a community project, these books help you plan shoots with collaborators, vendors, and venues, making every frame count.
When you pick up medium format film photography books, you’re buying a toolkit for consistency. Expect sections on film stock options and how they render skin, textures, and skies in a single frame. You’ll learn practical steps for scouting locations, timing light, and choosing the right film for your climate. These books also share budgets and rental strategies, so your community projects stay affordable without cutting corners. By the end, you’ll feel confident guiding teammates through gear decisions and shot lists that keep everyone aligned.
Your long-term goal should be to apply what you read to real shoots. Use the examples to map out your own project timelines, contact sheets, and test rolls. The best books push you to experiment with composition, framing, and the tactile joy of loading a film roll. As you practice, you’ll notice your images becoming more cohesive and your storytelling clearer. This is how you turn pages into practice, and practice into visible progress for your community and lifestyle projects.
Learn film grain, resolution, and handling for your work from medium format film photography books
Grain, resolution, and handling aren’t abstract ideas here; they’re tools you can touch. A solid book will explain how your choice of film stock and processing affects grain, then show you side-by-side examples so you can pick what suits your mood and project. You’ll see how higher resolution on larger formats translates to bigger prints without losing clarity, which helps when you present work to your community for feedback. Practical handling tips—like how to load film smoothly, how to cradle a camera for steady shots, and how to protect delicate negatives—keep your workflow clean and repeatable.
You’ll also learn how developers and scanners influence final results. The right guidance makes you ask the right questions: Will you print big or keep digital proofs? Do you want a grittier vibe or a clean, pristine look? By understanding grain behavior and resolution, you’ll tailor your process to your subject and audience. And when you’re out shooting, you’ll apply these rules on the fly—adjusting exposure with your eye and your book’s wisdom guiding you, not guessing.
Read medium format film photography books to master your camera setup and exposure
Your camera setup and exposure are the gears that turn your vision into reality. A strong book walks you through choosing lenses, film backs, and light meters that match your community projects. You’ll read practical checklists for setting white balance, metering modes, and bracketing strategies that save you time on location. These pages teach you how to set a consistent baseline so a teammate can jump in and shoot without introducing chaos.
Exposure control becomes less scary when you see real-case scenarios: street scenes, portraits, and group gatherings in variable light. The best reads explain how to anticipate shadows, handle backlighting, and preserve highlight detail. With steady notes on film speed and development times, you’ll feel empowered to share your settings with others, so your team moves with one voice rather than a hundred questions. Your confidence grows as your camera becomes an extension of your planning rather than a mystery box.
Choose the camera size that fits your community projects
Pick a size that fits your crew and your locations. The right medium format body should feel balanced in your hands and easy to transport to meetings, schools, or outdoor events. Think about how many people you’ll work with and how you’ll share gear; a more compact body can make workshops smoother, while a larger body might give you reliability in tough lighting. Your choice should support your workflow and keep your team engaged, not slowed down.
Expand your style with alternative photographic processes books
You can grow your style by diving into alternative photographic processes books. These guides give you simple steps and clear tips so you can experiment at home. You’ll learn the basics of cyanotypes, van Dyke, gum arabic, and more, all in one friendly place. When you read, you’ll feel like a friend is showing you where to start, not just listing terms. Your goal is to build confidence, not overwhelm your desk with fancy gear. The right book helps you pick a process you actually enjoy and sticks with it long enough to see real progress.
Keep an eye out for titles that explain materials you can find locally. Essential Books for Learning Analog Photography Styles are often written with beginners in mind, and they break down the steps into small, doable chunks. You’ll find projects you can finish in a weekend, which keeps your momentum going. As you flip pages, imagine your prints coming to life on paper, then think about how each process could match your personal vibe. That connection is what turns reading into doing.
Your bookshelf should also feature books that compare methods side by side. Having choices helps you decide what fits your space, budget, and time. When you see side-by-side examples, you’ll spot what you like and what you don’t, which saves you from buying the wrong kit. A great book becomes your toolkit, guiding you from curiosity to a real, everyday practice.
Try cyanotype and platinum steps you can learn
Cyanotype is a gentle entry into hands-on printing. You mix two simple chemicals, coat paper, and press your negatives to light. The result is a crisp blue print that looks classic and calm. You can start with a small kit and a quick sun print session to see results fast. The sprint to a finished piece keeps you motivated and builds your confidence to try more.
Platinum steps are a bit more involved, but they’re worth it for the depth and tonal range you gain. You’ll learn about sensitizing paper with platinum and palladium salts, then carefully controlling exposure and washing. The process rewards patience, so plan a weekend and a simple subject. With practice, your prints gain a rich warmth that feels personal and unique to you. The key is to follow the steps in your book and keep notes so you can repeat what works.
Both paths reward you with hands-on learning and a tangible sense of progress. A good guide will give you safety notes, materials lists, and troubleshooting tips so you don’t waste time. You’ll finish each project with a clear sense of what to tweak next time, keeping your curiosity alive rather than fading out.
Use alternative photographic processes books to make your unique prints
Your unique prints start with a steady plan from your favorite book. Choose a process that fits your mood—soft toning for moody portraits or bright cyanotypes for bold landscapes. Use the book’s project ideas to set up small, repeatable experiments. When you see what you like, tailor the steps to your own subjects and lighting.
As you practice, document your outcomes in a simple journal. Note the materials you used, the exposure time, and the final look. This habit turns reading into a practical toolkit you can reuse. Over time, your prints will carry your signature touch—made possible by the clear paths these books provide. Remember, your goal is to translate what you love into a process you can repeat with your own hands.
Preserve your prints and materials for community shows
To keep your work looking fresh at community shows, store prints in acid-free sleeves and keep them out of direct light. Label each piece with the process, date, and a short note about why you chose it. This helps visitors connect with your choices and makes your collection feel intentional.
Set up a small, organized display that tells a story. Group prints by process or theme, and add a short card that explains the method in simple terms. You’ll look confident, and your audience will understand your journey. Keeping materials clean and organized also means you’ll be ready for last-minute shows or spontaneous get-togethers with friends.
Grow your community and lifestyle with Essential Books for Learning Analog Photography Styles
You want to grow your circle and your skills, and Essential Books for Learning Analog Photography Styles are your first friends on that journey. These books give you real, practical steps you can take right away, not just pretty pictures. You’ll find simple explanations, clear project ideas, and shared language that helps you talk about photos with others in your circle. As you read, highlight techniques you can try on your next group shoot, and note questions you want to bring to your local community. This is where your new lifestyle starts—learning together, practicing together, and celebrating every small win.
These books anchor your practice in real-world experiences. You’ll discover how to read light, choose film stocks, and shoot slow for richer tones. By studying the pages, you’ll spot patterns you can apply during your own sessions with friends or neighbors. The content isn’t distant theory; it’s usable, peeling back complexity so you can pick up your camera and go. Keep a notebook handy and jot down ideas that feel doable for your group.
Finally, these readings push you to connect. You’ll see how mentors, peers, and new shooters can share tips, swap gear, and critique work with kindness. When you commit to reading together, you create momentum: conversations spark, Saturday shoots happen, and your confidence grows. Before you know it, your community isn’t just a club—it’s a daily habit you love.
Swap essential analog photography books and tips with your local group
You can grow faster when you trade books and tips with your local group. Start by choosing a book that matches your current level, then rotate responsibilities: one person leads a short talk, another reminds the group about a key technique, and someone else brings a few photo examples. This rotating approach makes learning feel like a shared project rather than a homework session. Your group will stay energized when everyone gets a turn to teach and learn.
Share small, practical takeaways from each book. For example, if a chapter focuses on metering, plan a mini-shoot where you test different readings with your camera and film stock. Bring printed cheat sheets or simple worksheets to the meet-up, so everyone can compare results side by side. You’ll notice faster improvement and more honest feedback because it’s rooted in real shoots, not abstract ideas. Your local swap becomes a living library you can actually use.
When you swap tips, you also swap gear habits. A friend might loan you a different lens to see how it changes your portraits, or you might trade a roll of film to compare color shifts. This hands-on exchange makes learning tactile and exciting. It’s not about who has the best setup—it’s about how you adapt, experiment, and learn together.
Practice analog portrait photography techniques on your group shoots
Group shoots are your playground for portrait techniques. Start with simple setups: one backlight, soft front fill, and a friendly model from your group. Practice posing that feels natural, not stiff, and time your shots to keep the flow. You’ll gain confidence faster because you’re learning in a supportive circle where feedback comes quickly and kindly.
Use your group to test different film stocks and develop times. Pick a common theme—like candid smiles or natural poses—and let everyone try a few variations. Compare results after the shoot and talk about what felt easy or tricky. Your critiques will improve as you practice, and you’ll notice a shared vocabulary forming across the group.
If you’re unsure about lighting, bring a portable reflector and show how it lifts a face in soft daylight. The key is to practice together, not in isolation. You’ll see your portraits grow more expressive when you’re comfortable asking for brief pose tweaks or lighting adjustments in a friendly setting with friends.
Organize your book club or photowalk to share skills
When you organize, keep things simple and fun. Pick a clear goal for the session—like improving skin tones in portraits—and share a short plan in advance: what to bring, what to try, and what to review afterward. A light agenda keeps the group focused without killing the vibe. You’ll feel the momentum grow as everyone participates, shares a tip, and tries a new technique on the spot.
Choose a friendly host rotation so no one feels overwhelmed. Document the event with quick notes or a mini-gallery afterward, and encourage members to leave comments and ideas for the next meet-up. Your book club or photowalk becomes a steady rhythm you and your community look forward to, turning learning into a lifestyle you share.

Junior Souza is a passionate analog photographer and the mind behind estoucurioso.com. With a camera always in hand and a roll of film never far away, Junior has spent years exploring the world through a 35mm lens — learning, experimenting, and falling deeper in love with the slow, intentional process that only analog photography can offer.
What started as pure curiosity quickly became a lifestyle. From testing different film stocks under harsh light to hunting vintage lenses at flea markets, Junior believes that understanding your tools is just as important as developing your eye.
Through estoucurioso.com, he shares everything he has learned along the way — the techniques, the mistakes, the references, and the stories behind the frames. His goal is simple: to build a space where beginners and enthusiasts alike can grow, get inspired, and never stop being curious.
Always learning. Always shooting.