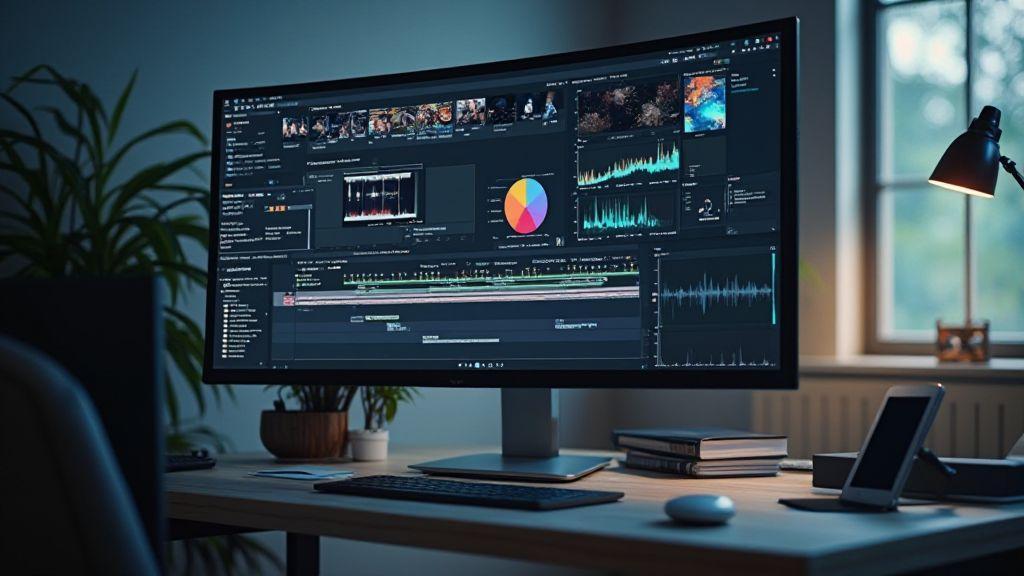
Plan your scanned film restoration workflow
You’ll want a clear map before you touch a frame. Start by listing the steps you’ll take from import to final export. Decide which tools you’ll use for scanning, cleaning, color, and sound if needed. A simple plan helps you stay organized and saves time later when you need to reproduce results. Think about the kinds of damage you expect—scratches, dust, color shift—and plan the corrections you’ll apply, in order, so errors don’t cascade. This is particularly important when pursuing Editing Scanned Film in Software for Intermediates.
Next, set up a file system that matches your plan. Create a main project folder, with subfolders for scans, edits, masks, and exports. Use a consistent naming scheme so you can spot a file’s purpose at a glance. If you’re collaborating, lock in who owns which edits and where the master files live. A clean workflow reduces confusion and makes it easier to roll back if something doesn’t look right. This approach supports Editing Scanned Film in Software for Intermediates by keeping everything traceable.
Finally, timeline and backups matter. Schedule time blocks for each stage, and build in checkpoints to compare progress with your initial plan. Keep versioned backups so you can try bold edits without risking the original. With a solid plan, you’ll feel confident every time you press a button. This planning mindset aligns with Editing Scanned Film in Software for Intermediates to deliver consistent results.
Scanned film restoration workflow
Your first move is to import your scans into your editing environment. Correct exposure and framing before you touch any pixels; this keeps your base clean. Then you’ll perform dust and scratch removal in a controlled way, so you don’t erase film texture or introduce artifacts. After that, you’ll tackle color and contrast, aiming for a faithful reproduction rather than a glossy look. Finally, you’ll prepare the file for final export, choosing the right color space and bit depth. In the context of Editing Scanned Film in Software for Intermediates, maintaining a faithful baseline is essential.
As you move through this workflow, organize your layers and masks so you can tweak only what you need. Use non-destructive edits whenever possible; that keeps your original scans intact and makes it easier to adjust later. You’ll likely alternate between global corrections and targeted fixes, testing on small sections to avoid overprocessing. Your goal is to restore the film’s character while removing the real-world flaws it picked up.
Throughout, you’ll want to document each decision. Note what you changed, why you changed it, and what you observed. That record becomes a guide for future projects and helps you explain your process if someone questions the result. Remember, consistency wins: keep a steady rhythm so each new clip matches your overall restoration.
How you use non-destructive editing scanned film
Non-destructive editing lets you experiment without destroying the original image. You create adjustment layers, masks, and curves that you can tweak any time. This approach gives you flexibility to push color, brightness, or sharpness and then dial them back if they don’t look right. You’re free to try bold looks, knowing you can revert to your base with a few clicks.
If you spot a problem later, you can adjust a single layer instead of redoing the whole frame. Use clipping masks to isolate areas so edits don’t bleed into neighboring regions. This method protects texture, grain, and motion while you refine color and contrast. Your final look will feel natural because every change sits on a separate layer you can tune or remove. This framework supports Editing Scanned Film in Software for Intermediates by keeping edits modular.
As you work, keep the hierarchy clean: name each layer clearly, group related edits, and leave notes about why a change was made. This clarity pays off when you revisit the film years from now or hand the project to a collaborator. You’ll save time and keep your edits transparent and reversible.
Start project and file naming
Begin with a clear project name and a versioning system. Use a format that shows the film title, date, and a version number, so you can track progress without opening files. For example: FilmTitleYearV01. Start with a master folder for scans, then create subfolders for edits, masks, and exports. Consistency here keeps you from mixing working files with masters.
Keep your primary files on a fast drive and back them up regularly. Use small, descriptive names for intermediate saves so you can quickly locate the exact step you’re after. If you’re collaborating, lock a naming convention you all follow, then stick to it. A tidy start saves you from chaos later on when you need to compare versions or re-create a look. This also supports Editing Scanned Film in Software for Intermediates workflows by making batch checks straightforward.
Improve color with film scan color correction intermediate
Color correction for film scans at the intermediate level is all about balance and control. You’ll start by checking white balance and exposure so the base looks honest, not punchy. Think of it like tuning a guitar: if one string is off, the whole song sounds wrong. In practice, you’ll use a neutral gray card or a reference frame from the scan to set a true starting point. Next, focus on the overall color cast. If your film is warmer or cooler than it should be, target the midtones first, then nudge shadows and highlights as needed. You don’t want to overcorrect; small, steady adjustments keep the look natural and filmic. As you build confidence, you’ll begin to separate the color influences by pushing the hue and saturation a touch to emphasize skin tones and skies without making the image look artificial.
For intermediate work, you’ll want to develop a consistent workflow. Create a baseline look that matches your project’s mood, then apply it across scenes so the film feels cohesive. You’ll learn to read histograms and vectorscopes like a weather report—spotting bias toward red, green, or blue and dialing it back. When you’re happy with the balance, save a preset so future scans don’t start from scratch. A common pitfall is chasing perfection on every frame; instead, aim for a controlled, repeatable result that keeps the film’s character intact. Remember, the goal is to keep the film’s grain and texture while making color feel accurate and pleasing to the eye.
As you gain experience, you’ll start to use secondary corrections to enhance specific areas. Target the skin tones first, then the blue skies or warm highlights without washing out the rest. It helps to work in a light, film-like grade rather than a high-contrast, modern look. If you see color bleeding in shadows or highlights, fix it with selective color adjustments or curve tweaks, not by brute force. Your final pass should feel natural, with the color vibe that matches the story you’re telling.
Color grading steps for scanned film editing techniques
Your color grading steps for scanned film should be simple and repeatable. Begin by rating the exposure grade—check shadows, mids, and highlights to ensure detail isn’t lost. Then set a neutral white balance reference, so your code doesn’t drift frame to frame. After that, adjust the global color to get a clean, filmic baseline. You’ll usually move in small steps, checking the result on a calibrated monitor to avoid surprises. Keep the look subtle; this is about preserving film character, not turning it into a digital cartoon. The key is consistency: a repeatable ladder of tweaks that you can apply to every scene.
Next, you’ll refine with shaping tools. Use curves to tame contrast and color channels to correct any bias. A gentle S-curve can help preserve detail while giving you a pleasing lift, but don’t overdo it. You want depth without crushing the blacks or blowing the highlights. Then dial in color management to align the image with a target color space, ensuring skin tones stay natural under different lighting. Finally, perform a fine-tuning pass on saturation and hue, focusing on midtones to keep the film’s memory intact. This is where you decide if the mood aligns with your project’s intent.
As you practice, you’ll integrate look development into your workflow. Build a set of reference looks that match various film stocks or moods, and apply them as needed. Always compare with the original scan to ensure you’re not straying from the source’s spirit. You’ll also learn to render outputs for different delivery—web, cinema, or print—without losing color fidelity. The process becomes a trusted routine that saves time and keeps your projects predictable.
Editing Scanned Film in Software for Intermediates color tips
When you’re editing scanned film in software for intermediates, you’re playing the long game: accuracy first, style second. Start with a clean slate: verify your project’s color space and color management settings, then set your monitor profile to match. This is where your work doesn’t get derailed by inconsistent viewing conditions. Use a basic, calm look as your base and avoid extreme shifts in hue or saturation that fight with the film’s texture. If you’re unsure, pause and compare to a known-good reference to see how your adjustments land in the real world.
Volume and grain matter too. Keep grain intact where it belongs and avoid smoothing it away, which can erase the film’s identity. When you tweak color, do it in small increments and check the result against the original scan. If you’re chasing a specific look, build a LUT or a set of presets you can reuse, but always recheck after each new shot to ensure continuity. You’ll find midtone skin tones respond best to restrained adjustments; this keeps characters’ expressions readable and natural.
A practical tip: work with the masked or selective color tools to salvage problem areas. If the sky looks too blue or the reds are overpowering a sunset, fix those areas without disturbing the entire frame. And don’t forget to review on a calibrated display at typical viewing distances; small shifts aren’t obvious up close, but they reveal themselves when you’re watching a full sequence. By the end, your color workflow feels polished and reliable.
Fix dust and scratches efficiently
You’re going to love how fast dust and scratches disappear when you follow a simple workflow. First, study the film at 100% zoom to spot every speck and scratch. Then, separate the clean areas from the rough spots so you don’t waste time touching up the good parts. Use temporary, non-destructive edits so you can undo if something looks off. When you finish, you’ll see your image feel crisper, and you’ll save time on future rescans by building a mental map of where trouble tends to hide.
Next, set a routine you can repeat. Clean the scanner glass, gently wipe the film with a microfiber cloth, and keep your hands steady. Dust loves to bounce around, but steady breathing and patient strokes make a big difference. As you work, label likely dust zones in your head or on a note so you can revisit them quickly later. Your goal is to reduce the amount of rework you need, not to chase every particle with a flashy fix.
Finally, you’ll test your result by toggling the dust layer on and off. If the dust is still obvious after your first pass, you can refine your approach with more precise tools or smaller brush sizes. By keeping the process tight and repeatable, you’ll create consistently clean scans and cut down on redoing the same spots across projects.
dust and scratch removal scanned film
When you deal with dust and scratches on scanned film, think of it as cleaning a window you never want to smear. Start with your healing tools set to a small brush and a gentle hardness. You want to blend, not erase, so edges stay natural. Use a soft, low-opacity pass to lightly sprinkle correction over the dust, then zoom out to confirm the result looks seamless. If a scratch runs along a line, try cloning along the edge to keep the texture consistent and avoid a visible patch.
Next, use dust maps to catch what your eyes miss. A dust map highlights problem areas and helps you apply corrections only where needed. This way, you’re not overcorrecting and you preserve the film’s grain and tone. If you spot a stubborn dust particle, a tiny, precise clone clone can bridge the gap without creating a halo. You’ll notice the difference when the image breathes again instead of looking flattened.
Finally, compare your edits with the original by toggling layers. If you see a mismatch in texture or tone, you can adjust opacity or blur slightly to reintroduce natural grain. Your end goal is a clean image that still feels like film, not a retouched photo.
Use healing, cloning, and dust maps
Healing, cloning, and dust maps are your best friends here. Healing fills in small flaws by borrowing nearby texture, which is perfect for evenly spaced dust. Cloning lets you copy a clean patch from a nearby area to cover larger spots or scratches, with careful edge work to blend. Dust maps illuminate where to apply these tools, so you don’t waste time guessing.
When you apply healing, work in tiny, precise strokes and watch how texture flows across the area. For scratches, clone along the edge to maintain direction and grain. Dust maps give you a visual guide; treat them as a spotlight that shows where to act next. This trio keeps your edits accurate and minimizes the chances of creating new artifacts.
As you practice, you’ll get a feel for when to switch from healing to cloning. If a patch stretches over a grain boundary, use a smaller brush and a lighter pass. Your goal is to remove the defect without drawing attention to the correction.
Work at 100% zoom with layers
Working at 100% zoom keeps your edits honest. You’ll see every little detail, so you can place corrections precisely where needed. Use layers to separate your dust fixes from the original image. This lets you adjust intensity, opacity, and even erase edits without starting over. Layers give you a safety net and a faster workflow if you need to try multiple approaches.
Keep one layer dedicated to dust fixes and another for scratches or blemishes. If a repair looks off, you can tweak or remove it without affecting the rest of the image. An occasional tip: name your layers so you don’t mix up healing and cloning later. Your future self will thank you for the clarity.
Recover highlights and shadows
When you aim to bring back detail from film scans, you focus on the highlights and shadows first. You’ll notice that bright spots can look washed out and dark areas can feel crushed. Your goal is to restore balance so the image looks natural, not fake. Start by evaluating the overall exposure and ask yourself where you lose detail. If your highlights glare, pull them back until you see texture again. If the shadows are muddy, lift them just enough to reveal structure without introducing noise. The trick is to move slowly and check often.
Next, use a light touch on local adjustments. Instead of blasting the entire image, apply targeted edits to blown-out sky areas or deep shadows in a corner. Keeping edits subtle helps you preserve the film’s character while reclaiming information. Remember that your eyes are your guide; what looks right on screen often matches what you’d see on a light table. If you overcorrect, you’ll end up with halos or gray bands that scream digital. Stay patient, adjust by small increments, and compare with the original to stay grounded in the film’s tone.
Finally, verify color balance after you recover highlights and shadows. Restoring brightness without color shift is crucial to a faithful result. If skin tones go off, back off the saturation slightly or tweak white balance in small steps. The aim is a natural, balanced look where highlights sparkle but still feel real, and shadows hold detail without looking flat. Your finished image should tell the story of the scene, not the editing you did to it.
dynamic range recovery film scans
Dynamic range recovery for film scans means you’re extending what your scanner captured, not inventing new data. You’ll start by assessing the range of tones in the scan and deciding where to push or pull. Use a graduated approach: lift the darkest parts only enough to see detail, and bring down the brightest parts so they’re not clipping. This keeps texture intact across the scene. If your scan came from a high-contrast scene, you may find that you need more adjustments in midtones to keep everything cohesive.
Next, lean on curve adjustments to balance overall tonality. A gentle S-curve can help bring out midtones while preventing highlights from blooming. Be mindful of the film’s original character—pushing too hard can destroy its grain and texture. If you see banding in the gradients, introduce a touch of grain or noise reduction thoughtfully to preserve a natural look. Your goal is to maintain the film’s feel while revealing hidden detail across the whole image.
Finally, double-check for color shifts that sometimes appear when you stretch dynamic range. If the blues look too cold or the reds too warm after enhancement, tweak the color channels separately in small increments. The best results feel seamless, like you didn’t edit at all. You want viewers to focus on the scene, not on the edits you made to it.
negatives tone mapping intermediate
Negatives tone mapping at an intermediate level means translating inverted contrast into a viewable image without losing film nuance. Start by separating the issues: contrast, brightness, and color cast. Apply a mild tone map to bring out details in both shadows and highlights, then fine-tune each channel to preserve skin tones and natural hues. You’ll often find that midtones carry the most life; give them a touch more depth without muddying the image.
As you adjust, keep an eye on grain and texture. Tone mapping can soften grain if over-applied, so strike a balance that keeps the film’s character. Use a soft touch on saturation to prevent colors from looking oversaturated after mapping. When you’re done, compare to the original scan to ensure you haven’t stripped the image of its authenticity. Your accuracy matters, and precise tuning will pay off in a more faithful final result.
Then, confirm that edges stay crisp where they should be, like hairlines or metal surfaces, even after tone mapping. If edges blur, apply a light sharpening pass or mask the sharpening to keep texture intact. The right intermediate steps let you preserve the film’s unique look while making the scene readable and vibrant.
Use raw scans and exposure stacks
Using raw scans and exposure stacks gives you the most control over recoveries. You’ll begin by loading the raw data, which preserves the maximum amount of information your film captured. With exposure stacks, you combine multiple exposures to cover both bright and dark regions. This lets you pull detail from the highlights and shadows without harsh edits. It’s like layering different moments of light to see the whole story.
Work through the stacks with careful blending. Start with the mid exposure as your base, then blend in the brighter and darker pushes where needed. This helps you avoid clipping and keeps texture consistent across the frame. When done, flatten the stack with a cautious approach so you don’t lose micro-detail from the film grain. The result should feel natural, as if you were peering at the scene through a well-tuned lens.
Keep in mind the workflow: name and organize your stacks, save incremental versions, and review at multiple zoom levels. This discipline prevents you from overediting and makes it easier to revert to a previous state if you need to. Your final image should honor the original capture while offering a clearer, more balanced view.
Control grain without losing detail
You want clean images that still feel authentic. The goal is to reduce noise without blurring the texture that gives your photos character. Start by targeting the loudest areas first, where grain steals detail from faces or sharp edges. Use a light touch: small, incremental adjustments keep you from washing out texture. When you zoom in, you’ll notice how subtle tweaks preserve skin texture, fabric weave, and fine lines. Remember, you’re not erasing grain; you’re controlling it so your final image reads smooth but not dead.
Next, choose the right tools for selective smoothing. If your software offers luminance vs color noise controls, dial in the luminance first because it usually hits grain without altering color too much. Then check color noise separately to avoid muddy patches. A practical trick is to compare before/after at 100% view on a difficult area like a shadowed face or a textured wall. If detail vanishes, back off a notch. Your goal is a balanced compromise where the grain is softened, but edge contrast still reads clearly.
Finally, apply a light, consistent grain-preserving process across the image. A bit of micro-contrast can help keep edges crisp after denoising. Consider using a mild sharpening after noise reduction, but be careful not to reintroduce halos around high-contrast edges. If you’re shooting RAW and have room to adjust, you’ll find you can maintain more texture while still delivering a clean look. You’ll end up with a photo that feels true to the moment, not sanitized.
grain reduction scanned negatives intermediate
Grain reduction for scanned negatives sits in a sweet middle ground. You want to maintain the original’s character while smoothing the worst of the specks. Start with a gentle pass that reduces visible grain without blurring fine lines. Then, inspect midtones where grain often hides; you’re aiming for a natural balance where textures like skin pores and fabric threads remain visible. In practice, you’ll adjust sliders gradually and rely on your eyes more than numbers.
Next, work with masks to keep control precise. Use a midtone mask to protect areas you know should stay detailed, like eyes, lips, and crisp textures. If your software supports layer-specific masking, apply stronger grain reduction in flat, smooth areas (like skies or flat walls) and less where detail matters. This intermediate approach gives you a cleaner look without turning your negatives into washed-out images. You’ll feel the difference in both texture and depth when you compare with the original.
When to keep film grain for look
Film grain can be the soul of your image. You keep it when it adds character, mood, or a sense of realism that clean noise-free pixels can’t match. If the scene has warmth or intentional texture, retain some grain to preserve that authentic feel. You’ll often notice grain in shadows and midtones; don’t chase perfect silence there—let a hint stay so the photo doesn’t look sterile. When you need a retro vibe or a natural filmic texture, lean into tasteful grain rather than eliminating it completely.
On days you want a modern, clinical look, reduce grain aggressively. But be mindful: over-smoothing can flatten the image and erase depth. If you’re unsure, test both versions: one with subtle grain and one without, and pick the one that sells the mood. Your choice should align with the story you’re telling and how your audience will feel looking at it.
Speed up work with batch processing film scans
Batch processing film scans is your fastest route to clean, consistent results without babysitting every frame. You’ll save time by applying the same edits across many images at once, then only tweak the few that need a personal touch. Think of it like laying out a row of prints and hitting apply all instead of adjusting each one by hand. The key is planning your steps once and reusing them, so your workflow becomes predictable and repeatable. When you set up a solid batch, you’ll notice fewer mistakes, faster turnarounds, and more room to handle tight deadlines. For editors focusing on Editing Scanned Film in Software for Intermediates, batch processing is essential.
You’ll want to start with a clear target look—contrast, color balance, dust removal, and sharpening—then build a chain that can be repeated. If you have multiple rolls or negatives, group similar frames together so your batch uses the same adjustments without overdoing anything. This is where presets shine: they keep you consistent across dozens of scans, so your final set feels cohesive. As you gain confidence, you’ll add small tweaks only for the outliers, not the entire batch, which keeps your speed up and your quality high.
By embracing batch processing, you reduce repetitive tasks and free up mental energy for the creative parts of editing. You’ll notice fewer manual errors and a smoother overall tone across your scans. The more you rely on well-tuned presets and automated steps, the more you’ll feel in control of the process, and your final gallery—or client delivery—will look polished and deliberate.
batch processing film scans
Using batch processing for film scans means you apply a single workflow to many files at once. Start with a consistent file naming and folder structure so you can drop new scans into the same place and fire off the same edits. You’ll stack adjustments like exposure, white balance, dust removal, and sharpening into a sequence that you can apply to all the images in a folder. If your software supports it, enable parallel processing to push multiple cores at once, which can shave minutes off a large job.
Next, test your batch on a small subset before committing to the full run. This helps you catch problems that could ruin dozens of frames. Once you’re happy with the look, run the batch and check a few representative images afterward. If something’s off—like a color cast or over-sharpened edges—you can refine your preset and re-run the batch. Over time, you’ll build a library of batch profiles tuned to different film stocks or scanning setups, and you’ll be amazed how fast you can deliver.
scanned film software plugins
Plugins extend your batch power by adding smart dust or scratch removal, color grading, or auto-tone options right inside your editor. You want plugins that are reliable, fast, and easy to tweak so you keep your hands on the flow instead of fighting the interface. Choose ones that let you apply the same adjustments to entire batches with a single click, then adjust only the results that are clearly off. When you find a plugin you trust, you’ll start to rely on it like a favorite tool, not a gimmick.
Practice using plugins on a few sample scans first. Look for presets that match your film stock and scanning conditions, then save those as custom presets for reuse. If a plugin offers batch processing of its own, use it to streamline steps like dust removal or grain reduction across your folder. The right plugins save you time and help your images stay consistent from frame to frame.
Build presets and run scripts
Presets are your fastest route to consistency. Build them around your common needs—exposure, color balance, dust removal, and sharpening—and save them so you can apply them in one click. Running scripts can automate repetitive tasks, like renaming files, applying a preset, or exporting in multiple formats. With well-made presets and scripts, you’ll turn a two-hour job into something you finish in minutes, leaving room for more editing or client communication.
Create a simple, repeatable script that does the big three: apply your film-specific preset, run dust removal, and save as the preferred output format. You’ll be surprised how often you reach for the same sequence. Always test a batch on a small set first to ensure the script handles exceptions, like different file sizes or scans with different color casts. Once you’ve got it dialed in, you’ll feel like you’ve built a little machine that does the tedious parts for you.
Editing Scanned Film in Software for Intermediates: Quick Start Checklist
- Verify color space and monitor calibration before you begin Editing Scanned Film in Software for Intermediates.
- Establish a baseline look and apply it consistently across scenes.
- Use non-destructive edits (adjustment layers, masks) to maintain flexibility.
- Preserve film grain; avoid over-smoothing during editing for Editing Scanned Film in Software for Intermediates.
- Leverage batch presets to keep edits uniform across multiple frames.

Junior Souza is a passionate analog photographer and the mind behind estoucurioso.com. With a camera always in hand and a roll of film never far away, Junior has spent years exploring the world through a 35mm lens — learning, experimenting, and falling deeper in love with the slow, intentional process that only analog photography can offer.
What started as pure curiosity quickly became a lifestyle. From testing different film stocks under harsh light to hunting vintage lenses at flea markets, Junior believes that understanding your tools is just as important as developing your eye.
Through estoucurioso.com, he shares everything he has learned along the way — the techniques, the mistakes, the references, and the stories behind the frames. His goal is simple: to build a space where beginners and enthusiasts alike can grow, get inspired, and never stop being curious.
Always learning. Always shooting.