Film speed basics for metering
You need to understand how film speed guides your light readings. When you meter a scene, your meter uses the film speed you’ve set to judge light levels. If you pick the wrong speed, your exposure drifts and your photos can look washed out or too dark. The goal is to line up your meter with the actual film you’re using for a clean, usable exposure. Think of film speed as a fuel gauge for your meter: accurate numbers lead to accurate results.
Your meter reads light and uses the film speed to translate that light into an exposure value. If you’re shooting a roll labeled ISO 400, the meter assumes ISO 400 film responds to light in a standard way. Changing the speed later without adjusting the meter is like budgeting with the wrong currency—the scene’s brightness gets misread, and you fight with camera settings. Mastery comes from consistently aligning the meter setting with your film speed.
When you shoot different films, the meter behaves differently. A faster film (higher ISO) needs less light to reach the same exposure, while a slower film (lower ISO) needs more. Keep that relationship straight in your head and in your camera. With practice, your exposures become predictable and controllable.
Why ISO values matter to your meter
ISO values tell your meter how sensitive your film is to light. If you forget to set the right ISO, the meter can push you toward the wrong shutter and aperture, causing flat shadows or blown highlights. By keeping ISO aligned with your film, you give your meter a true map of the scene’s brightness.
In mixed lighting, ISO matters even more. The meter can’t predict how every beam will affect the film, so you rely on your ISO setting to translate light into proper exposure. Double-check ISO before you start, especially when swapping film or using manual ISO control. If you change ISO without re-metering, you’ll likely lose a stop or more of exposure.
You’ll quickly notice that changing ISO without re-metering throws off exposure by about a stop. Treat ISO as the first dial you adjust before you meter, not after. It keeps your camera from fighting you and helps you hold a consistent look.
How film sensitivity profiling works
Film sensitivity profiling teaches your meter how your film actually responds to light. Tell it the film’s ISO, and the meter uses that to estimate shutter and aperture. If the film is truly ISO 400, the meter guides you toward settings that balance highlight detail and shadow texture. This is the foundation for consistent results.
Profiling also clarifies latitude: some films handle overexposure better, others tolerate underexposure more. A properly set meter reflects these quirks, helping you plan shoots with bright skies or deep shade. Practical practice—test daylight, shade, and mixed light frames to see how the meter’s suggestions align with the film’s performance. Profiling makes your meter a trusted guide.
Quick ISO checklist
- Keep your ISO aligned. Before you meter, confirm your film speed and set it correctly in your camera.
Compensating for Film Speed Variations in Metering
When you shoot with film, your meter may not perfectly match the film’s actual speed. You’ll notice brighter or darker results than expected. The key is compensating for these speed quirks so exposure stays reliable across rolls. This section shows practical steps to adjust your meter, track changes, and keep notes so you’re never guessing again. Compensating for Film Speed Variations in Metering keeps your images consistent even if the film batch reads light a bit differently.
First, recognize that film speed isn’t a single fixed value in real-world use. Some batches read faster or slower than the box says. Your meter helps, but you must set it to account for those differences. Think of it as tuning a guitar: a small offset on the meter brings exposure back in harmony with the film you’re using. A simple routine prevents surprises during shoots.
Ultimately, compensating for these variations means you’re in control. You’re not at the mercy of every changing light; you steer toward consistency and fewer blown highlights or muddy shadows. Your frames will align more closely with your vision, even when the film throws a curveball.
Set a film speed offset on your meter
Set a small, repeatable offset so your meter always talks to your film the same way. Start with a baseline you’re comfortable with, then adjust by a stop, half-stop, or quarter-stop depending on how the stock reads. Once set, every exposure moves closer to target without guesswork.
Practice makes this second nature. After a roll, compare measured exposure to the result and tweak the offset as needed. If highlights clip, you’re underestimating light; increase the offset. If shadows stay muddy, you may be overestimating; reduce it. Keep a small notebook or app note to log the exact offset and the film used. Your meter gains memory for each stock.
A simple, repeatable rule helps on the fly: apply a known offset for a given film stock, and refine after a test roll. This yields smoother, intentional exposures.
Track ISO variance adjustment in notes
Track how ISO behaves with each film batch. When loading a new box, note how your meter reads at a known scene and compare it to the box speed. Record the ISO variance you observe and the offset used. Over time you’ll map which films run fast or slow and how large the gaps tend to be.
Keep notes concise: film stock, batch, lighting condition, meter reading, exposure decision, offset used, final exposure setting. When you return to the stock, you’ll apply the same logic without a new round of guessing. This habit cuts guesswork and protects your time in the field.
Your notes become a personalized cheat sheet that grows more accurate with every roll, helping your meter feel less like a mystery box.
Meter offset quick guide
- Start with a baseline offset (0.0, then ±0.25 or ±0.5 stops) and adjust based on results.
- For each batch, log the exact offset and the outcome.
- If highlights clip, reduce the offset; if shadows go muddy, increase it.
- Revisit notes after a test roll to refine your standard offset for that stock.
- Keep the guide handy in your camera bag or notes app for on-set reference.
Light meter calibration methods
You deserve simple, reliable methods to keep your meter accurate. Learn how a gray card and a reference meter anchor readings, and schedule regular checks so you never guess exposure again.
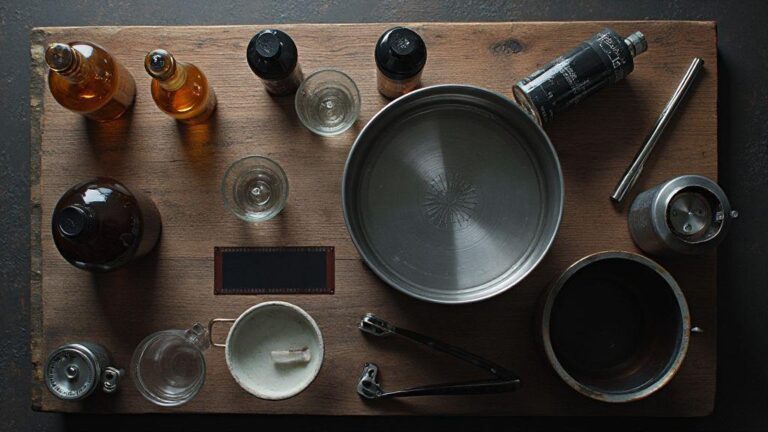
Calibrate with a gray card and reference meter
A gray card gives your meter a solid target. Place the card in the scene to provide a neutral reference and compare the meter’s suggested exposure to the card’s neutral tone; adjust if needed. This method is fast, repeatable, and portable.
Pairing a gray card with a trusted reference meter provides a baseline reading to compare against your camera’s meter. Discrepancies reveal whether you need to adjust for film speed or metering mode, helping you catch drift before it hurts shots.
Schedule regular light meter calibration checks
Treat calibration like regular maintenance. Set a cadence—monthly for heavy use, quarterly for lighter use. Each check should confirm the gray card target aligns with the reference meter and note any drift. A log helps you spot slow drifts or flaky gear before they impact results.
Keep a quick log: date, readings, and adjustments. This helps you spot drift and stay proactive on shoot days, saving time and protecting your results.
Calibration steps summary
- Place a gray card in the scene.
- Take a reading with your meter.
- Compare to a reference meter and adjust to match.
- Repeat with the card in different lighting to confirm consistency.
- Recheck test exposures to ensure the light, film speed, and meter align.
Exposure compensation algorithms for film
Exposure compensation algorithms aim to balance shadows and highlights so images stay natural, with skin tones kept clean and detail preserved. They use scene brightness and often a reference point like a gray card to apply a correction value to exposure. You should understand where these corrections come from so you can rely on them when needed and override them when they don’t fit your scene.
These methods aren’t perfect, but they’re consistent enough to save time. They factor in ISO, available light, and film latitude to decide how much to adjust. In tricky lighting, the algorithm might bias toward protecting highlights. You’ll often see a push or pull in exposure to prevent washing out or flattening the scene. With practice, you’ll know when the camera’s default compensation helps—and when it doesn’t.
To get the most from these algorithms, test them across different scenarios: window-lit portraits, landscapes with a bright sky, and dim indoor scenes. Compare how exposure changes and how much detail you retain. You’ll see patterns: bright scenes benefit from a touch more exposure to protect highlights; dark scenes may need less to preserve texture. This makes compensation feel like a tool you control rather than a default.
How algorithms handle ISO variance adjustment
Camera metering uses ISO as a stand-in for film speed. When ISO changes, the algorithm reevaluates scene brightness and decides how much exposure to add or subtract. Raising ISO can reduce exposure to prevent clipping but may introduce more grain in shadows. Lowering ISO may require more exposure to maintain midtones, risking highlight clipping if not careful. You’ll notice this most in high-contrast scenes.
Because film reacts differently than digital sensors, more exposure isn’t always better. The algorithm nudges exposure to keep a balanced look, not simply the brightest result. Watch how your film stock handles ISO shifts to anticipate the algorithm’s moves.
Practically, higher ISO can brighten the scene but coarse grain may appear; lower ISO preserves texture but demands careful metering to avoid dull midtones. Test and remember how your stock interacts with ISO shifts to anticipate how the algorithm will respond.
When to override metering exposure correction
Sometimes the scene demands a hand. Backlit subjects or bright skies can cause automatic compensation to flatten an image. Overriding metering can prevent underexposure in the subject’s face or protect sky detail. Trust your eye: if the image feels off, try a different compensation value.
Overrides are useful in unusual lighting or color scenarios where a neon sign or a white dress near a window can mislead the meter. Overrides aren’t cheating—they tailor the result to your vision. When learning, set a rule: meter for the scene baseline, then apply a small, deliberate override as needed, comparing results to refine your approach.
Algorithm override tips
- Start with a baseline exposure for neutral light, then try a one-stop adjustment.
- Use a test roll to map how stock reacts to different compensations; keep notes.
- When unsure, protect highlights; a little clipping is easier to recover than lost detail in shadows.
- Maintain a simple log of scenes where overrides helped to spot patterns.
Reciprocity failure correction for long exposures
Long exposures can cause reciprocity failure—film stops responding linearly to light, making shadows too dark or highlights muddy. This is common with strong light sources or very dark scenes requiring long shutter times. Have a plan to account for nonlinearity, and use a quick correction workflow to keep exposure accurate across frames.
Treat long-exposure results as a mix of light, film, and time. Reciprocity failure behaves like a stubborn friend who doesn’t follow the rules. The cure is a workflow: recognize the scene’s brightness range, note exposure time, and prepare corrections ahead of time. A good plan stabilizes results across lighting conditions.
Your goal is consistent tonality in long exposures. Use a chart-backed approach and an on-set panel to stay honest, avoiding guesses about shadows. You’ll push for impact without sacrificing highlight or shadow detail.
Recognize when reciprocity affects your shots
Reciprocity shows up when a long exposure looks flatter or bright sources bloom more than expected. Dim interiors or night scenes with bright accents increase the likelihood. If a measured exposure yields milky shadows or clipping highlights, reciprocity is likely at play. Compare a known neutral scene across exposure times to see the nonlinearity.
Plan ahead on set by mapping key tones and predicting where the film will bend. If you expect high contrast in a frame, adjust exposure strategy to keep tonal transitions smooth.
Use reciprocity failure correction charts on set
Carry a compact reciprocity correction chart on set to translate exposure into real-world tweaks. The chart links exposure time to film response, guiding you to add minutes to shutter time or shift aperture when needed. Pair the chart with a quick test shot to confirm corrections.
Keep the chart handy and mark conditions (bright backlighting, long exposure times). Having a few scenarios in your notebook lets you flip to a familiar case quickly. Corrections should feel automatic, not scrambling.
Reciprocity correction quick panel
A portable quick panel lists common corrections near the camera: exposure times, aperture tweaks, and alternate ISO notes. It’s your cheat sheet for light that won’t behave. Use it to translate brightness into practical adjustments in seconds.
Label frequent scenarios (city night, backlit portraits, high-contrast interiors) so you can reference the panel and shoot again. Include a rule: if shutter time doubles, corrections may not double—the nonlinearity of reciprocity failure matters.
Sensitometry-based metering explained
Sensitometry ties light, film speed, and exposure together. It’s a recipe: balance light with how the film responds. Metering with sensitometry uses the film’s response curve to predict the final image before you shoot. It’s math you can rely on when lighting shifts.
You meter for the film’s response, not just light intensity. Consider basefog, toe, rise, and shoulder of the curve—each part tells how shadows, midtones, and highlights will behave. Your meter becomes a bridge between what you see and what the film records, helping you place exposure to preserve detail across brightness.
If you switch film speeds or emulsions, sensitometry still guides you. The goal is to know how the film responds to a given light level and to meter toward that response. You’ll learn which exposures push shadows or protect highlights based on the curve, boosting confidence in changing light.
Read film response curves to set exposure
Identify the basefog and the straight-line portion—the range where exposure changes translate cleanly into density. Meter to place midtones at a point on the curve that keeps detail in shadows and highlights. Then locate where your scene’s brightness sits on the curve: bright highlights need slightly darker exposure to avoid clipping; dark scenes may need more exposure to reveal texture.
Understand the toe and shoulder: the toe preserves shadow texture, the shoulder protects highlights. If unsure, shoot a test frame and compare to a proof strip. You’ll develop a feel for how much exposure translates into acceptable density.
Apply sensitometry-based metering in mixed light
In mixed light, sensitometry helps you choose a tonal anchor rather than guess. Pick a target point on the curve and meter for that point. In tungsten-dominated scenes with mixed daylight, bias exposure toward midtones to protect skin tones. Adjust as light shifts to balance contrast and detail across sources.
Rule of thumb: aim for a middle-to-high detail point on the curve for skin tones, then adjust for more or less contrast. A quick test frame or two confirms how the film reacts and whether you should tweak exposure on the fly.
Sensitometry cheatsheet
- Know the toe, straight line, and shoulder; use the straight line for most exposures.
- Meter for midtones to preserve texture in shadows and highlights.
- In bright scenes, bias exposure down to prevent clipping.
- In dark scenes, bias exposure up to reveal shadow detail without blowing highlights.
- When mixing light, prioritize skin tones and midtones, then adjust mood.
- Always test a frame when changing film speed or emulsion; notes beat memory.
- Remember: Compensating for Film Speed Variations in Metering helps keep a consistent look across films.
Exposure latitude and dynamic range adaptation
Exposure latitude is the wiggle room your image has before clipping shadows or highlights. By embracing dynamic range adaptation, you protect contrast and keep textures. Your goal is to balance how much you push exposure without losing nuance at the extremes. Practice shows where your camera shines and where it oversteps, helping you frame shots that hold both bright skies and shaded faces.
In practice, look for mixed lighting and decide how much latitude you need. In high-contrast scenes, you might underexpose slightly to protect highlights, then lift shadows in post or with fill. If the scene is flatter, push exposure to reveal shadows while keeping highlights safe. Know your detector’s limits and stay within them, so every pixel carries information. Your past shots guide future exposures.
When you manage exposure latitude well, you gain clearer colors, better texture, and more post flexibility. Latitude is not a single number, but a spectrum you navigate as you frame. Dynamic range adaptation prepares you for varied lighting and helps you keep images true to the moment.
Meter to protect highlights or shadows
Choose what to protect: highlights or shadows. Meter for the brightest part to keep highlights from clipping, accepting some shadow lift later. Or meter for shadows to preserve detail there, letting highlights fall where they may. Apply the decision with exposure compensation, bracketing, or RAW capture to preserve information. The goal is repeatable results that keep essential tones intact.
Use exposure latitude optimization in push/pull work
Push (more exposure in post) benefits from extra highlight headroom; pull (less exposure) benefits from deeper shadow detail. Use RAW to recover data in both directions. Test a range of exposures to map latitude behavior. For push, grade gently to avoid clipping; for pull, preserve texture and reduce noise rather than crushing contrast. Practice helps you dial in the latitude you need for each scene.
Latitude decision rule
Prioritize the part of the image that matters most. If the focal point sits in bright windows, protect highlights first; if it’s a shadowed subject, protect shadows first. Make your choice explicit and repeatable to build a reliable workflow over time.
On-set metering exposure correction workflow
The goal is a bright, clean shot without blown highlights or dull skin tones. Check light levels as you frame, measure key areas with your meter, and compare readings to the camera’s exposure. If underexposed, adjust exposure compensation or shutter angle; if overexposed, pull back slightly. This workflow keeps dynamic range intact and prevents white walls or crushed blacks later in post. Aim for stable exposure across takes, not a single perfect frame.
On set, you’re not guessing—you’re applying a plan. Balance meter readings with your stock or sensor profile. If stock speed is low or your sensor is punchy, raise exposure slightly and verify with a quick test frame. Keep notes showing how each meter result translates to aperture, ISO, or ND usage. The more you practice, the less you rely on guesswork and the more you own the look you want.
As you finalize exposure, set a consistent method for logging and cross-checking readings so post can match. If lighting changes, adjust quickly and recheck. The aim is a smooth, predictable exposure curve across shots, helping color balance stay stable and easing the editor’s job.
Log film speed compensation and meter readings
Record film speed compensation next to each meter reading. Note how stock speed or sensor profile affects exposure and the compensation applied. When a meter shows a given EV, log the aperture, shutter, ISO, and any ND or diffusion used. This becomes your reference for color timing and helps justify decisions if a frame looks different in post. If you change stock or light, log the new compensation so nothing slips.
Link readings to your exposure decision on set. If you compensated for a brighter scene, show the revised aperture or shutter angle and the resulting reading. If you needed a look, capture both initial and final readings to illustrate your reasoning. These notes are your road map from scene setup to final grade.
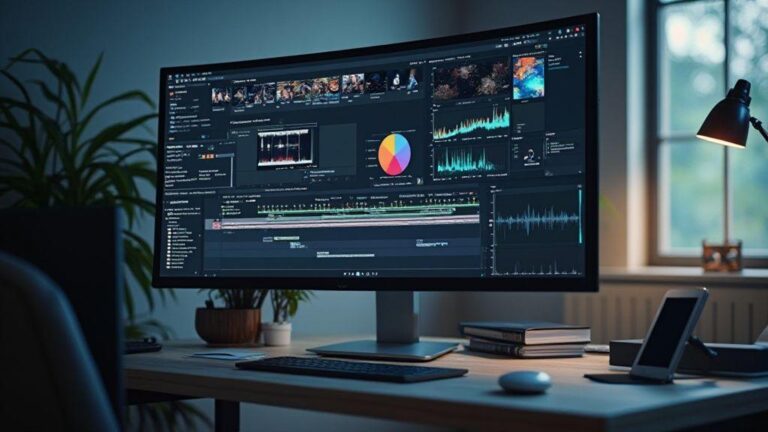
Pass exposure notes to the lab and processor
Send precise exposure notes so the lab can reproduce your look. Include film speed compensation details, meter readings, and the exact exposure settings. If you used LUTs or a color science target, mention that too. The more exact you are, the fewer surprises the lab will face.
Keep notes organized in a scannable block, and attach a quick still reflecting the exposure result. Clear communication saves time and keeps your project flowing from shoot to screen.
On-set quick log
Maintain a concise, bullet-point summary for quick reference during takes. Include film speed compensation, meter reading, and the exposure decision (e.g., increase ND by 1 stop or open 1/3 stop). Keep it in a notebook or phone note for fast access. The quick log helps you stay on plan during fast setups.
Test, profile, and record film sensitivity
You’ll gain precise control over how film responds to light. Testing reveals the real sensitivity of your film and how it interacts with your meter. Map how your film changes with different light levels so you can trust your exposure decisions.
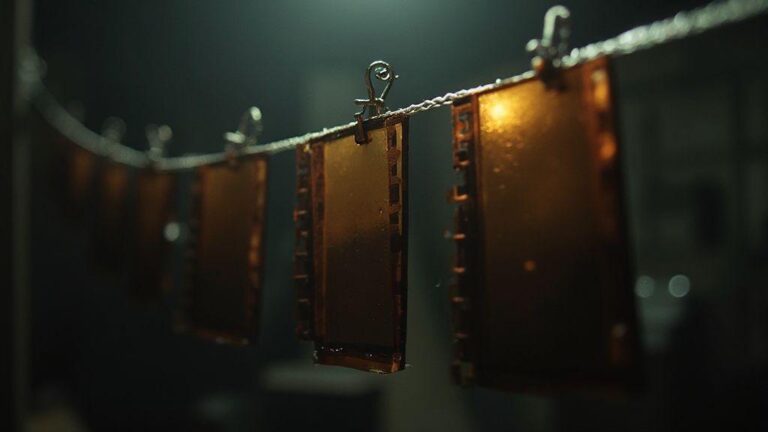
Run controlled exposures on test strips to compare prints from light to darker scenes. You’ll notice patterns: some films peak quickly, others hold brightness longer. Keep notes organized so you can reuse data on future shoots and in varied lighting.
Create a film sensitivity profiling report that summarizes how actual sensitivity lines up with labeled ISO at common light levels. Include key strip data and concrete metering adjustments. A practical profile saves time and protects results against changing conditions. Use it to stop guessing and start dialing in exposures that match your creative vision.
Run test strips to map ISO variance adjustment
Lay out several test strips under the same lighting, each with a different exposure step. Mark shutter speeds, apertures, and distances so you can repeat later. Compare densities to see where film reads differently from the box. This map shows how ISO varies with light, guiding real-world readings.
Keep density notes tied to the produced exposure. If a strip looks brighter than expected, you may need a lower ISO setting in those conditions; if darker, a higher ISO. Use consistent development so changes reflect film sensitivity, not chemistry. Build a curve that guides future shoots.
Create a film sensitivity profiling report
Your profile should summarize how actual sensitivity compares to labeled ISO at common light levels. Include key strip data and concise metering adjustments for quick reference. The report should offer actionable rules for compensating in tricky lighting and note how development timing affects results. A short checklist you can skim before a shoot helps you rely on data rather than memory. With a solid profile, you can trust your meter and film to work together, not against each other.
Test strip record form
Fill out: lighting condition, labeled ISO, actual exposure settings, development details, and observed density. Record whether the ISO should be adjusted up or down for that scenario. This form tracks trends across shoots and film lots, keeping things simple but complete for future use.

Junior Souza is a passionate analog photographer and the mind behind estoucurioso.com. With a camera always in hand and a roll of film never far away, Junior has spent years exploring the world through a 35mm lens — learning, experimenting, and falling deeper in love with the slow, intentional process that only analog photography can offer.
What started as pure curiosity quickly became a lifestyle. From testing different film stocks under harsh light to hunting vintage lenses at flea markets, Junior believes that understanding your tools is just as important as developing your eye.
Through estoucurioso.com, he shares everything he has learned along the way — the techniques, the mistakes, the references, and the stories behind the frames. His goal is simple: to build a space where beginners and enthusiasts alike can grow, get inspired, and never stop being curious.
Always learning. Always shooting.