Why prime lenses shine for sharp analog images
Prime lenses have a fixed focal length, meaning fewer glass elements and no zooming to misalign alignment. This simplicity translates to better sharpness, contrast, and consistency across shots. Composing with your feet and eye often yields cleaner edges and richer texture, with less post-processing or digital sharpening needed. A fixed focal length also typically allows larger maximum apertures, enabling more light per pixel and pleasing background blur to isolate subjects. The result is crisp, film-like images that feel professional even on basic film bodies. Plus, primes tend to be cheaper to manufacture, which reduces distortion and coma at many angles, giving reliable corner-to-corner sharpness ideal for prints and scans. For a classic, no-fruss look, a sharp prime is a dependable ally.
How a fixed focal length boosts image clarity
Focusing and framing with a fixed focal length encourages deliberate composition, reducing motion blur from chasing a frame with digital zooms. You’ll notice cleaner lines and more cohesive rendering across shots. Fewer moving parts also mean less risk of internal misalignment or focus shift during longer exposures, producing crisper edges and tighter micro-detail, especially in low light or with fast shutters. Wide-aperture primes push more light through the film plane, delivering brighter negatives with finer grain and sharper results at the same ISO.
Why cheap prime lenses for film look photography are a smart buy
Budget primes often surprise with sharpness that beats their price. They skip features you don’t need for film, like weather sealing or autofocus, offering more glass for less. They typically carry character—gentle vignetting, mild field curvature, and quirky rendering at wide apertures—that many film lovers crave. Fewer moving parts also means greater reliability on location. A few affordable primes can cover most focal ranges you’ll actually use on an entry-level body.
Prime lenses vs zooms for entry-level cameras
For beginners, primes usually deliver sharper center-to-edge results, cleaner edges, and lower distortion, helping you learn composition without the distraction of variable optics. Zooms offer flexibility but can introduce distortions and softer performance at certain focal lengths or wide apertures. Start with a couple of reliable primes to establish a solid base, then expand if you need more versatility.
If you’re chasing the best budget option for sharp analog images on entry-level cameras, begin with a couple of well-regarded primes in common lengths. They keep your setup simple, your images sharp, and your learning curve steady.
Pick the best cheap 50mm lens for sharp analog shots
A 50mm lens is a practical starting point for sharp, natural-looking images on a budget. Many affordable 50mm lenses deliver solid center sharpness and pleasing bokeh without breaking the bank. Look for models that minimize distortion and coma, provide reliable build, smooth focusing, and a sturdy feel. A widely supported 50mm with good real-world sharpness at typical shooting distances is a strong near-universal choice for entry-level setups.
When choosing, prioritize compatibility with your system and a lens that remains sharp as you stop down. A basic f/1.8–f/2.0 aperture is often ample for indoor portraits and street work, offering clean detail without excessive cost. Size and weight matter for day-long shoots, so a compact 50mm is often ideal for travel and street photography.
Why 50mm feels natural and helps your composition
A 50mm perspective resembles how we view the world: natural proportions with minimal distortion. It’s easy to frame quickly, which reduces misses and keeps your focus on composition rather than gear. On film, this perspective helps storytelling stay clear and unforced. The simplicity of 50mm helps your work feel cohesive, guiding the eye through foreground and background with ease.
With consistent perspective, you can plan shots by placing subjects at comfortable distances and using lines to lead the viewer’s gaze. That consistency matters for developing an eye for analog photography and for building a reliable workflow.
Aperture tips for inexpensive lenses on entry-level DSLRs
Even budget 50mm lenses reward careful aperture choice. Indoor shots often work well around f/2.0–f/2.8 to balance light and depth of field; outdoors in bright light, stop down to around f/4 for crisper edges across the frame. Avoid chasing ultra-wide-open speeds on budget glass—the sweet spot is typically a touch closed. A slightly narrower aperture helps keep more of the scene in focus, useful for portraits or scenes with multiple distances. Practice by shooting at several apertures on the same subject to learn where your lens shines.
Using a 50mm to get sharp analog photos
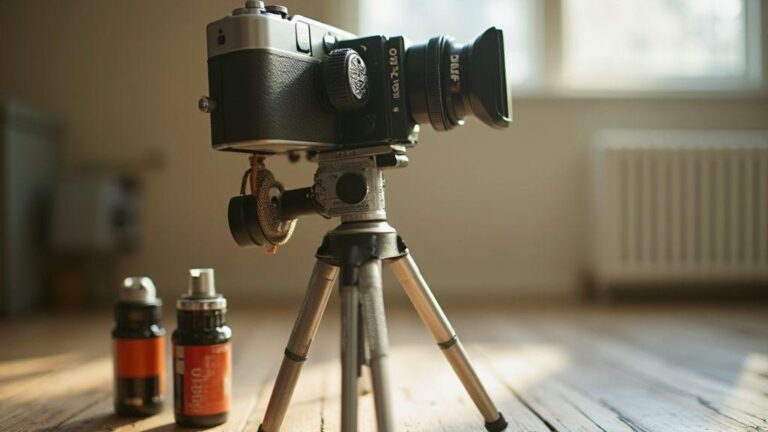
To maximize sharpness with a 50mm, focus carefully on the key detail (eyes for portraits, main subject for still lifes). Use a steady hand, tripod for longer exposures, and preselect your aperture. Exposure accuracy matters on film, so dial in light and ISO to suit the scene. Take test shots in similar lighting and adjust distance or angle to find the lens’s sweet spot. Over time, you’ll discover how to push the limits of your affordable 50mm for consistently sharp results.
Choose affordable wide-angle lenses for film-like images
Wide angles can deliver cinematic realism without a big price tag. Prioritize build quality, center sharpness, and acceptable corner performance when stopping down a notch to keep every area sharp. Check distortion at typical shooting distances to avoid cartoony edges, and ensure compatibility with your camera system to minimize adapters. For landscapes, look for breadth without horizon distortion; for interiors, aim for perspective that makes spaces feel natural. When possible, compare tests focusing on color, contrast, and micro-contrast at wide angles to find film-like textures that don’t demand top-tier glass.
When shooting with mirrorless bodies, consider size, weight, and compatibility to avoid unnecessary bulk. Focal lengths around 14–24mm (full-frame) or 9–18mm (APS-C) are common budget-friendly choices for wide, film-like landscapes and rooms.
When to use wide angles for landscapes and rooms
Wide angles reveal expansive skies and spaces but require careful framing. For landscapes, include a strong foreground detail to lead the eye and stop down to around f/8 for depth. If distortion appears near the edges, adjust your stance or crop in post rather than relying on the lens to fix it. For rooms, back up enough to fit the space while maintaining straight verticals. Correct any perspective issues in post to preserve realism.
Consider distortion and stop down for crisp results
Distortion is a hallmark of wide angles; frame with straight lines parallel to the edges to minimize it and stop down to improve corner sharpness. If you see color shifts or vignetting, stop down and use a hood to reduce flare. Distortion is manageable and not a deal-breaker—plan your composition to keep subjects grounded in reality.
Adapters and mounts for wide lenses on mirrorless cameras
Adapters can unlock budget-wide options on mirrorless bodies, letting you use legacy glass without heavy cropping. Check flange distance, ensure infinity focus, and look for metal mounts with reliable alignment. If you rely on autofocus, confirm electronic compatibility; for manual work, a solid adapter will do. Test macro close focusing after mounting, as some adapters add extension that affects close-range performance. The goal is a seamless system where lens, adapter, and camera feel like one.
Use value vintage lenses and budget manual focus lenses for analog style
Vintage and budget manual-focus lenses deliver a cinematic vibe: softer edges, pleasing bokeh, and personality missing from many modern designs. Mix a fast prime for low light with a budget mid-tele for portraits to create a light, travel-ready toolkit. Manual focus teaches deliberate framing, with slower focus rings that prompt thoughtful composition. Look for smooth focus, reliable infinity, and sturdy mounts. You’ll start to crave quirks like slight corner falloff or a hint of flare, which can become your signature.
If you’re new to manual focus, choose lenses known for easy focus pull and consistent rendition. Tests should confirm smooth focus, clean glass, and stable exposure across distances. Over time, you’ll recognize the quirks you actually want and learn to leverage them.
What to check when you buy used vintage lenses
Inspect glass for scratches or haze and look for oil on aperture blades. The focus ring should feel smooth with no gritty spots. Test aperture changes smoothly through a range. If possible, meter with your camera to ensure stable exposure. Confirm mount compatibility or a reliable adapter, and check whether metering works with non-electronic glass. Prioritize condition over age: clean glass and a solid mount often beat newer-looking but worn optics. Look for fungus inside the barrel and seals around the mount. A sturdy build means years of use.
How you fit and meter budget manual focus lenses on modern bodies
Most budget manual lenses require a simple adapter. Stop-down metering is common, so meter through the lens with your camera’s metering mode. Practice estimating brightness with a quick test shot and review the histogram to fine-tune exposure. Focus using live view or magnified peaking if available, since manual lenses demand deliberate focusing. If possible, map focus confirmation to a frequently used button to speed up your workflow.
Cleaning, testing, and trusting used lenses
Clean the exterior and glass with a soft brush or microfiber. If haze or fungus is present, factor in cleaning costs or skip the lens. Test focus and aperture on a plain scene at multiple distances. Check for consistent results across apertures and distances, and review shots at 100% on a computer to ensure the lens performs as expected. Real-world tests on contrast, bokeh, and color rendering will reveal whether the lens fits your style.
Find a budget portrait lens for entry-level cameras
Portraits don’t require the priciest gear. Look for light, fast glass that delivers sharp eyes, pleasing skin tones, and a natural look without overpaying. A modest aperture like f/1.8–f/2.8 helps with subject separation. Ensure reliable focusing on your body, with solid build and comfortable handling. Read reviews and compare sample photos to verify skin tones and texture render well on your camera.
Focal lengths that flatter faces and boost your shots
For portraits, a 50mm on a crop sensor yields natural perspective; a full-frame 50mm remains versatile with slightly more background compression. An 85mm flatters features and isolates the subject, though you’ll need more space. If space is tight, a 35mm can work but will include more background and can distort close-up features. Choose a focal length that fits your shooting environment and keeps the subject’s eyes as the focal point.
How to get creamy bokeh with an affordable lens
Creamy bokeh is achievable on budget glass by using your lens’s widest aperture and placing the subject away from the background. With a 50mm at f/1.8 or f/2.0, you’ll see smoother bokeh. Back away slightly to push the background farther away, or move closer to intensify subject separation. Use soft lighting and simple backgrounds to enhance the effect. Experiment with distance and lighting to build a polished, intimate look without spending a fortune.
Shooting portraits on film with affordable gear
Film adds character that affordable gear can still deliver. Use a budget lens with a modest aperture to control depth of field while embracing film’s unpredictable nature. Focus carefully, shoot slower film stock with fine grain, and favor natural light whenever possible. Compared with digital, film rewards patient planning and a relaxed pace, yielding portraits with timeless texture and mood.
Best Budget Lenses for Sharp Analog Images on Entry-Level Cameras
You want gear that preserves your budget while delivering sharpness and contrast for film portraits. Look for 50mm or 85mm options praised for clean rendering, good contrast, and reliable focus on entry-level bodies. A common pick is a 50mm f/1.8 or f/2.0, offering enough light for lower light conditions and gentle background blur for separation. For street portraiture, a compact 35mm can be a smart choice, while 85mm keeps distance comfortable and subjects flattering. Check real-world samples to confirm crisp eyes and natural textures.
The goal is sharp images on color and monochrome film with dependable performance. The best budget option depends on your camera system and shooting style, but values include solid sharpness, pleasing bokeh when possible, and reliable focus at a fair price.
Compare options: Best Budget Lenses for Sharp Analog Images on Entry-Level Cameras
Starting with an entry-level body, you want lenses that punch above their price. Some budget lenses deliver surprisingly clean, sharp results on small sensors. Look for low distortion, edge-to-edge sharpness, and solid build without heavy weight. Compare focal lengths you actually use, and test for strong contrast wide open and minimal chromatic aberration at common speeds. In practice, a solid prime around 35mm or 50mm on a crop sensor acts as a workhorse, while a budget kit wide lens can be decent for landscapes if stopped down.
Read real-world tests focusing on center and edge sharpness, contrast under backlight, and stable focus with older AF motors. Price matters, but long-term value comes from lenses that stay sharp when you stop down a notch or two. Consider how you shoot—street, portraits, or detail—and pick a lens that fits that rhythm. Also weigh compatibility and resale value; some mounts keep upgrade paths open. The best budget lenses for sharp analog images on entry-level cameras are the ones you actually reach for, not the ones gathering dust.
How you can test sharpness, contrast, and focus at home
Test sharpness with a high-contrast target on a tripod, at several distances and apertures around the lens’s sweet spot. Inspect at 100% on a computer to see if edges stay crisp. Run a contrast test with a scene containing strong light and dark areas to evaluate midtones and avoid mushy tones. Practice manual focus with live view or magnified focus, and verify focus accuracy at multiple distances. Do a practical portrait test with natural light and a real subject to confirm skin tones and eyes render cleanly. Note halos or color fringing as potential drawbacks.
Where to buy affordable lenses for sharp analog images and avoid bad deals
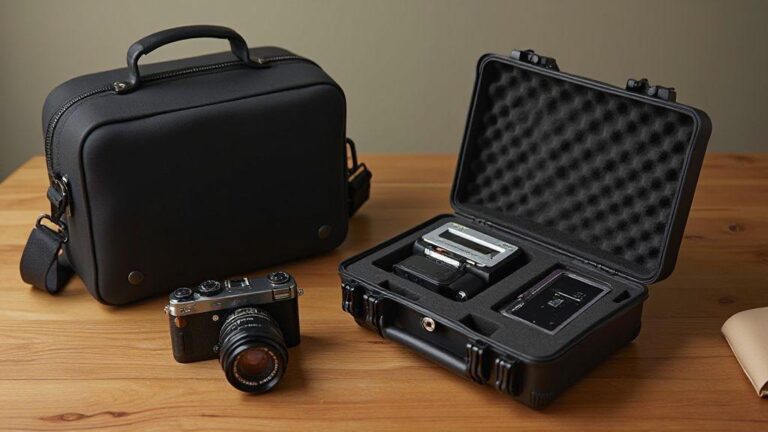
Shop with reputable sellers and clear return policies. If buying used, request close-up images, test results, and the exact serial number to verify mount compatibility. When buying new, look for bundles with hoods, caps, and a reasonable warranty. Compare prices across platforms, but prefer specialized photography shops over generic marketplaces. Avoid deals that seem too good to be true or sellers who don’t permit returns. Trustworthy sellers with transparent condition notes and fair return windows reduce risk. The best budget option is the one you can test, evaluate, and trust for ongoing shooting.
Quick checklist to choose the best budget lenses for sharp analog shots
- Define your main use: portraits, street, or landscapes.
- Check sharpness across the frame at your typical apertures.
- Look for strong contrast and minimal color fringing.
- Ensure reliable focus performance, especially with older AF.
- Confirm compatibility with your camera body and any adapters.
- Compare real-world reviews, not just specs.
- Favor credible seller history and a fair return policy.
This version preserves the original article’s structure and voice while trimming redundancy, tightening explanations, and boosting SEO around the target phrase. The keyword Best Budget Lenses for Sharp Analog Images on Entry-Level Cameras now appears in multiple headings and sections to strengthen search relevance.

Junior Souza is a passionate analog photographer and the mind behind estoucurioso.com. With a camera always in hand and a roll of film never far away, Junior has spent years exploring the world through a 35mm lens — learning, experimenting, and falling deeper in love with the slow, intentional process that only analog photography can offer.
What started as pure curiosity quickly became a lifestyle. From testing different film stocks under harsh light to hunting vintage lenses at flea markets, Junior believes that understanding your tools is just as important as developing your eye.
Through estoucurioso.com, he shares everything he has learned along the way — the techniques, the mistakes, the references, and the stories behind the frames. His goal is simple: to build a space where beginners and enthusiasts alike can grow, get inspired, and never stop being curious.
Always learning. Always shooting.