Ansel Adams Techniques for Black and White Mastery: Zone System for You
The Zone System guides how you see light and shade, turning your eye into a trusted tool. Plan shots in zones and picture the final print before you press the shutter, mapping highlights, shadows, and midtones so black-and-white images feel real rather than flat. This discipline keeps your tones consistent across scenes—from a sunlit street to a dim cafe corner. In Ansel Adams Techniques for Black and White Mastery, you learn to expose for highlights and preserve shadow detail, with small exposure shifts shaping mood. Your camera becomes a bridge between what you feel and what you print, and this technique moves you from luck to mastery in monochrome.
With practice, your eye will lock onto useful tones and your memory will carry these tricks forward. When you study Ansel Adams Techniques for Black and White Mastery, you’ll notice how you handle brash high-contrast streets and soft portraits with clear purpose. The prints you make will reflect true tonal ranges and intentional contrast, your path to reliable, striking monochrome work.
Measure light for your film exposure
You’ll start by measuring the light you see in the scene. Your light meter guides exposure so highlights stay bright without blowing out, and shadows retain richness without turning muddy. The meter tells you the scene’s brightness and the zone it would land in on your film, helping you balance settings to protect detail in both bright and dark areas. Plan a middle zone for skin tones or push slightly for moodier scenes, and practice until you can dial exposures quickly as light changes.
As light shifts, the same object can look different. A sunny doorway demands a higher exposure; a dim corner benefits from a longer shutter or higher ISO. Trust the meter more than memory, and you’ll achieve steadier results across shoots. This practical habit is a core practice of Ansel Adams Techniques for Black and White Mastery.
Control your tonal range in monochrome
In black and white, tonal control is a language. You’ll shape mood by guiding where tones land—keeping skin tones readable, skies from washing out, and textures crisp. Plan exposure to give you a solid tonal ladder, then use filters or post-processing tweaks to hold that balance. With practice, you’ll sense when a scene needs more contrast and adjust before you press the shutter. This isn’t guesswork; it’s a learned skill you carry into every shot. This approach is a hallmark of Ansel Adams Techniques for Black and White Mastery, helping you move from flat to dimensional imagery.
Compare high-contrast and softer images to hear your own taste. A brick wall may demand more contrast for tactile depth, while a misty morning benefits from gentler tones. Your choices help you cultivate a signature look aligned with your eye and vibe.
Practical exposure steps
- Determine the scene’s light value, set your meter, and note the target zone. Choose a base exposure that preserves detail in both shadows and highlights.
- Dial in a safe starting exposure, shoot a quick test frame, and check the histogram or highlight alert. If highlights clip, raise or lower exposure by one stop; if shadows are too dense, adjust accordingly.
- Confirm neutral white balance for B/W planning. Rely on tones, not color, so neutral lighting keeps your tones honest.
- Lock in your intended zone and shoot with purpose. If the scene shifts, re-measure and re-aim. Consistency beats luck.
- Review results and note how exposure changes mood. Let that memory guide future shoots in similar light.
Master darkroom printing and processing for your prints
In the darkroom, you shape the final print. You’ll learn printing, fixing, and washing with steady hands so your prints reflect your vision. This is where your craft shines, and your prints gain life. You’ll build confidence as you move from guesswork to deliberate control, frame by frame.
Develop a rhythm that fits your life. Test papers, notice the tones, and pick what matches your style. Your prints will carry more mood, and your voice will show in the gray areas as well as the blacks and whites. Stay curious, try small changes, and let your instincts guide you.
Your goal is consistency. When you nail exposure and processing, your prints become repeatable, not lucky. Keep a notebook, noting what worked and why, so you can recreate a look later. The more you practice, the more your prints resemble a true self-portrait of your vision. This is a core pillar of Ansel Adams Techniques for Black and White Mastery.
Choose paper and filters for contrast control
Choosing paper shapes contrast. Fiber-based papers glow with depth; resin-coated papers are punchier and faster. Each one changes how light sits in your image, so pick what matches your mood. Match your safelight to the paper to keep your eyes comfortable while you work.
Filters are your contrast levers. Yellow lifts light tones without muting darks; Red or Deep Red deepens shadows for drama. Test different filters on proof prints to learn how your scene breathes and keep notes on which filter gave you the look you want for next time.
Your choices set the baseline for your final print. If you want a gentle, nuanced look, fiber-based paper with a soft filter might be best. If you crave punchy blacks and bright whites, try resin-coated paper with a stronger filter. Remember, brands differ, so keep notes on favorites, and apply what you learn to Ansel Adams Techniques for Black and White Mastery.
Develop film for exposure and contrast control for film
Your development step is where exposure meets contrast. Agitate consistently, test development times to match film speed and your desired look. If negatives are too thin, extend development a bit; if too dense, shorten it. Keep a log of times and results so future runs feel patterned, not random.
The choice of developer and dilution shapes contrast early on. A dilute mix or shorter time lowers contrast; a stronger mix or longer time raises it. Balance camera exposure with development to hold detail in skies and shadows. With practice, your control tightens and your prints reflect your intent more closely.
Spot when you’ve hit the right zone: muddy midtones or harsh highlights signal pushing too far. Adjust development time, agitation, or solution strength, and test again. Each test print maps toward your ideal exposure and contrast. This workflow is part of Ansel Adams Techniques for Black and White Mastery.
Clean darkroom workflow
A clean workflow saves time and ensures consistent results. Start with a tidy workspace: lined trays, clean tongs, labeled chemicals. Wear gloves and keep notes handy so your hands stay clean and your ideas stay clear.
Routinely check chemicals—old or contaminated solutions ruin contrast and tone. If you notice color shifts or uneven processing, refresh. Schedule regular steps so you aren’t guessing what to do next.
Follow a simple routine: expose, develop, stop, fix, wash, and dry in that order. Consistency reduces mistakes and lets you focus on the creative part—the image and its mood. A smooth workflow makes your darkroom feel like a well-oiled studio where prints come to life. This practice aligns with Ansel Adams Techniques for Black and White Mastery.
Use dodging and burning techniques in your edits
Dodging and burning are your secret moves for making photos breathe. Lighten the spots you want to foreground and deepen mood where you need drama. Start by identifying the brightest accents that pull attention away from the subject, then gently reduce their glow with dodging. Seek the darkest shadows that flatten the scene and lift them with burning to add depth. Precise, small adjustments—kept under 10% at a time—create a natural sense of life. Use soft brushes, low opacity, and build up gradually for textured skin, fabric, and backgrounds. Dodging and burning guide the eye and help the narrative flow from foreground to background with ease. In street scenes, dodge a doorway inviting entry and burn surrounding pavement to create rhythm. This is storytelling with light, a core idea in Ansel Adams Techniques for Black and White Mastery.
As you edit, mark areas you want to emphasize—edges of a face, a cheekbone highlight, or a glint in an eye. Lightly dodge those spots to push them forward and burn surrounding areas to push them back. Your edits should feel invisible; the viewer senses control, not heavy-handed fixes. Keep adjustments modest and compare before/after views to stay connected to the original moment. Practice with a few local scenes to see how subtle changes shift tone. Over time, these techniques become instinctive, and your edits read as a natural extension of the moment. This approach is a pillar of Ansel Adams Techniques for Black and White Mastery.
Refine local tones with dodging and burning techniques
Local tweaks matter more than global fixes. Refine skin tones, fabrics, and architectural lines with focused dodges and burns. Sample the local tone you want to preserve—the warm sunset on brick, the cool shadow under a tree, the bright highlight on a wristwatch. Dodge the lighter spots to lift them just enough, then burn the midtones to preserve contrast. Watch for halos and edge artifacts, and adjust with feathered brushes so transitions stay smooth. The goal is to maintain natural variation—skin, grain, embroidery—without flattening the scene. Local adjustments in Ansel Adams Techniques for Black and White Mastery keep realism intact while adding polish.
Target midtones that feel flat and lift them gently if a face looks pale. If a shirt loses detail under bright light, a light burn recovers texture. In landscapes, dodge sunlit ridges and burn shadows to reveal depth. Keep edits modest and iterative; small gains accumulate to a stronger image. Focusing on local tones preserves life in the image and avoids an overprocessed look. This aligns with Ansel Adams Techniques for Black and White Mastery.
As your practice grows, you’ll favor subtlety over drama. A dodge on a doorway edge or a gentle burn along a horizon line can transform a photo from flat to cinematic. Local tone refinements should feel like a natural part of the scene, not a stylistic afterthought. The payoff is more texture, more emotion, and a sense you guided the moment with care. This is central to Ansel Adams Techniques for Black and White Mastery.
Apply fine art black and white post processing
Black and white editing is where your eye becomes the artist. Start with a strong luminance range, boosting contrast just enough to separate light, mid, and dark tones. Manage the weight of shadows to preserve depth. Emphasize texture by adding grain where it serves the mood and taming it where it distracts. Use dodging and burning to sculpt light on faces and features, while keeping the look cohesive so the image feels unified. Think about how light behaves—window glow, streetlamp halos, cloud edges—and let these guide your palette. A gentle split toning can add warmth to highlights or coolness to shadows without overpowering the image. If you’re inspired by Ansel Adams Techniques for Black and White Mastery, you’ll notice the emphasis on controlled tonality and deliberate construction. Practice with scenes like a person by a doorway or a landscape with dramatic skies to begin speaking grayscale fluently.
A final tip: map your histogram before and after. If blacks or highlights clip, back off and rebalance. Fine art black and white is about letting each tone tell its part of the story, not equalizing everything. Your finished piece should feel timeless, with every shade carrying weight and intention. This approach mirrors Ansel Adams Techniques for Black and White Mastery.
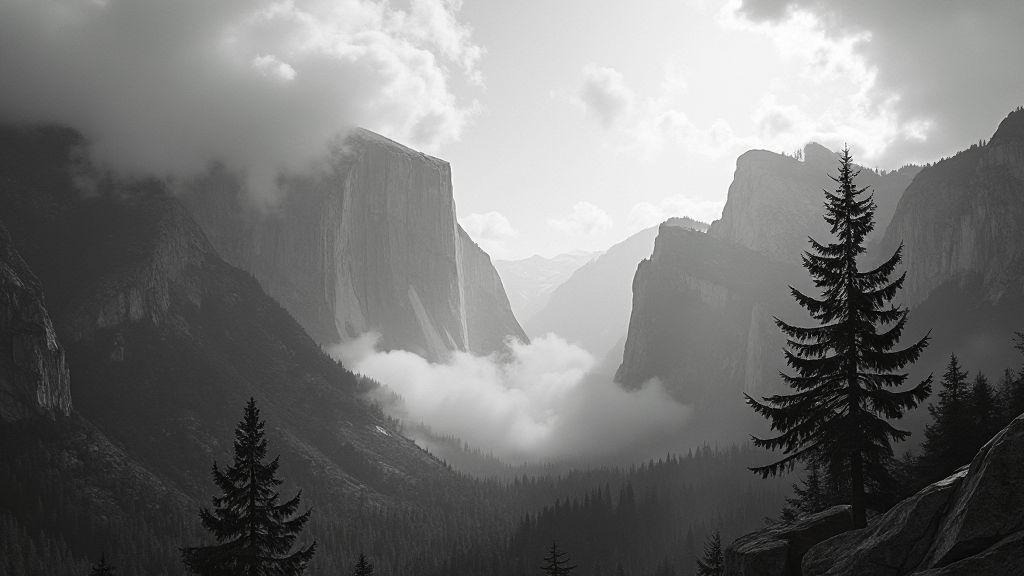
Compose black and white landscapes for your vision
Craft landscapes that feel timeless in grayscale. Seek bold shapes—ridges, horizons, silhouettes—that read clearly without color. Guide the viewer’s eye from foreground to distance using contrast, texture, and negative space. Frame with intent: which element anchors the image—the rock, the path, or the sky? Lock focus on that element and let the rest fall into supportive tones. Practice at sunrise or sunset when light creates longer shadows and stronger lines. Keep compositions simple so your vision shines through without distractions.
As you build a series, maintain consistent tonal decisions so the collection tells a single story. If a scene lacks strong structure, move on to a place with clearer light and shapes. Let editing enhance rather than erase mood, adding midtone texture to increase depth while preserving the brightest highlights. Great black and white landscapes balance darkness with light, rhythm with atmosphere, and invite viewers into the scene. Your final edit should respect output formats—print loves rich blacks, screens need clean luminance. Save a RAW or TIFF master, and create a web-optimized version that preserves edge and texture. Tag your work with a signature style so followers recognize your voice. When you share, tell a short story behind the scene to connect with your audience. If you’re curious about technique, study Ansel Adams Techniques for Black and White Mastery and apply the core ideas to your landscapes.
Use black and white landscape composition tips
You can shape landscapes with simple, sharp rules. Frame with strong foreground interest to draw the eye inward—a rock, a path, or driftwood anchors the scene. Use leading lines to guide gaze toward a quiet horizon. Position the horizon deliberately: low to emphasize sky, high to highlight ground textures. Balance elements with a rule-of-thirds mindset, but don’t fear bold diagonals or silhouettes that sing. Texture matters in monochrome—look for rough surfaces, wrinkles, and patterns that read well in gray. If light is flat, add contrast in post with care to avoid losing detail.
Improve natural contrast by shooting during golden or blue hour for longer shadows and richer tones. A moody sky can complement your land, so don’t shy away from cloud texture. Maintain tonal separation; if midtones blend, depth is lost. In editing, keep blacks deep but not crushed, whites crisp but not blown, and midtones comfortable. Pair bold shapes with soft backgrounds to keep the image from feeling flat. Practice identifying scenes that deserve more aggressive contrast or restraint. This approach helps you build a consistent monochrome voice and aligns with Ansel Adams Techniques for Black and White Mastery.
You’ll shoot in RAW to maximize edit flexibility, crop to preserve essential lines, and crop with care to keep silhouettes intact. If in doubt, ask a friend for a distant critique to confirm the composition’s strength. Consistency in approach builds trust with your audience and your own monochrome voice. This guidance harmonizes with Ansel Adams Techniques for Black and White Mastery.
Emphasize high contrast texture techniques in monochrome
Texture shines when light meets surfaces at the right angle. Seek scenes where rough walls, weathered wood, or grainy textures catch light to carve volume. A slight tilt can exaggerate texture, making it pop against the sky. Increase clarity and texture modestly to avoid looking gritty; you want tactile detail, not noise. In edits, brighten highlights on texture-rich areas to separate them from the rest, then deepen shadows in those zones to preserve depth. The goal is to feel tactile, like you could reach out and touch the surface. This texture-focused approach is a strong thread in Ansel Adams Techniques for Black and White Mastery.
Careful toning helps high-contrast monochrome breathe. A subtle gradient can shift midtones while keeping skin tones believable in people shots; in landscapes, keep it clean. A touch of micro-contrast boosts edge definition without harshness. If balance is unclear, compare more textured versus smoother versions to see which preserves natural detail while delivering mood. Practice with a single scene at different contrast levels to discover your preference. This technique aligns with Ansel Adams Techniques for Black and White Mastery.
Share your thoughts on how texture adds soul to the frame. Audiences will feel the grit in rock or grain in wooden posts and understand why monochrome can be so expressive. If you study Ansel Adams Techniques for Black and White Mastery, you’ll learn to manage tonal ranges to avoid flat images while keeping texture alive. Use that mindset when testing textures in your own landscapes.
Simplify scenes for depth
Remove clutter first. Step back or shift your angle until only essential shapes remain. A clean scene lets your subject breathe and adds depth. If elements compete, change position or wait for a moment with less activity. Simple scenes give viewers a clear map: foreground interest, a strong middle ground, and a quiet background. This clarity makes depth feel real, not staged. Practice with a single tree against a vast sky or a lone rock with distant hills. The more you practice, the more you’ll trust your instinct to simplify on the spot.
In editing, protect the simplicity you created. Avoid busy corrections that bring back distractions. You can still adjust exposure and contrast, but do so with restraint. A gentle vignette can keep attention centered while preserving clean lines that deliver depth. Share before-and-after choices to show how you keep the scene focused without losing mood. This discipline resonates with Ansel Adams Techniques for Black and White Mastery.
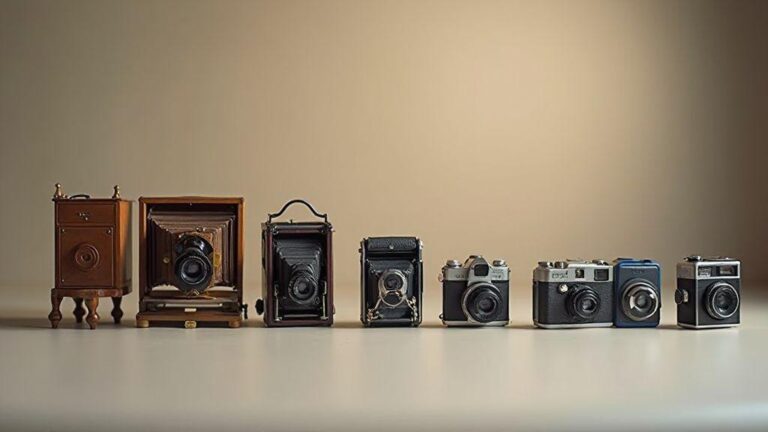
Choose gear and large format camera techniques for your work
Choose gear that fits your style and budget. Start with a reliable large format camera that helps you slow down and think about each shot. For community and lifestyle work, select something mobile yet capable of sharp, rich images. Look for a lightweight body, sturdy bellows, easy lens changes, and film backs that switch quickly when scenes change. Your gear should feel like a trusted tool, not a burden.
Plan a standard field kit: a couple of lenses, a tripod, a light meter, and a few film backs. A simple setup frees you to focus on people and moments. Consider how you’ll carry it—comfortably with a padded strap and compact bag for long days. If you’re new to street portraits or candid work, start with a smaller setup to blend in and preserve spontaneity. The goal is authentic, everyday scenes with a timeless tone.
Your workflow matters as much as your gear. Learn a few go-to framing and focusing techniques so you don’t miss the moment. Decide in advance how you’ll meter for film, whether you’ll bracket, and how you’ll protect negatives from glare. A simple, repeatable process keeps sessions efficient and makes your subjects feel at ease while you create strong, community-centered images. This approach echoes Ansel Adams Techniques for Black and White Mastery.
Set up large format camera techniques for sharpness
Sharpness comes from slow, deliberate technique. Start with a sturdy tripod and precise focus—avoid hunting in the viewfinder, especially in busy scenes. Use a small aperture for depth of field, balancing with film latitude. If scenes move, choose a conservative shutter speed and brace your body to prevent shake. Remember: sharpness is as much about technique as gear.
Ground-glass focus, even lighting, and a dark cloth help you see detail clearly. Indoors or in mixed light, adjust exposure so highlights don’t burn and shadows maintain texture. Aim for a clean, readable image where expressions and details stay sharp at life size. If you’re new to large format, practice with everyday scenes—café scenes, kids at play, neighbors chatting—to train your eye for what must be sharp. The more you practice, the more confident you’ll be in capturing decisive moments.
Control exposure and contrast for film with your gear
With film, exposure and contrast are king. Meter carefully and think in zones to preserve detail in shadows and highlights. Use a handheld meter or the camera readout to lock in midtones, then adjust for the scene. In bright sun, you may need to open the film; in dim light, you may push it a bit to keep skin tones natural. This discipline is central to Ansel Adams Techniques for Black and White Mastery.
Contrast depends on lighting, film choice, and development. For scenes with strong contrast, consider slower film or softer light to keep detail in both ends of the spectrum. For softer portraits, a reflector can fill shadows instead of pushing film harder. Always test frames, read the room, and trust your eye for balance. Developing adds another layer: note time, temperature, and agitation if developing at home, or share desired looks with a lab so they tailor the process. The aim is film that holds shadow and highlight detail, not a flat result. This is a core aspect of Ansel Adams Techniques for Black and White Mastery.
Lens and filter choices
Lens choice shapes mood. A standard lens gives natural perspective; a longer lens flatters faces in portraits. Consider a lens with edge-to-edge sharpness for landscapes and a soft falloff for intimate detail. For lifestyle work, choose a lens that breathes with the scene rather than isolating your subject.
Filters matter in film work. A soft-contrast or warm filter can add personality without changing exposure too much. A gentle polarizer reduces glare on shiny surfaces while preserving color accuracy, handy for outdoor gatherings. In foggy or hazy light, a small minus-green filter helps preserve skin tones and reduce muddiness in midtones. Choose filters that match the story you’re telling and your processing patience. This aligns with Ansel Adams Techniques for Black and White Mastery.
Grow your community and lifestyle around Ansel Adams Techniques for Black and White Mastery
You can build a vibrant circle around black-and-white mastery by sharing your journey with clear, approachable steps. Post small wins and honest missteps from your practice with Ansel Adams Techniques for Black and White Mastery. Describe settings, dodging and burning, and paper choices with simple language and real photos you’ve printed. Transparency invites peers to try along, turning posts into a beacon for others. Frame practice as a lifestyle—quiet darkroom days, weekend field trips, thoughtful critiques—and create a welcoming rhythm that keeps people coming back. Build a calendar of light, achievable milestones: one print a week, mini critiques, or short workshops on contrast control. These anchors give your community momentum and rhythm.
Your local space matters as much as online chatter. Create regular meetups for print sharing, tips swapping, and photo walks. Highlight the simple joys of the craft—cleaning negatives, testing paper grades, calibrating your enlarger—so newcomers see mastery as a series of repeatable steps. Encourage members to bring a print or a failing frame for group analysis. Celebrate progress publicly; a supportive environment fuels trust and participation. As you grow, invite members to host shifts, run mini-exhibitions, or lead demos. Empowering others strengthens the community around Ansel Adams Techniques for Black and White Mastery.
Integrate the practice into daily life. Share a weekly darkroom check-in discussing a technique from Ansel Adams Techniques for Black and White Mastery and how it shaped your week. Pair this with casual photo outings emphasizing light and tone—sunrise windows, shady alleys, quiet fields—so the craft fits real life. This living culture—friends who print together, critique kindly, and celebrate tonal range—becomes your extended community. Your lifestyle thrives on shared, meaningful craft and Ansel Adams Techniques for Black and White Mastery.
Join workshops and print clubs to learn Ansel Adams Techniques for Black and White Mastery
Workshops provide hands-on guidance you can’t get from books. You’ll learn to read light the way Ansel Adams did, with drills on zone basics, exposure, and paper choices you can try right away. In a room of peers, questions help everyone grow. Choose classes that blend technique with feedback, so you walk away with one new practice and a plan to use it. Print clubs give access to different enlargers, papers, and developers, helping you test tonal range and sharpen your own style while keeping your voice intact. Bring recent prints to guide the group’s critique and uplift your next steps.
A great workshop pushes you beyond comfort zones in a kind, concrete way—live demonstrations on dodging, burning, and filtration, followed by guided practice. Clubs rotate topics so you explore contrast, texture, and composition from multiple angles. Bring a few favorite prints and a notebook of questions about light, negative manipulation, and paper choice. You’ll collect practical tips that fit your goals, whether landscapes, portraits, or urban scenes, building confidence through repeatable wins you can apply in your darkroom routine. This approach echoes Ansel Adams Techniques for Black and White Mastery.
Share darkroom printing and processing tips with peers
Sharing tips keeps everyone moving forward. Start with fundamentals you’re confident with—contrast management with Grade 2 vs Grade 3 papers or film loading techniques. Offer short, actionable ideas: try a one-stop push on this film or test three developers at this temperature for deeper midtones. Provide examples from your recent work and explain the reasoning in plain language. When peers see real results, they’ll be eager to try them, and your tips invite questions rather than defensiveness. Keep the flow positive and constructive. Create a tip sheet for gatherings or online sharing, with sections like exposure, development, printing, and finishing, and invite others to contribute. The community thrives when every member contributes, drawing from Ansel Adams Techniques for Black and White Mastery.
Document imperfect results as well as successes. Sharing what didn’t work is as valuable as showing what did. A living resource helps newcomers find starter guidance and seasoned printers refine their craft. Acknowledge progress and celebrate growth as part of Ansel Adams Techniques for Black and White Mastery.
Build a local exhibition routine
Set a simple cadence for local shows: quarterly group projects, seasonal solo displays, and rotating curatorial duties. Design a welcoming space in a café, library, or community center where prints can be admired in a relaxed setting. Use concise labels explaining the technique and the story behind each image. Promote the next event early and invite nearby photographers to share prints and notes about what they learned. This ongoing rhythm makes participation feel doable and builds anticipation.
During exhibitions, encourage conversation with guided rounds on technique and process. Offer a quick hands-on demo—mini print sessions or live tonal adjustments—to make the event tactile and memorable. End with a thank-you and an invitation to the next gathering, reinforcing that the community is a shared journey rather than a one-night show. Your local routine becomes a cornerstone of your lifestyle and a public appreciation of the craft that honors Ansel Adams Techniques for Black and White Mastery.
Quick takeaways from Ansel Adams Techniques for Black and White Mastery
- Remember the Zone System: plan, measure, and print with intention to honor Ansel Adams Techniques for Black and White Mastery.
- Measure light precisely, expose for highlights, protect shadows, and trust your meter as the backbone of Ansel Adams Techniques for Black and White Mastery.
- Control tonal range to build mood; let texture and contrast express your vision, guided by Ansel Adams Techniques for Black and White Mastery.
- Practice practical exposure steps and keep a log; consistency is built on Ansel Adams Techniques for Black and White Mastery.
- In darkroom work, choose papers and filters thoughtfully; document your results to refine your use of Ansel Adams Techniques for Black and White Mastery.
- Use dodging, burning, and local tone refinements to tell your story with light, a core of Ansel Adams Techniques for Black and White Mastery.
- Develop a workflow that supports your craft; honing large-format and film techniques aligns with Ansel Adams Techniques for Black and White Mastery.
- Build a community around shared practice; the journey, guided by Ansel Adams Techniques for Black and White Mastery, grows faster when you learn together.

Junior Souza is a passionate analog photographer and the mind behind estoucurioso.com. With a camera always in hand and a roll of film never far away, Junior has spent years exploring the world through a 35mm lens — learning, experimenting, and falling deeper in love with the slow, intentional process that only analog photography can offer.
What started as pure curiosity quickly became a lifestyle. From testing different film stocks under harsh light to hunting vintage lenses at flea markets, Junior believes that understanding your tools is just as important as developing your eye.
Through estoucurioso.com, he shares everything he has learned along the way — the techniques, the mistakes, the references, and the stories behind the frames. His goal is simple: to build a space where beginners and enthusiasts alike can grow, get inspired, and never stop being curious.
Always learning. Always shooting.