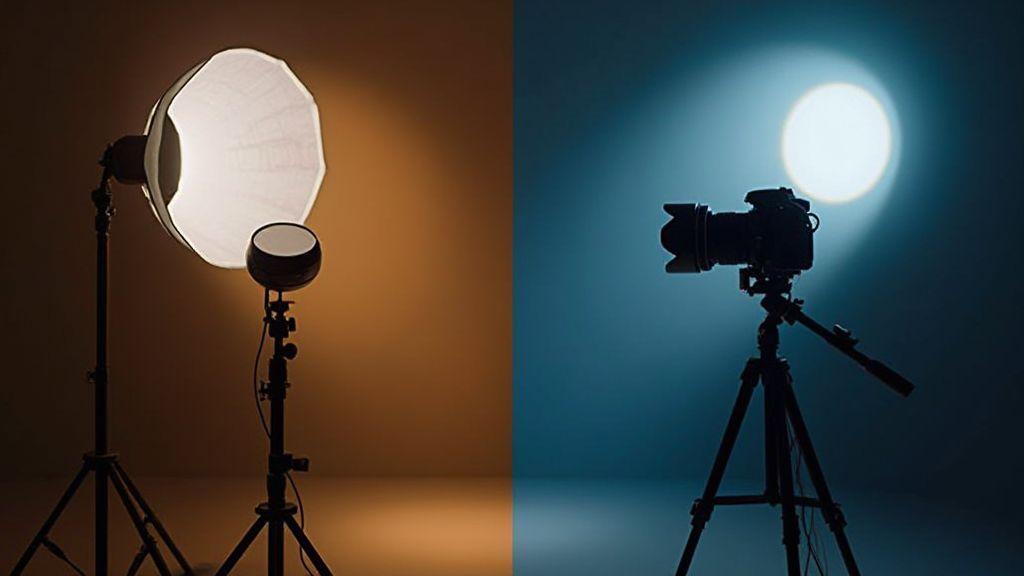
Incident vs spot metering explained
When you’re choosing a metering method, you’re deciding how your camera reads the scene. Incident metering reads the light falling on your subject, not the subject’s color or brightness. This makes it a reliable starting point for a neutral exposure, especially in tricky lighting. Spot metering concentrates on a tiny area in your frame, often around 1–5% of the frame, to read its brightness. This can preserve detail in specific spots like a bright sky or a shadowed face, but it can mislead you if you don’t account for the rest of the scene. In practice, you’ll switch between them depending on what you’re photographing and where your lighting risk sits.
In quick situations, incident metering offers reliability because it captures the overall light balance. You’ll set your exposure to keep skin tones natural or to avoid blown highlights. Spot metering, on the other hand, is for precision when a single exposure value must protect detail in one area, even if other parts of the frame go lighter or darker. Readings can diverge in high-contrast scenes, so you decide which area you care most about preserving. Your goal is to pick the method that aligns with your subject’s most important details.
To wield these methods well, practice reading scenes quickly and choosing the method that serves your image intent. Incident metering works well for portraits in even light or when you want a balanced look. If your subject sits against a bright background or a deep shadow, you might use spot metering to lock in detail where it matters most. With practice, you’ll switch between them with intention, not guesswork, so exposure stays consistent across shots.
What each meter reads and why it matters to you
Your camera’s meter reads brightness in your scene, but the meter type changes what gets measured. An incident meter reads the light that falls on your subject, not the subject’s brightness. This tends to produce an exposure that feels natural for skin tones and midtones, handy for everyday photography. A spot meter reads a tiny, targeted area—often the area you point the camera at with the exposure lock—making it ideal for protecting highlights or shadows in high-contrast scenes. The key is knowing what the meter is measuring and why that choice affects your final image. You’ll feel more in control when you understand this: the meter isn’t deciding your look—you are.
Why this matters when you shoot: incident metering helps you avoid overly bright faces or dark shadows in mixed light, giving you a neutral baseline. Spot metering helps you lock exposure on areas you want to preserve, like a dramatic sky or a shadowed face. Your answer guides which metering mode you rely on.
How you tell the exposure difference quickly
Switching between incident and spot metering causes a quick shift in exposure results. Incident metering usually yields even exposure across faces and midtones. Spot metering aimed at a bright sky can push you to underexpose the rest of the frame to protect sky detail. Targeting a dark area with spot metering can push you to overexpose the rest to reveal shadow detail. Interpret the readout for the scene’s brightest and darkest parts and adjust accordingly.
A fast check is the histogram and highlight warnings after a shot. If the incident reading keeps highlights safe but the sky clips, you might stay with incident and nudge exposure slightly down. If spot metering on the subject preserves detail but the background blows out, protect the subject and accept some background loss. Practice by swapping modes in the same scene to see how exposure shifts, then lock in the mode that matches your goal.
Key fact you must know
Your exposure strategy isn’t black and white. Advanced Incident vs Spot Metering in Complex Lighting often means blending insights from both modes and using exposure compensation to fine-tune. You’re not stuck with one method; you’re steering the outcome by what you prioritize in the moment.
When you should choose advanced incident metering
Choosing advanced incident metering is like picking the right tool for a tricky task. Use it in scenes with tricky lighting that confuse your eye and your camera’s meter. In backlit or high-contrast setups, built-in metering can misread and push you toward underexposure or overexposure. Advanced incident metering measures the light that falls on your subject, not the light bouncing off it, giving you a truer read of the scene. This helps when the subject sits in shadow while the background is bright, or when mixed light comes from sun and shade.
In studios, outdoors at dusk, or during ceremonies where you need consistent results, advanced incident metering shines. It helps you stay in control as light changes—clouds drift, or people cast new shadows. For portraits, it keeps skin tones natural without blowing them out, and it pairs well with manual tweaks after you lock in the reading.
If you’re learning, start with a simple incident read and test how your exposure translates to the scene. Use it to compare backlit subjects with other lighting setups. Practice will reveal which situations demand advanced incident metering and which don’t. Your goal is a clean, balanced exposure that preserves detail in both highlights and shadows.
Why incident metering helps in backlit scenes
Backlit scenes fool the eye and the camera: the subject tends to be underexposed to keep the bright background from blowing out. Incident metering measures the light that falls on the subject, not what the frame shows, giving a natural read of light on the subject. This helps skin tones stay accurate and reduces the need for guesswork or excessive bracketing.
In backlit situations, you often want subject detail without washing out the background. Advanced incident metering helps you set an exposure that preserves those details, then you can tweak from there to taste. The result is a lifelike photo where the subject doesn’t disappear into the glow behind them. It also provides consistency for a sequence, speeding up editing and improving reliability across frames.
How you position the meter for best results
Position the meter where the light falls on the subject, not where you think it should be. If the subject’s face is the main focus, aim at the face or the brightest skin areas to read how bright the subject will appear.
For a group, meter where light hits the majority of faces or the key focal point, avoiding back corners. Take readings and adjust so the overall scene looks natural, with readable faces and correct skin tones. It’s okay to re-read from a different spot if lighting isn’t even.
In mixed lighting, read from the key lit area. If part of the face is in light and part in shadow, you’ll often shoot for the brighter side or blend in post, but the initial read should come from the brighter portion to avoid flat shadows.
Simple incident rule
Take the reading from the area that best represents your subject’s lighting, then set exposure to keep the subject properly exposed while preserving highlight detail. If unsure, start with an exposure that keeps the subject mid-tone and adjust from there.
When you should choose spot metering for highlights and shadows
Spot metering locks in the exact brightness of a small part of your frame. Use it when highlights are bright and you don’t want to blow them out, or when shadows are deep and you need to hold their detail. In scenes with a wide dynamic range, spot metering provides a precise reading from the area you care about most—like a white wedding dress or a shadowed face.
Consider the camera’s metering mode and exposure compensation as well. If the subject sits against a bright background, spot metering helps avoid a gray, underexposed subject. If the subject sits in shade, spot metering can keep skin tones from washing out. Test a few frames quickly and adjust exposure based on the spot reading you trust most for the scene. The payoff is cleaner highlights and richer shadow detail without guessing.
In mixed light, spot metering lets you expose for the key area and let the rest fall where it may. Your goal is to keep the subject from clipping while preserving texture in the darker areas. If light changes—clouds moving, a performer stepping in and out of light—you’ll adapt by re-reading the spot on the most important area. You’re exposing for the thing that matters most to your story.
How you lock exposure on bright highlights
Point your spot meter at the bright area you want to preserve and confirm the exposure. The reading tells you how bright that highlight is, and you can keep that level steady. If the highlight is risky, set exposure to prevent blowout, even if the rest of the frame darkens. A practical trick is to enable exposure lock (AE-L) after you get your spot reading and recompose. This anchors brightness as you move the frame or light changes.
How you protect shadow detail with spot reads
Use a spot read on the darker area you want to preserve and expose to keep texture visible there. The camera will underexpose the bright parts slightly to protect shadow detail, yielding a more balanced image with better midtones and less posterization in the dark zones. In rooms with a bright window, spot metering on shadows near your subject helps keep their features readable while letting the window glow behind them.
Spot metering quick tip
Always check your histogram after you shoot. If highlights peak on the right without clipping, you’re good. If shadows look crushed, spot read a bit more toward the darker area and re-shoot. Quick practice with a few test frames in tricky light will train your eye faster than guesswork.
Mixed lighting metering strategies for real scenes
In real scenes, light never sits still. You’ll often face mixed lighting: sun, sky, and indoor lamps all at once. Start by recognizing no single reading fits every part of the frame. Use your camera’s metering as a guide, then adjust by eye. A mid exposure often preserves the feel of the scene better than chasing absolute accuracy. Check your histogram after you shoot and adjust if you see clipped shadows or blown highlights.
Treat metering as a helpful hint rather than a final verdict. If near a bright window, bias exposure toward the darker side to keep the window from washing out. If under a tungsten lamp, bias toward warmth to avoid blue casts. Compare a couple of quick frames—one biased brighter, one darker—and pick the look that preserves detail where you need it. Fine-tuning with exposure compensation helps maintain natural skin tones and the scene’s mood. The goal is readable color and texture, not perfect readings.
Exposure compensation is your fast lane through mixed light. If the meter hints at underexposure on a bright background, apply a small positive bias. If the scene looks cool and faces look blue, a tiny negative bias can warm things up without washing out the background. Use small nudges and compare frames on the LCD or viewfinder.
- Mixing rule of thumb: target skin tones around mid-brightness, and use incident readings as the baseline for ambient light. If a highlight is at risk, pull exposure back slightly; if shadows crush texture, nudge exposure up a touch. Scan for clipped whites or crushed blacks after setting exposure.
How you blend incident and spot readings
Blend by taking an incident reading at your position to capture true ambient exposure, then take a spot reading on the highlight you want to keep or the shadow detail you must preserve. If the highlight reads too bright, back off and rely on the incident reading with slight darkening. If shadow detail is the priority, bias toward the spot reading that preserves texture while letting the rest fall where it may. The blend is pragmatic: aim for consistency with the scene rather than a perfect average. If the face under a window is underexposed, lean on the incident reading and use exposure compensation. If shadows are your focus and you’re okay with a brighter sky, borrow more energy from the spot metering but keep the subject from going muddy.
Practice quickly: decide which part must stay true, then let the others follow. The rule is simple: incident reading reveals the scene’s truth, spot readings protect crucial details. Use them together to negotiate the final exposure you want. Your aim is a look that matches the moment, not perfect technical numbers.
When you use exposure compensation in mixed light
Exposure compensation is your fast lane through mixed light. If the meter hints underexposure on a bright background, apply a small positive compensation. If faces look blue or cool, a tiny negative compensation warms things up. Small, controlled nudges beat big jumps. Compare frames with and without compensation to find the setting that preserves mood and detail.
When you should switch between meters
Switch to spot metering when the subject is much lighter or darker than the background to anchor tones. For even lighting or general balance, evaluative metering is helpful. In high-contrast scenes, use spot metering for highlights and compensate to protect shadows. For a bright sky and dark foreground, meter the sky to preserve detail, then rely on exposure compensation to bring up the foreground.
For backlit subjects, switch to spot or center-weighted metering to anchor exposure on the subject. In flat light, evaluative metering works well. In mixed lighting, meter the brightest area you want to keep detail in, then balance with exposure compensation. You don’t have to stay in one mode; switch as the scene shifts for the most consistent results.
In difficult lighting, the Advanced Incident vs Spot Metering in Complex Lighting debate often ends with using spot metering for crucial tones and adjusting with exposure compensation. Practice bracketing and compare results to see which mode yields the most pleasing exposure. With time, you’ll know when to switch by instinct, not guesswork.
Quick camera settings you can use now
On the move, rely on fast, reliable options. Start with manual mode with ISO at the lens’s minimum for the light and a shutter speed that freezes motion or suits the scene. For moving subjects, use 1/250s or 1/500s; for still landscapes, 1/125s or slower if using a tripod. If in doubt, use auto ISO to maintain safe shutter speeds. Metering mode matters: switch to spot metering for subjects against bright backgrounds to protect tones; evaluative for even light; exposure compensation in high-contrast scenes. Shoot RAW to adjust white balance in post. Keep a simple checklist: exposure, ISO, shutter, metering mode, and whether exposure is locked with AE-L.
If lighting changes, practice this drill: take three quick meters—spot for the subject, evaluative for the scene, and a safety read from a bright patch—then compare readings and choose. This trains your eye to see what the meter tells you versus what you want to capture.
A simple flow to choose the right meter fast
1) Assess if the subject is evenly lit or if highlights/shadows are critical.
2) If even, take an incident reading from the subject’s position and set exposure. If texture or detail in highlights is paramount, take a spot reading from the highlight and compare to the incident.
3) Compare skin tones; if natural with the incident reading, you’re likely on track. If skin reads flat or too dark, adjust by a stop toward the spot value or blend techniques.
4) Check the scene balance. If contrast is too high or too flat, switch to a blended approach.
Field checklist:
- Confirm target exposure with an incident reading at the subject’s position.
- Take a spot reading from the area you want to preserve details in (highlights or texture).
- Compare spot and incident readings and note the exposure difference.
- Check skin tones on the LCD; adjust if needed.
- Take a quick test shot and review histogram.
- If high contrast, blend exposure with compensation or a quick tweak.
- Re-check after light changes.
Practical complex lighting exposure techniques
Balance brightness and shadow to keep the subject clear and true to life. Think in layers: highlights, midtones, shadows. Push exposure slightly to keep skin tones intact, then pull shadows back in post if needed. In practice, mix metering and exposure tricks: use a center-weighted or matrix meter for the overall scene, then compare with what you want in the final look. Protect bright windows or reflections first, then adjust the rest for balance. Expect to shoot a few frames with small tweaks. The goal is a subject properly exposed while maintaining detail in the brightest and darkest areas.
For complex lighting, rely on manual exposure plus targeted tweaks. Start with a base exposure and make small adjustments to prevent flatness. Anticipate where highlights land and set exposure so the critical parts stay legible.
How you use a gray card with incident metering
Pair a gray card with incident metering: place the card where the subject sits in the same light, read the light landing on the card, and dial in that exposure. Compare the scene to the card’s reading on the LCD. If there’s a mismatch, adjust by a stop or two until it aligns. This reduces guesswork in tricky light, like near large windows or harsh sun, and yields consistent results across shots because exposure is rooted in the light touching the subject.
Using a gray card with incident metering is handy when the subject wears bright colors or the background contains strong light. It helps avoid overexposure on whites or underexposure on dark tones.
When you bracket and review for safety
Bracketing is a safety net in complex lighting. Shoot a sequence—three frames at -1, 0, and 1 EV—to ensure you capture something usable if one exposure loses detail in highlights or shadows. Review on a bright monitor or sunlit viewfinder to confirm detail in both ends of the histogram. If you see clipped highlights or crushed shadows, refine your next set.
Prioritize safety and gear care when bracketing. If near water or moving machinery, protect your gear while testing exposures. Check the histogram to avoid surprises—the goal is a clean spread that preserves mood. Bracketing gives you options, so you choose the final frame with confidence.
Note-taking helps: document bracket settings, frames merged, and tone-mapping choices. Label frames to reference them later. Good notes save time later.
Technique to try
Try a quick three-shot bracket in a real scene: base exposure, one half stop brighter, one half stop darker. Shoot RAW to preserve quality. Check which frame captures skin tones most faithfully and retains detail in highlights and shadows. If unsure, lean toward the frame that preserves texture and avoids clipping on bright windows or reflective surfaces. This exercise trains your eye to see exposure impact.
HDR metering workflows for wide dynamic range
Design an HDR metering workflow that respects wide dynamic range. Start with a consistent baseline exposure, then compensate for parts too bright or too dark. Think in exposure brackets to avoid surprises when merging later. Preserve both highlight detail and shadow texture, not force one to the other.
Shoot several frames at different exposures. For a scene with bright sky and dark foreground, capture a normal exposure, a brighter one to hold sky detail, and a darker one to protect shadows. If using a tripod, stay aligned; if handheld, shoot quickly and minimize movement. You might start with matrix metering for a broad read, then fine-tune with spot metering on key areas. Keep a steady hand to ensure bracketed shots line up.
Review frames for clean detail where it matters. If highlights blow out in two shots but not in the third, lean toward the shot that preserves highlights while keeping shadow detail. Note color shifts or shadow noise, as these will affect tone-mapping choices later. Shoot more frames than you think you need, then discard weak ones.
How you capture multiple exposures for HDR
Bracket around your base exposure: baseline, darker frame to protect shadows, brighter frame to protect highlights. If your camera supports auto-bracketing, use a safe range like -2, 0, 2 stops and shoot quickly. Confirm increments match your scene and keep a balanced histogram across frames. For broad scenes, bracketing ensures you capture sky and ground details. If handheld, minimize movement and consider a shift if alignment is robust. Consistency in framing prevents ghosting.
How you merge and tone-map for a natural look
Aim for a natural look with an HDR merge that aligns frames and minimizes motion artifacts, then tone-map to compress brightness range for display. Keep midtones intact so the final image doesn’t look obviously HDR. Favor tone-mapping algorithms that retain texture and avoid halos. Tweak exposure and saturation gently to avoid color shifts. If artifacts appear, swap blend methods or reduce local contrast. The result should be a believable scene with soft highlight glow and textured shadows. Less is more when it feels right.
HDR workflow note
Keep notes: bracket settings, frames merged, final tone-mapping choices. Label each frame to reference during edits. If comparing Advanced Incident vs Spot Metering in Complex Lighting, note how metering influenced bracket choices. Good notes save time later.
Practical metering tips for photographers in the field
Metering is your compass when light goes wild. In tricky scenes—bright skies, dark shadows, or mixed light—start with evaluative or matrix meter for a general read, then verify with a quick shot and histogram. If you see clipping or crushed shadows, adjust exposure bias or switch metering modes. Dial in exposure compensation as needed, and shoot RAW to adjust white balance later. Keep a simple checklist: exposure, ISO, shutter, metering mode, and whether you’ve locked exposure with AE-L.
Use a few quick meters in changing light: spot for the subject, evaluative for the scene, and a safety read from a bright patch. Compare readings and choose. This trains your eye to read the meter versus what you want to capture, improving speed and consistency.
Quick camera settings you can use now
Baseline: manual mode with ISO at the minimum for the light, shutter speed to freeze motion or suit the scene. If people move, use 1/250s or 1/500s; landscapes can be 1/125s or slower with a tripod. If you’re unsure about light, use auto ISO to maintain safe shutter speeds and preserve detail. Metering mode matters: switch to spot metering for subjects against bright backgrounds, or evaluative for even light. If high-contrast, use exposure compensation. Shoot RAW for post adjustments. Keep a simple checklist: exposure, ISO, shutter, metering mode, and whether AE-L is locked.
When light changes, run a quick drill: three meters (spot for subject, evaluative for scene, bright patch) and compare. This trains your eye to see what the meter says versus what you want to capture.
When you should switch between meters
Switch to spot metering when the subject is much lighter or darker than the background to anchor tones. Evaluative metering suits even lighting or general balance. In high-contrast scenes, use spot metering for highlights and compensate to protect shadows. For a bright sky and dark foreground, meter the sky to preserve detail, then rely on exposure compensation for the foreground.
For backlit subjects, switch to spot or center-weighted metering to anchor exposure on the subject. In flat lighting, evaluative metering works well. In mixed lighting, meter the brightest area you want to preserve and balance with compensation. You don’t have to stay in one mode; switch as the scene shifts for consistent results.
In difficult lighting, the Advanced Incident vs Spot Metering in Complex Lighting debate often ends with using spot metering for crucial tones and adjusting with exposure compensation. Practice bracketing and compare results to see which mode yields the most pleasing exposure. With time, you’ll know when to switch by instinct, not guesswork.
Top practical tip
Always meter for your subject when there’s strong backlight and use exposure compensation to preserve detail in the subject while letting the background glow. If unsure, meter for the subject’s midtones and adjust toward a brighter exposure to let the background sing. This keeps you honest with the scene and provides a clear path to a well-exposed image.
Spot metering comparison and a quick decision checklist
You’re choosing between spot metering and incident readings, aiming for fast results. Spot metering targets a tiny area, giving a precise value for that spot. It’s useful for exposing a white shirt or bright window. But in tricky light or wide tonal ranges, a single value can mislead. Use this quick checklist: if the subject is in strong backlight or there’s big contrast, you’ll likely need an incident or blended approach. If the scene is mostly even and you’re targeting a specific highlight or shadow detail, spot metering helps. Trust your eyes; visually compare the spot read with the scene and adjust.
Spot reads are precise but not always practical. A single dot doesn’t represent the whole frame, so you may end up underexposing or overexposing other parts. Quick checks: read the brightest area you want to retain detail and compare to the darkest area you care about. If the difference is wide, mix methods or switch to an incident reading. The goal is natural skin tones and preserved texture, not chasing a perfect numeric value.
As you gain experience, use spot metering as a decision accelerator. It shows where not to over-simplify. If the subject is off-center or lighting is uneven, a single spot may mislead. The real value is having a quick, repeatable reference you can trust in a fast shoot. When you combine spot readings with your judgment and a quick scene check, you’ll shoot with confidence and pace.
How you compare spot reads to incident reads
Compare by testing a spot reading against the light on the subject you care about and the light around them. If the spot read suggests a much brighter exposure than the incident reading, the highlights are likely bright. If the incident reading keeps the scene balanced and skin tones right, you’ll lean on the incident reading for a natural result. Take both readings in the same shot and see which aligns with your target exposure. The goal is a consistent look across tones, not a single perfect number.
Spot readings behave differently with backlight; a bright window can be captured well by spot metering, but the subject’s face may go underexposed if you rely only on that value. Incident readings reflect the light on the subject, which often produces a more natural result. If skin looks too pale or dark, adjust. A blended approach or switching to incident for the main exposure followed by a spot read for key details is a practical path. With practice, you’ll trust this combination quickly.
A mental rule of thumb: if a spot read differs from the incident read by more than about two-thirds of a stop, test alternative exposures. It’s not a fixed rule, but it helps avoid guesswork.
A simple flow to choose the right meter fast
1) Look at the scene and your exposure target. If the subject is evenly lit and you want general exposure, take an incident reading from the subject’s position and set exposure there. If you want texture on a highlight, take a spot read from that highlight and compare to the incident reading.
2) Check skin tones. If natural with the incident reading, you’re likely on track. If skin looks flat or dark, adjust by a stop toward the spot reading or blend techniques: base exposure with incident, then push/pull a touch with a spot read for the highlight or shadow you care about.
3) Assess overall balance. If the scene is too contrasty or flat, switch to a blended approach.
Field checklist (repeatable workflow):
- Confirm the target exposure with an incident reading at the subject’s position.
- Take a spot reading from the area you want to preserve details in (highlights or texture).
- Compare the spot read to the incident read and note the exposure difference.
- Check skin tones on the LCD; adjust if they look unnatural or flat.
- Take a quick test shot and review histogram or highlight warnings.
- In high-contrast scenes, blend exposure using compensation or a quick manual tweak.
- Re-check after light changes.
The role of Advanced Incident vs Spot Metering in Complex Lighting in practice
Advanced Incident vs Spot Metering in Complex Lighting is most powerful when you blend both approaches. Use incident readings to ground you in the scene’s truth and spot readings to protect crucial highlights or shadows. Exposure compensation helps harmonize the two, preserving skin tones and texture while keeping the overall mood intact. Practice with controlled tests, bracketed sequences, and quick comparisons to learn when to rely on each method. The aim is not perfection of a number but a look that matches how the scene felt when you captured it.
Final reminder: the meter is a guide, not a rulebook. Your creative intent drives the final exposure, and mastering the balance between Advanced Incident vs Spot Metering in Complex Lighting will give you faster, more reliable results in real-world shooting.

Junior Souza is a passionate analog photographer and the mind behind estoucurioso.com. With a camera always in hand and a roll of film never far away, Junior has spent years exploring the world through a 35mm lens — learning, experimenting, and falling deeper in love with the slow, intentional process that only analog photography can offer.
What started as pure curiosity quickly became a lifestyle. From testing different film stocks under harsh light to hunting vintage lenses at flea markets, Junior believes that understanding your tools is just as important as developing your eye.
Through estoucurioso.com, he shares everything he has learned along the way — the techniques, the mistakes, the references, and the stories behind the frames. His goal is simple: to build a space where beginners and enthusiasts alike can grow, get inspired, and never stop being curious.
Always learning. Always shooting.